background image

19

hdbitt hdmi extender matrix

BUTTON CONTROL 

There is a “TX ID”

on TX unit, and there are both “RX 

ID”and “TX connected” 

 on the RX unit.

Each of them consists of two Nixie tubes and two buttons (beside the 
Nixie tube), the left button controls the value of the left Nixie tube, and 
the right one to control the value of the right Nixie tube. The value of 
each Nixie tube is from 0 to 9, each button is pressed value of TX ID is 
“00”, and press the left button once, also press the right button once, 
then the value of TX ID is changed to “11”. When the value of “TX 
connected ” on the RX unit is as same as the value of “TX ID” on the 
TX unit, a connection built between the TX and RX units.
Short press: Press to set IGMP group and display the setted value. 
Product switches automatically to the corresponding IGMP group 5 
seconds after the press.
Long press: Press and keep 3 seconds to reset the product.

COMPUTER SOFTwARE CONTROL USE gUIDE 

1.  Access to network
  Connect your PC/computer with the off-the-shelf  IGMP 
  Ethernet switch via a single network cable 
2.  PC/computer setting
  Change the PC/computer's  IP to 192.168.1.xxx
  (xxx can be 0 to 255) , which as same as the IP segment of TX 
  unit and RX unit.
3.  Web operation
  Open application program “HDbitT E-Matrix Control center”,
  it displays the interface as Figure 1

en

Summary of Contents for IDATA HDMI-MX383

Page 1: ...hdbitt hdmi extender matrix hdbitt hdmi extender matrix Manuale d istruzione User s manual www techly com IDATA HDMI MX383 MX383R www techly com info techly com ...

Page 2: ...rarlo Scollegare il prodotto dall alimentazione e da altri apparecchi se dovesse esserci un problema Non esporre il prodotto ad acqua o umidità ATTENZIONE RISCHIO DI SCOSSE ELETTRICHE NON APRIRE 1 Si consiglia di leggere attentamente il presente manuale prima di procedere con la messa in funzione del prodotto e di tenerlo a disposizione per eventuali esigenze future 2 Non invertire trasmettitore e...

Page 3: ... HDbitT over IP 2 Risoluzione supportata fino a 1080p 60Hz full HD 3 Distanza di trasmissione fino a 120 meters via CAT6 4 Supporta funzione IR pass back per controllare la sorgente dalla posizione del ricevitore 5 Consente una configurazione matrix input output flessibile e scalabile fornendo 100 ingressi a infinite uscite 6 Supporta controllo tramite software per selezionare e cambiare l ingress...

Page 4: ...o ID del trasmettitore 4 Tasto RESET 5 Ingresso alimentazione DC5V 6 Indicatore trasmissione dati 7 Uscita segnale RJ45 8 Indicatore di connessione 9 Interfaccia di connessione prolunga IR blaster 10 Ingresso segnale HDMI Ricevitore 1 RX ID mostra il canale del ricevitore come un numero indicatore del numero ID corrente del ricevitore 2 Finestra ricevitore IR canale controllo remoto 3 Indicatore a...

Page 5: ...P Configurazione punto punto Guida all uso dell IR IR passback Il cavo prolunga IR blaster deve essere collegato alla porta di uscita IR del trasmettitore IR di questo extender Matrix e il cavo prolunga ricevitore IR deve essere collegato alla porta IR di ingresso del ricevitore di questo extender matrix L emettitore dell IR blaster deve essere il più vicino possibile alla finestra del ricevitore ...

Page 6: ... dall Apple Store 2 Per prima cosa collegare il controller video matrix allo switch IGMP Quindi collegare il telefono cellulare tablet e il controller video matrix insieme tramite hotspot matrix come figura 1 A questo punto aprire l APP Matrix Controller scaricata si entrerà nell interfaccia come figura 2 e si avvia l APP di controllo Funzioni APP 1 Anteprima Cliccare sul tasto play per vedere in ...

Page 7: ...tivo mobile tablet per controllare il sistema Modalità Router APP Matrix Control Lite 1 Utenti Android Scaricare l APP Matrix Control Lite dallo store 2 Prima di tutto collegare il router allo switch IGMP Quindi collegare insieme il telefono mobile e il router aprire l APP Matrix Control Lite scaricata per entrare nell interfaccia come mostrato nella figura 3 TX ID RX ID il numero di connessione T...

Page 8: ...e il collegamento tra le unità TX e RX Pressione breve premere per impostare il gruppo IGMP e visualizzare il valore impostato Il prodotto passa automaticamente al gruppo IGMP corrispondente 5 secondi dopo la pressione Pressione prolungata premere e mantenere premuto per 3 secondi per resettare il prodotto Guida all uso del software di controllo tramite computer 1 Accesso alla rete Collegare il PC...

Page 9: ...n il loro indirizzo IP predefinito Se è realmente necessario impostare l indirizzo IP seguire le indicazioni come da figura 2 qui viene riportato un esempio di come configurare l indirizzo IP del TX per la configurazione del RX il procedimento è lo stesso Scansione periferiche e impostazione qui viene riportato solo un esempio della cofigurazione del TX la configurazione del RX è la stessa del TX ...

Page 10: ...ierica come figura 4 Impostazione del canale della periferica TX ID come figura 5 Cliccare il tasto Aggiorna per salvare la nuova configurazione Modifica la modalità pre operazione come mostrato nella figura 6 hdbitt hdmi extender matrix ...

Page 11: ...o diversi Q La TV mostra questo messaggio Verificare il segnale di ingresso del trasmettitore A 1 Verificare se c è un ingresso di segnale HDMI del trasmettitore 2 Cercare di collegare la sorgente di segnale direttamente allo schermo per vedere se c è uscita di segnale dalla sorgente o cambiare la sorgente di segnale e il cavo HDMI e provare di nuovo Q La visualizzazione non è fluente non è stabil...

Page 12: ...e di responsabilità Il nome del prodotto e i marchi riportati possono essere marchi registrati di produttori collegati TM e possono essere omessi nel manuale utente Il design e le specifiche di questa unità sono soggetti a modifiche senza preavviso Le immagini sono solo di riferimento I prodotti potrebbero differire leggermente dalle immagini riportate sul presente manuale In conformità alla norma...

Page 13: ...rom mains and other equipment if a problem should occur Do not expose the product to water or moisture CAUTION RISK OF ELECTRIC SHOCK DO NOT OPEN 1 Please read the user manual carefully before use this product and keep these instructions 2 Do not mix up transmitter and receiver before installation 3 Channel of the transmitter TX must be different otherwise the system would be breakdown including t...

Page 14: ...on distance is up to 120 meters via CAT6 4 Support IR pass back function to control source device from RX location 5 Offer scalable and flexible input output matrix configuration allows 100 input to infinite output 6 Support computer control software to select and switch source device input 7 Plug and play 8 Support to select and switch source device input from receiver via remote control and hard...

Page 15: ... TX ID number 4 RESET button 5 DC5V power input 6 Data transmission indicator 7 RJ45 signal output 8 Connection indicator 9 IR blaster extension cable interface 10 HDMI signal input Receiver unit 1 RX ID mark receiver unit as a number indicator of the current RX ID number 2 IR receiver window remote control channel 3 Power indicator 4 TX CONNECTED indicate the input channel as a number and when th...

Page 16: ...t configuration IR use guide IR passback IR blaster extension cable should plug into the IR out port of TX Transmitter of this extender matrix and the IR receiver extension cable should plug into the IR in port of the RX Receiver of this matrix extender The emitter of IR blaster should as close as possible to the IR receiver window of the signal source device IR remote control Using the IR remote ...

Page 17: ...e APP Matrix Controller from the APP Store 2 Firstly connect the video matrix controller to the IGMP switch Then connect mobile phone tablet and the video matrix controller via hotspot matrix with each other as figure 1 At this time open the downloaded APP matrix control will enter to the interface as figure 2 and APP control starts APP function 1 Preview Click play button to preview the content o...

Page 18: ...let to control the system simultaneously Router MODE APP Matrix Control Lite 1 Android User Download the APP Matrix Control Lite from APP Store 2 Firstly connect the router to the IGMP switch Then connect mobile phone and the router with each other open the downloaded APP Matrix Control Lite will enter to the interface as figure 3 TX ID RX ID TX connected number can be re set by this APP also can ...

Page 19: ...f TX connected on the RX unit is as same as the value of TX ID on the TX unit a connection built between the TX and RX units Short press Press to set IGMP group and display the setted value Product switches automatically to the corresponding IGMP group 5 seconds after the press Long press Press and keep 3 seconds to reset the product Computer software control use guide 1 Access to network Connect ...

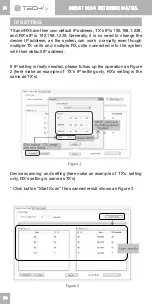
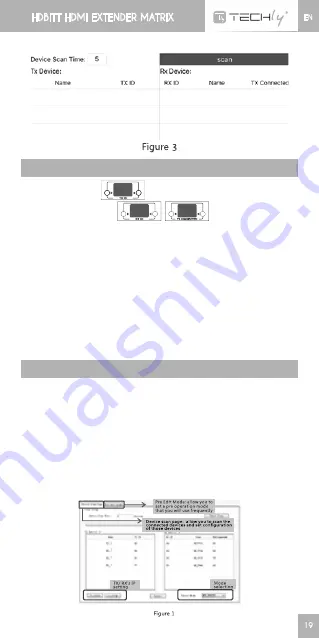
Page 20: ...lly even though multiple TX units and multiple RX units connected into the system with their default IP address If IP setting is really needed please follow up the operation as Figure 2 here make an example of TX s IP setting only RX s setting is the same as TX s Device scanning and setting here make an example of TX s setting only RX s setting is same as TX s Click button Start Scan the scanned r...

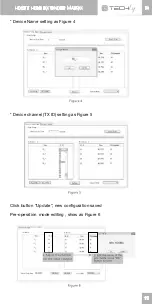
Page 21: ...21 hdbitt hdmi extender matrix Device Name setting as Figure 4 Device channel TX ID setting as Figure 5 Click button Update new configuration saved Pre operation mode editing show as Figure 6 EN ...

Page 22: ... s channel are different Q TV display Please check the transmitter input signal A 1 please check if there is a HDMI signal input of transmitter 2 Try to connect the signal source directly to display device to see if there is signal output from source device or change the signal source HDMI wire and try again Q Display is not fluent not stable A 1 Please check and make sure your switch is with IGMP...

Page 23: ...rature 0 60 C Storage temperature 20 70 C Relative humidity 0 95 no condensation Color Black Disclaimer The product name and brand name may be registered trademark of related manufacturers TM and may be omitted on the user manual Design and specifications of this unit are subject to change without prior notice Pictures are for reference only Products may differ slightly from images shown This prod...

Page 24: ...www techly com ...

Reviews: