background image


P-4 


Power Cord Connection 

 
The PW1610PKG is a powered speaker which means it has the built in amplifier. 

The PW1610PKG’s speakon 

output allows you to connect a passive speaker directly to the PW1610PKG and receive its power from there. 


To connect the power cord to the powered speaker simply plug female side of the power cord into the power cord 
input which is on the rear of the unit. Then plug the male side of the power cord to an electric outlet. The AC power 
cords supplied purposefully have 2 blades and one grounding prong. 


If your outlet is not equipped to handle this type of plug, do not attempt to forcefully plug this AC power cord into the 
outlet, and do not alter the plug so that it can fit in the outlet. The only course of action you can take is to find 
another outlet which is properly equipped to handle a grounded plug or have an electrician upgrade your electrical 
outlet. Be sure that the plug is well connected so that it does not disconnect in the middle of usage. If at any point in 
time the supplied AC power cord is punctured or damaged replace it with a new power cord from a local electrician.


NOTE:  
-ONLY PLUG IN T

HE AC POWER CORD WHILE THE UNIT’S POWER IS OFF AND THE VOLUME IS 

TURNED DOWN.   
-TURNING ON THE UNIT WITH THE VOLUME TURNED UP MAY CAUSE THE UNIT OR ANY 
SPEAKERS CONNECTED TO IT TO BE DAMAGED.  
-ALWAYS TURN DOWN THE VOLUME PRIOR TO TURNING OFF THE UNIT. 


PW1610PKG 


Summary of Contents for PW1610PKG

Page 1: ...User Manual ABS Molded Powered Speaker MODEL PW1610PKG QUESTIONS COMMENTS CALL 888 842 6277 or email info tpro com ...

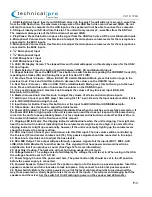
Page 2: ... used in connection to this unit make sure that all of your equipment is turned OFF 12 Once installation and wiring is complete power on all your equipment with the volume and level controls turned DOWN Once all the equipment is ON slowly raise the volume or level controls to their proper positions 13 When grounding this unit be sure to do so correctly so as not to defeat the built in grounding in...

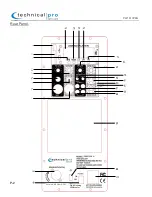
Page 3: ...P 2 Rear Panel PW1610PKG Use with 6 8 Ohm ONLY PW1610PKG ON OFF ON Flashing LED Woofer ...

Page 4: ...t the input to AUX LINE IN or USB SD Bluetooth 19 Treble Knob Use this knob to adjust the treble levels 20 Power LED Indicator The Power LED will illuminate Blue when the unit has successfully powered on If the Power LED fails to light up when the unit is powered on and the does not respond to the power being turned on the unit s fuse as probably blown For fuse replacement instructions contact Tec...

Page 5: ...attempt to forcefully plug this AC power cord into the outlet and do not alter the plug so that it can fit in the outlet The only course of action you can take is to find another outlet which is properly equipped to handle a grounded plug or have an electrician upgrade your electrical outlet Be sure that the plug is well connected so that it does not disconnect in the middle of usage If at any poi...

Page 6: ...e speaker The Input selector 18 should be set to the AUX LINE IN when using the RCA or 1 8 inputs When the Line Input selector is set to AUX LINE IN the LCD Screen will NOT light up This is normal Only the power indicator will light up NOTE BE SURE NOT TO CONNECT AN AMPLIFIER OR ANY AMPLIFIER SIGNAL INTO THE RCA INPUT JACK AS THIS COULD DAMAGE THE SPEAKER NO OTHER AMPLIFIER IS NEEDED TO POWER YOUR...

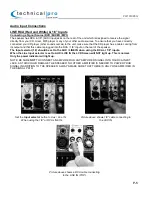
Page 7: ...our other equipment DO NOT ATTEMPT TO CONNECT THE USB INPUT TO A SMART PHONE COMPUTER OR LAPTOP The Input selector 18 should be set to the USB SD BLUETOOTH IN when using those inputs When using the USB SD inputs the LCD Screen will light up and display information such as the track number track title elapsed time and Repeat mode PW1610PKG Set the Input selector button to USB SD Bluetooth IN when u...

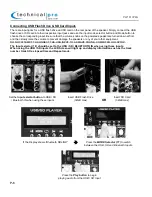
Page 8: ... Devices Locate TP PW1610 and connect to this device If required enter password 0000 4 zeroes If you have successfully paired to the speaker the display screen will show Bluetooth PAUSE Once a device has been paired with the unit it will disconnect once it outside of the range of the speaker about 30 feet the device will automatically re connect with the speaker once it is within range again when ...

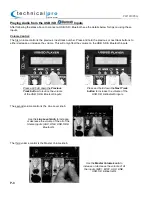
Page 9: ...e USB SD Bluetooth inputs The second volume control is the Line Level knob The third volume control is the Master Volume knob PW1610PKG Press and hold down the Previous Track button to reduce the volume of the USB SD Bluetooth inputs Press and hold down the Next Track button to increase the volume of the USB SD Bluetooth inputs Use the Line Level knob to increase or decrease the volume of the all ...

Page 10: ...mited to the USB SD Card inputs Press the Repeat button to switch between repeating the CURRENT track R1 repeating ALL tracks RA and turning the repeat function OFF RO PW1610PKG Press the Previous Track button to move to the previous track when using the USB SD Bluetooth inputs Press the Next Track button to move to the next track when using the USB SD Bluetooth inputs Press the REPEAT Track butto...

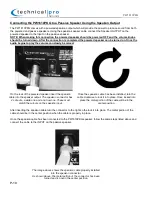
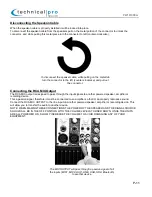
Page 11: ...o the lock it into place The metal portion of the cable should be in the center position when the cable is properly in place Once the speakon cable has been connected to the PW1610PKG speaker follow the same steps listed above and connect the cable to the INPUT on the passive speaker PW1610PKG On the rear of the powered speaker insert the speakon cable into the speaker output The speakon connector...

Page 12: ...er so that it can properly reproduce sound Connect the RCA MIX OUTPUT to the line input on another powered speaker amplifier or recording device This will allow you to transfer the audio to another device NOTE WHEN MAKING THESE CONNECTIONS THE POWER OF THE SPEAKER AND THE SIGNAL SOURCE SHOULD ALL BE IN THE OFF POSITION WITH THE VOLUME LEVELS TURNED DOWN ONCE THE UNITS ARE ALL POWERED ON SLOWLY INC...

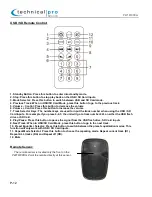
Page 13: ... the USB SD Card inputs For example if you press 6 4 3 the unit will go to track number 643 on either the USB flash drive or SD Card 8 Play Pause Press this button to pause the signal from the USB flash drive SD Card inputs 9 Next Track When in USB SD Card Mode press this button to go to the next track 10 Preset Equalizer Selector Press this button to switch between the preset equalization modes T...

Page 14: ...rn the BOTTOM tightening knob to lock the angle into place When closing the tripod this knob will need to be loosen first To set the height of the tripod loosen the TOP tightening knob and allow the tripod tube to move up or down to the desired position and insert the metal rod Then tighten the knob once again PW1610PKG Insert the metal rod at the desired height Make sure the metal rod is installe...

Page 15: ... the unit Point the remote at the remote sensor on the front of the unit THIS DEVICE COMPLIES WITH PART 15 OF THE FCC RULES OPERATION IS SUBJECT TO THE FOLLOWING TWO CONDITIONS 1 THIS DEVICE MAY NOT CAUSE HARMFUL INTERFERENCE AND 2 THIS DEVICE MUST ACCEPT ANY INTERFERENCE RECEIVED INCLUDING INTERFERENCE THAT MAY CAUSE UNDESIRED OPERATION Federal Communications Commission Requirements The equipment...

Reviews: