26
The TouchScreen searches for zones connected to the panel system. This can take a few minutes.
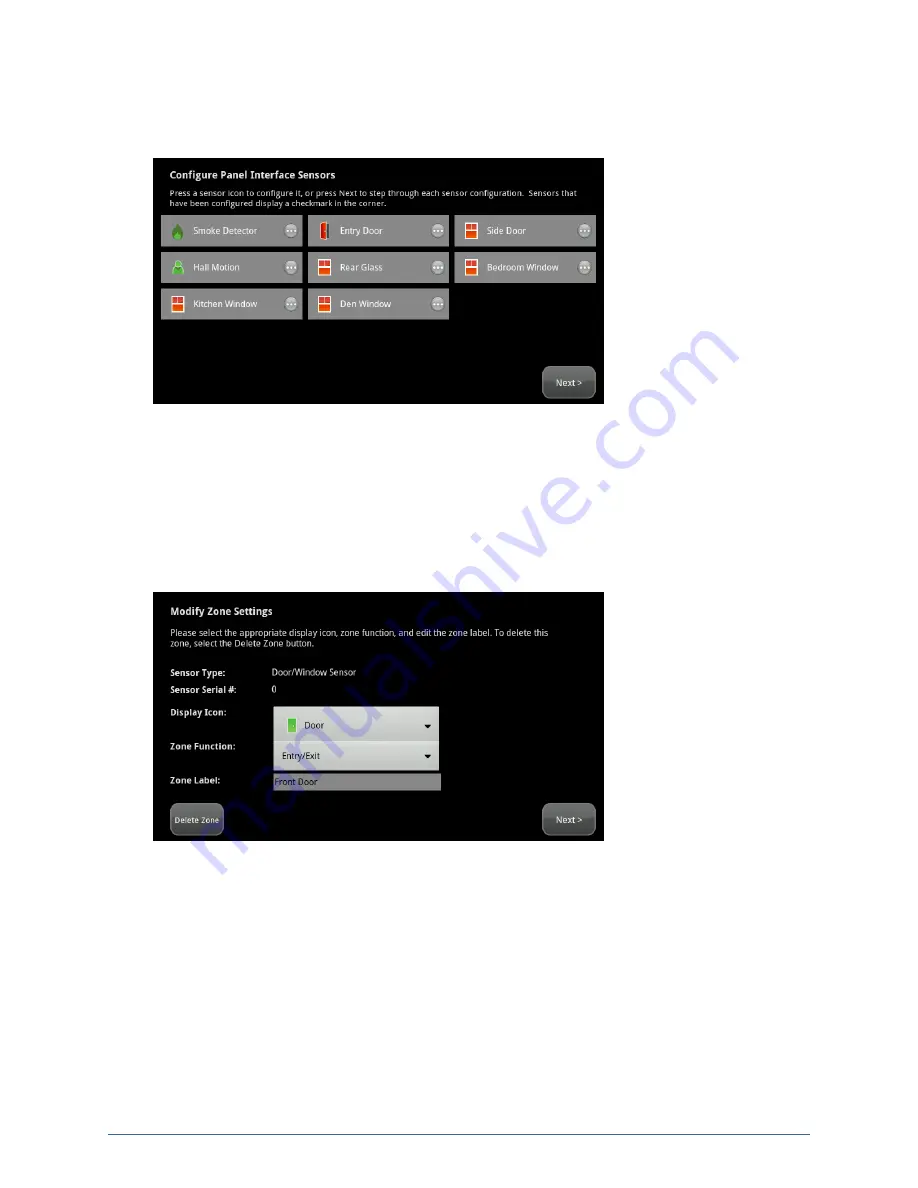
When all the zones are found, an icon for each is displayed on the Configure Panel Interface
Sensors screen.
Note:
When zones connected to the Vista alarm panel are found by the TouchScreen, it
automatically configures their functionality (for example, entry/exit, perimeter, etc.)
and sensor type (for example, door/window, motion detector, etc.) based on various
criteria. The
Panel Interface Module Installation Guide
describes the mapping of
sensors that are auto-configured by the TouchScreen. It is necessary to review the
newly added sensors to determine whether they require manual configuration.
5. Tap a Zone icon to display the Edit Sensor/Zone – Modify Zone Settings screen.
Figure 26: Settings: Edit Sensor/Zone - Modify Zone Settings Screen
The items that are available for configuration may vary based on the type of sensor being
configured.
6. Configure the sensor. For more information about each option, see
on
page
7. If you need to delete a zone, click Delete Zone. The Delete Zone confirmation dialog is displayed.
Click
Yes
to delete the zone or
No
to keep it.
Home System Installation Guide


