14
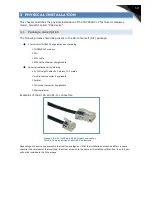
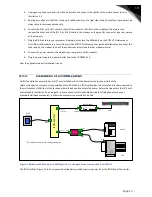
Un-plug your NT1 connector from the wall socket and connect the splitter to the wall socket with the appropriate
cable via the port called “Line” as displayed in Illustration 3.4.
1.
Connect the NT1 cable to the ISDN splitter in the port marked “ISDN or Phone”. Your phone should now work
again.
2.
Connect the RJ11 (or RJ-45) cable to the last free socket of the splitter (the top right on the picture) and
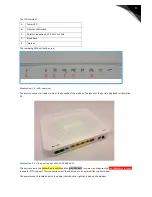
connect the other end of the RJ 11 (or RJ-45) cable to the DSL-device using the grey connector (see rear
picture of the modem on page 9).
3.
Plug the RJ45 cable into your computer Ethernet port or into the WAN-port on the AT&T VPN Gateway or
Cisco Ethernet based routers for multi-user environments (see AT&T VPN Gateway user guide installation)
and connect the other end to the 1st yellow port of the modem (see the rear modem picture on page 9).
4.
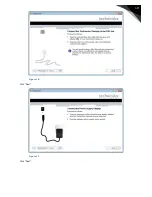
Connect the power cable to the rear of the modem (see rear picture page 9).
5.
Plug the power supply to a 230V/50Hz or 110V/60Hz and to the modem.
Now the physical modem installation is done.


