background image

English   

- 14 -

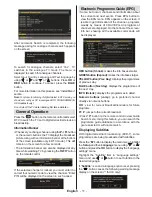
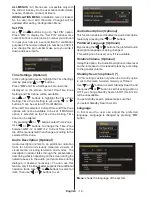
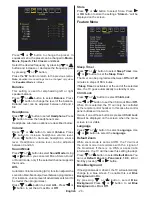
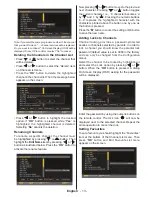
How to Add a Channel to a Favourites List

• By pressing “

” or “ ” buttons, highlight the channel  

that you want to add to the favourite list.

• By pressing “

OK

” button, the highlighted channel is 

added to the Favourite List. 

• F icon indicates that a channel is added  to Favourite 

List.

Removing a Channel from Favourite List

• Highlight the channel that you want to remove from 

the favourite list and press OK button to remove.You 

can press “

OK

” button again to re-add a channel.

• To activate Favourites, go to the Configuration menu 

and  select  Favourite  mode.  Use  “ ”  /  “ ”  to  set 

Favourite  mode  as  on. To  cancel  Favourites,  set 

Favourite Mode to Off.

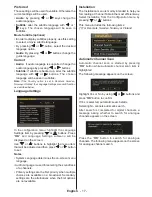
On Screen Help 

For all menus, press the 

INFO

 button to display the 

help information about the menu functions.

Programme Guide

This  section  is  same  with  the  instructions  given  in 

the General Operations page. Please see Electronic 

Programme  Guide  (EPG)  section  in  the  General 

Operations part.

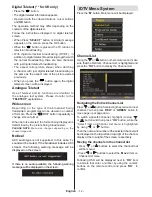
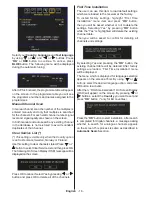
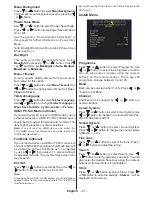
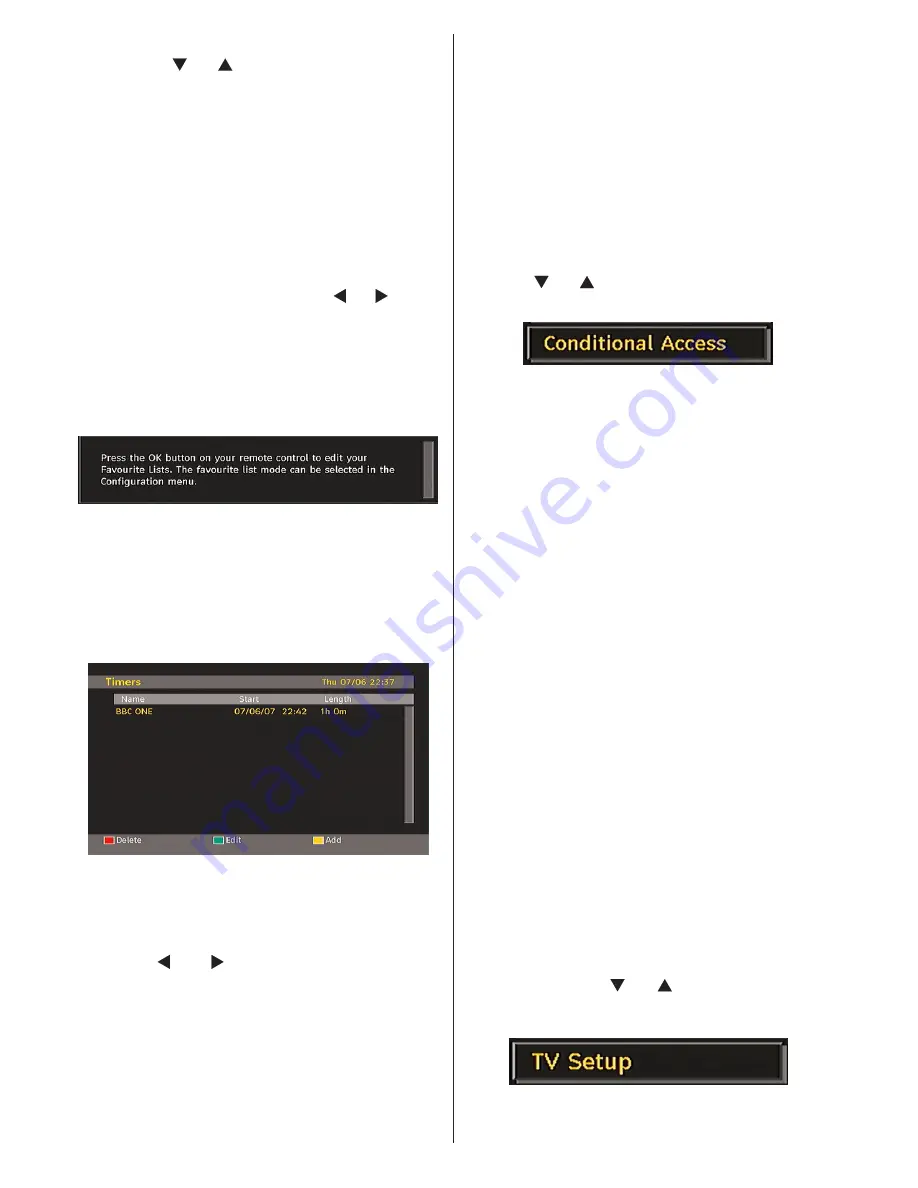
Timers

To display timers window, activate the item from the 

main menu. To add a timer, press the 

YELLOW

 button 

on  the  remote  control. Then    “Add Timer”  window 

appears.

Channel

:  “ ”  or  “ ”  keys  will  navigate  the  user 

through the TV or Radio list.

Date

: Starting date is entered via the Left/Right or the 

numeric buttons.

Start

: Starting time is entered via the Left/Right or 

the numeric buttons.

End

: Ending time is entered via the Left/Right or the 

numeric buttons.

Change/Delete

: permits or prohibits any modifications 

for other users.

Duration:

 Duration between Start and End time.

Repeat:

 You can set a timer to be repeated as Once, 

Daily or Weekly.
You can save the adjustments by pressing the 

GREEN


key or cancel the process by pressing the 

RED

 button. 

You can edit the list via 

GREEN

 key and delete with 

the 

RED

 button.

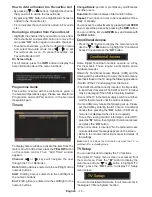
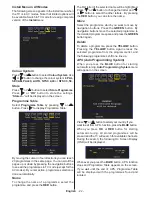
Conditional Access

• Press the “

M

” button to display the main menu and 

use the “ ” or “ ” button to highlight the “Conditional 

Access” line and press the “

OK

” button:

Some Digital Terrestrial channels operate on a Pay 

Per View basis. These require a subscription and a 

hardware decoder.
Obtain the Conditional Access Module (CAM) and the 

viewing card by subscribing to a pay channel company, 

then insert those to the TV using the following procedure.

• Switch off the TV and unplug from the mains.
• The CAM should be correctly inserted, it is impossible 

to insert fully if reversed. The CAM or the TV terminal 

may be damaged if the CAM is forcefully inserted.

• Connect the TV to the mains supply, switch on and then 

wait for few moments until the card is activated.

• Some CAMs may require the following set up. Please 

set the CAM by entering the IDTV menu, Conditional 

Access then pressing the “

OK

” button. (CAM set up 

menu is not displayed when it is not required.)

• To see the viewing contract information: enter IDTV; 

press the “

M

” button, then highlight Conditional Access 

and press the “

OK

” button.

• When no module is inserted, “No Conditional Access 

module detected” message appears on the screen.

• Refer to the module instruction manual for details of 

the settings.

Note

: Insert or remove the CI module only when the TV  is 

switched off or in standby mode.

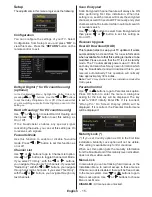
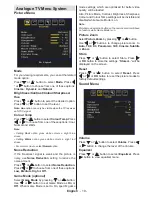
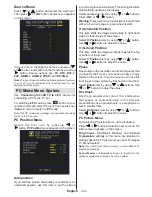
TV Setup

You can use this item to display the TV functions.
The digital TV Setup menu screen is accessed from 

the main menu. Press the 

“M”

 button to display the 

main menu and use “ ” or “ ” button to highlight “TV 

Setup”,  press  the  “

OK

”  button  to  display TV  Setup 

menu screen.

You can find detailed information for all menu items in 

“Analogue TV Menu System” section.

Summary of Contents for 32-2010

Page 1: ...COLOUR TELEVISION WITH REMOTE CONTROL OPERATING INSTRUCTIONS For assistance please call our Tesco Electrical Helpline on 0845 4566767 32 2010 ...

Page 2: ...ghtning 3 Replacement Parts 3 Servicing 3 Waste Disposal 3 Information for Users in European Union Countries 3 Disconnecting the Device 3 Headphone Volume 3 Installation 3 LCD Screen 3 Warning 3 Connection to a Television Distribution System Cable TV etc from Tuner 3 Environmental Information 4 Repair Information 4 Overview of the Remote Control 5 LCD TV and Operating Buttons 6 Viewing the Connect...

Page 3: ...ences Preparation For ventilation leave a free space of at least 10 cm all around the set To prevent any fault and unsafe situations please do not place any objects on top of the set Use this device in moderate climates 10 cm 10 cm 10 cm Safety Precautions Please read the following recommended safety precautions carefully for your safety Power Source The TV set should be operated only from a 220 2...

Page 4: ...ency range galvanic isolator see EN 60728 11 If any solid object or liquid falls into the cabinet unplug the TV and have it checked by qualified personnel before operating it any further Cleaning Before cleaning unplug the TV set from the wall outlet Do not use liquid or aerosol cleaners Use soft and dry cloth Ventilation The slots and openings on the TV set are intended for ventilation and to ens...

Page 5: ...in Power Save Mode When the TV is not in use please switch off or disconnect the TV from the mains plug This will also reduce energy consumption Disconnect power when going away for longer time Note that annually using the TV set in Power Save Mode has more power efficiency than disconnecting the TV from the mains plug instead of keeping stand by mode Therefore disconnect the TV from the mains plu...

Page 6: ...s 11 Exit in DTV mode 12 Hold in TXT mode 13 Update in TXT mode No function 14 Index page Guide in DTV mode 15 Reveal in TXT mode Switch from TV to PC 16 Green Picture menu 17 Red Sound menu 18 Menu 19 OK Select Freeze Picture analogue TV 20 mode Hold in TXT mode Channel List DTV mode Cursor Left 21 AV Source 22 Info 23 Volume up down 24 Mute 25 Picture mode selection 26 Time Subtitle on off in DT...

Page 7: ...Coaxial Out 3 outputs digital audio signals of the currently watched source RF Input connects to an antenna or a cable 4 Note that if you use a decoder or a media recorder you should connect the aerial cable through the device to the television with an appropriate antenna cable as shown in the illustration in the following pages HDMI 5 2 HDMI input HDMI 6 1 HDMI input HDMI Input is for connecting ...

Page 8: ...our device Audio Inputs are used for connecting audio signals of external devices 4 Connect the audio cable between the AUDIO INPUTS on the TV and the AUDIO OUTPUT jacks on your device Also to enable PC YPbPr sound connection in such a case use an appropriate audio cable between the connected device s audio outputs and the TV s audio inputs Note If you connect a device to the TV via the VIDEO or P...

Page 9: ...tors of the TV set DVD players may have different connectors Please refer to your DVD player s instruction book for additional information Power off both the TV and the device before making any connections Note Cables shown in the illustration are not supplied If your DVD player has an HDMI socket you can connect via HDMI When you connect to DVD player as illustrated below switch to HDMI source Se...

Page 10: ...ntly pulling backwards from the indicated part Insert two AAA R3 or equivalent type batteries inside Please ensure the correct polarity is observed and replace the battery cover Note Remove the battery from remote control handset when it is not to be used for a long period Otherwise it can be damaged due to any leakage of batteries Switching the TV On Off To Switch the TV On Connect the power cord...

Page 11: ...llowing sections Volume Setting Press button to increase the volume Press button to decrease the volume A volume level scale slider will be displayed on the screen Programme Selection Previous or Next Programme Press P button to select the previous programme Press P button to select the next programme Programme Selection DirectAccess Press numeric buttons on the remote control to select programmes...

Page 12: ...h a case Electronic Programme Guide EPG Some but not all channels send information about the current and next events Press EPG button to view the EPG menu EPG appears on the screen It is able to get Information of the channel programs weekly by means of 7 DAY EPG All programs of channels are displayed On the bottom of the screen info bar showing all the available commands will be displayed RED but...

Page 13: ...format being displayed is determined by the picture being broadcasted PLEASE NOTE Menu size changes depending on the chosen image size Notice AC3 audio type is not supported In this case Tv sound will be muted If the broadcast includes AC3 stream the following warning message will be displayed on the screen If there is no audio available the following warning message will be displayed on the scree...

Page 14: ...racter Pressing or button toggles the current character i e b character becomes a by and c by Pressing the numeric buttons 0 9 replaces the highlighted character with the characters printed above the button one by one as the button is pressed Press the M button to cancel the editing or OK button to save the new name Adding Locks to Channels Channel locking provides a password protected access to c...

Page 15: ...e GREEN key or cancel the process by pressing the RED button You can edit the list via GREEN key and delete with the RED button Conditional Access Press the M button to display the main menu and use the or button to highlight the Conditional Access line and press the OK button Some Digital Terrestrial channels operate on a Pay Per View basis These require a subscription and a hardware decoder Obta...

Page 16: ...y encrypted channels will not be located while in automatic search or manual search Use or button to select Scan Encrypted and then press or button to set this setting as On or Off Receiver Upgrade Over Air Download OAD This feature helps to keep your TV updated It works automatically and searches for new information when available Note that this setting is inactive to be modified Please ensure th...

Page 17: ...ccording to the selected Time Zone Audio Description Optional Audio description refers to an additional narration track for blind and visually impaired viewers of visual media including television and movies The description narrator talks through the presentation describing what is happening on the screen during the natural pauses in the audio and sometimes during dialogue if deemed necessary You ...

Page 18: ...ons to highlight the menu item that will be adjusted and then press or button to set Notes System Language determines the on screen menu language Audio Language is used for selecting the soundtrack of a channels Primary settings are the rst priority when multiple choices are available on a broadcast Secondary settings are the alternatives when the rst options are not available Installation The Ins...

Page 19: ... pressing or button and press OK to delete all of the channels First Time Installation The user can use this item to load default settings which were loaded to the receiver at the factory To install factory settings highlight First Time Installation menu item and press OK button then you will be asked whether or not to delete the settings Selecting Yes by pressing OK button while the Yes is highli...

Page 20: ... or to choose from one of these options Low Medium High or Off Game Mode optional Select Game Mode by pressing or button Use or button to set Game Mode as On or Off When Game Mode is set to On specific game mode settings which are optimized for better video quality will be loaded Also Picture Mode Contrast Brightness Sharpness Colour and Colour Temp settings will be invisible and disabled while Ga...

Page 21: ...s Press or button to select AVL Press or button to set the AVL as On or Off Store Press or button to select Store Press or OK button to store the settings Stored will be displayed on the screen Feature Menu Sleep Timer Press or button to select Sleep Timer Use or button to set the Sleep Timer The timer can be programmed between Off and 120 minutes in steps of 10 minutes If Sleep Timer is activated...

Page 22: ... HDMI or YPbPr connectors and set 1080i 1080P resolutions Full Mode item will be visible You can set Full Mode as 1 1 or Normal by using or If you select 1 1 screen ratio will be adjusted correctly If you set Normal screen ratio may expand Ext Out Press or button to select Ext Out Use or button to set the Ext Out as On or Off Note For copying from a DVD or VCR device you should choose desired sour...

Page 23: ...ighlighted Press or button to change that letter and or button to select the other letters By pressing the RED button you can store the name Move Select the programme which you want to move by navigation buttons Press the GREEN button By navigation buttons move the selected programme to the decided programme space and press the GREEN button again Delete To delete a programme press the YELLOW butto...

Page 24: ...ure best results H Horizontal Position This item shifts the image horizontally to right hand side or left hand side of the screen Select H Position item by using or button Use or button to adjust the value V Vertical Position This item shifts the image vertically towards the top or bottom of the screen Select V Position item by using or button Use or button to adjust the value Phase Depending on t...

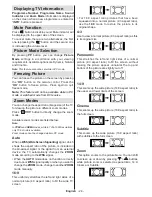
Page 25: ...de cannot be changed while in PC mode Auto When a WSS Wide Screen Signalling signal which shows the aspect ratio of the picture is included in the broadcast signal or the signal from an external device the TV automatically changes the ZOOM mode according to the WSS signal When the AUTO mode does not function correctly due to poor WSS signal quality or when you want to change the ZOOM mode change t...

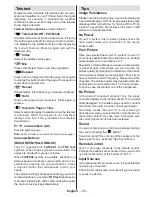
Page 26: ...revious page respec tively Tips Image Persistence Please note that ghosting may occur while displaying a persistent image LCD TVs image persistence may disappear after a short time Try turning off the TV for a while To avoid this do not leave the screen in still picture for extended periods No Power If your TV system has no power please check the main power cable and connection to the mains socket...

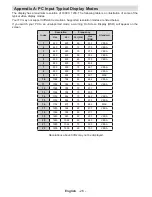
Page 27: ...Frequency Standard Hor Ver Ver Hz Hor KHz 1 640 480 60 31 5 VESA 2 640 480 72 37 9 VESA 3 640 480 75 37 5 VESA 4 800 600 56 35 2 VESA 5 800 600 60 37 9 VESA 6 800 600 70 43 8 7 800 600 72 48 1 VESA 8 800 600 75 46 9 VESA 9 832 624 75 49 7 MAC 10 1024 768 60 48 4 VESA 11 1024 768 70 56 5 VESA 12 1024 768 72 57 7 13 1024 768 75 60 0 14 1152 864 70 64 2 VESA 15 1152 864 75 67 5 VESA 16 1152 870 75 68...

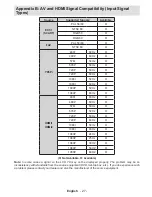
Page 28: ...z O 1080P 60Hz O HDMI1 HDMI2 480I 60Hz O 480P 60Hz O 576I 50Hz O 576P 50Hz O 720P 50Hz O 720P 60Hz O 1080I 50Hz O 1080I 60Hz O 1080P 24Hz O 1080P 25Hz O 1080P 30HZ O 1080P 50HZ O 1080P 60HZ O X Not Available O Available Note In some cases a signal on the LCD TV may not be displayed properly The problem may be an inconsistency with standards from the source equipment DVD Set top box etc If you do e...

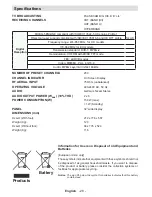
Page 29: ...play RF AERIAL INPUT 75 Ohm unbalanced OPERATING VOLTAGE 220 240V AC 50 Hz AUDIO German Nicam Stereo AUDIO OUTPUT POWER WRMS 10 THD 2 x 6 POWER CONSUMPTION W 150 W max 1 W Standby PANEL 32 wide display DIMENSIONS mm DxLxH With foot 212 x 776 x 567 Weight Kg 12 3 DxLxH Without foot 94 x 776 x 524 Weight Kg 11 6 Specifications Products Battery Information for Users on Disposal of old Equipment and B...

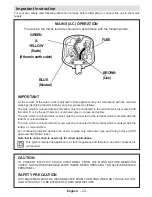
Page 30: ...ted to the terminal which is marked with the letter N or coloured Black The wire which is coloured brown or red must be connected to the terminal which is marked with the letter L or coloured Red For continued protection against risk of fire replace only with same type and rating of fuse ASTA approved 5A 250VAC fuse Note Earth connection is used only for classI applications This symbol means this ...

Page 31: ...50174931 ...
Reviews: