background image

1

Read these instructions. 
Keep these instructions. 
Heed all warnings. 
Follow all instructions. 
Do not use this apparatus near water. 
Clean only with a slightly damp cloth. 
Do not block any ventilation openings. 
Install in accordance with the manufacturer’s instructions. 
Do  not  install  or  operate  near  any  heat  sources  such  as 
radiators, stoves, or other apparatus that produce heat. 
Unplug  this  apparatus  during  lightning  storms  or  when 
unused for long periods of time.
Refer all servicing to qualified service personnel. Servicing is 
required when the apparatus has been damaged in any way, 
such as the power-supply cord or plug is damaged, liquid has 
been spilled or objects have fallen into the apparatus, the 
apparatus has been exposed to rain or moisture, does not 
operate normally, or has been dropped.

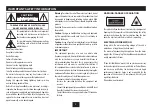
WARNING: DANGER OF RADIATION

Warning

: To reduce the risk of fire or electrical shock, do not 

expose this product to rain or moisture. The product must not 
be exposed to dripping and splashing and no object filled 
with liquids such as a vase of flowers should be placed on the 
product.
No naked flame sources such as candles  should be placed on 
the product.

Caution:

 Changes or modifications not expressly approved 

by  the  manufacturer  could  void  the  user’s  authority  to 
operate this device.

Caution:

 Usage of controls or adjustments or performance 

of procedures other than those specified herein may result in 
hazardous exposure.

IMPORTANT 

This  equipment  generates,  uses  and  can  radiate  radio 
frequency energy and, if not installed and used in accordance 
with  the  instructions,  may  cause  harmful  interference  to 
radio  communication.  However,  this  is  no  guarantee  that 
interference  will  not  occur  in  a  particular  installation.  If 
this equipment does cause harmful interference to radio or 
television reception, which can be determined by turning the 
equipment off and on, the user is encouraged to try to correct 
the interference by one of the following measures:
-   Reorient or relocate the receiving antenna.
-   Increase  the  separation  between  the  equipment  and 

receiver.

-   Connect the equipment into an outlet on a circuit different 

from that to which the receiver is connected.

-   Consult the dealer or an experienced radio/TV technician 

for help. 

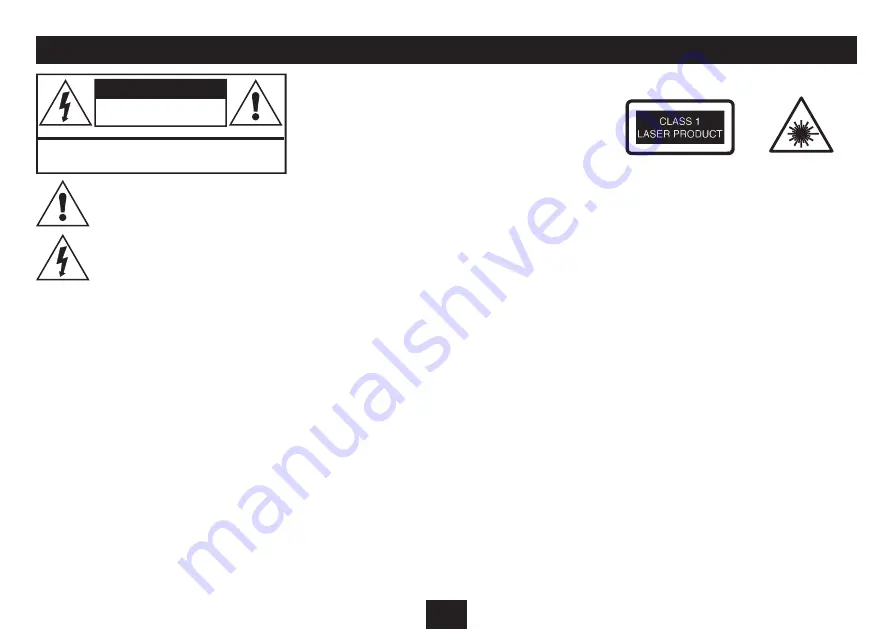
This symbol indicates that there are important 
operating  and  maintenance  instructions  in 
the literature accompanying this unit.
This symbol indicates that dangerous voltage 
constituting a risk of electric shock is present 
within this unit. 

CAUTION!

RISK OF ELECTRIC SHOCK

DO NOT OPEN

TO REDUCE THE RISK OF ELECTRIC SHOCK 

DO NOT REMOVE COVER (OR BACK) 

  IMPORTANT SAFETY INFORMATION

These labels tell you that the unit contains a laser component. 
Opening the CD compartment lid and defeating the safety 
interlocks  will  expose  the  user  to  radiation  from  the  laser 
beam. Do not stare into the laser while it is operating.

ELECTRICAL INFORMATION

Rating  plate:  The  mains  operating  voltage  of  the  unit  is 
marked on a rating plate on the back panel.
The means of disconnecting this appliance from the mains 
supply is the AC mains plug. This should be unobstructed and 
readily operable at all times.

“Made for iPod/iPhone” means that an electronic accessory 
has been designed to connect specifically to iPod or iPhone 
and  has  been  certified  by  the  developer  to  meet  Apple 
performance  standards.  Apple  is  not  responsible  for  the 
operation  of  this  device  or  its  compliance  with  safety  and 
regulatory standards.
iPhone shown not included.

Summary of Contents for MC-121IDAB

Page 1: ...MC 121IDAB Owner s Handbook Vertical audio system ...

Page 2: ......

Page 3: ...nication However this is no guarantee that interference will not occur in a particular installation If this equipment does cause harmful interference to radio or televisionreception whichcanbedeterminedbyturningthe equipmentoffandon theuserisencouragedtotrytocorrect the interference by one of the following measures Reorient or relocate the receiving antenna Increase the separation between the equi...

Page 4: ... 1492 MHz Germany uses both bands Your radio can tune Band III Countries in Europe that use Band III include Belgium Denmark Holland Italy Norway Portugal Spain Sweden Switzerland Your radio will tune stations in all these countries Your radio cannot receive French or German stations broadcasting in the L Band though FM services are available all over Europe Being digital DAB transmissions can hav...

Page 5: ... ensure that the screw heads will not pull out of the slots 240 mm Use a spirit level to ensure that the screws will be level and check that the unit will be fixed at the height you require When you have mounted the screws mount the unit carefully onto the screw heads Check that the mounting is secure before use NOTE Most walls will require the use of wall plugs when mountingthefixingscrews Ifyoua...

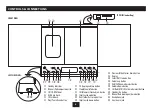
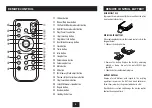
Page 6: ...Pause Scan button CONTROLS CONNECTIONS FRONTVIEW g CD door open close button h Stop Menu Info button i ID3 Memory Clock adjust button 1 Skip Search up button 1 Next folder Cursor up button 1 Skip Search down button 1 Previous folder Cursor down button 1 Display 1 Select FM Stereo button 1 Volume up button 1 DAB FM Aux mode select button 1 Volume down button 1 CD iPod USB SD Card mode select button...

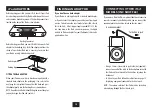
Page 7: ...rfirstuse pulloutthesafety strip to activate the battery REPLACINGTHE BATTERY Whenreplacingthebatteryintheremotecontrol refertothe diagram below 1 Slide out the battery holder 2 Remove the battery Replace the battery observing polarity as shown Use only the same CR2032 type specified 3 Slide the battery holder back into place BATTERY DISPOSAL Dispose of used batteries with regard to the recycling ...

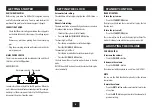
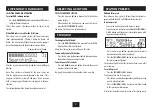
Page 8: ...ess the or button to set the minutes digits Press the ID3 MEM C ADJ button The clock time will be set and the unit will return to Standby mode NOTE When a DAB station is tuned the clock will always be set automatically GETTING STARTED STANDBY CONTROL To turn the system on Press the STANDBY ON button The display will light and the system will set to play the last functionused To turn the system off...

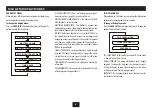
Page 9: ... one frequency step at a time To auto tune to FM stations Pressand holdthe or buttontotunetothenextor previous station in the band Tuningwillstopautomaticallywhenthestationisreached STATION PRESETS TO SELECT ANOTHER STATION Press the or button to browse the list of stations on the display When you find the station name you want to listen to press the SELECT MONO ST button Theradiowillre tunetothes...

Page 10: ...ill display a signal strength bargraph The longer the bargraph the stronger the signal Setting the display to show signal strength is useful when setting up the aerial for the strongest signal TIME AND DATE Time and date are updated by broadcasted information PROGRAMMETYPE This describes when available the style of the programme being broadcast FM DISPLAY MODES When playing an FM station you can c...

Page 11: ...e scanthebandatanytimeifyoumovetoadifferent area or just to refresh the stored list of available stations To start a scan Select the DAB band Press the PLAY PAUSE SCAN button to start the scan The unit will now display the legend SCANNING and a bargraphtoshowscanprogress The number of services found during the scan will be shown at therightsideofthedisplay Number of services found ...

Page 12: ...OPEN CLOSE button After a few seconds the disc will read and the disc data will be displayed Unloading a disc If the disc is playing press the STOP MENU INFO button and wait a few seconds for the disc to stop Press the CD Door CD OPEN CLOSE button Thedoorwillopen Grip the disc at the sides and lift it off the turntable and out of thedisccompartment Track playing Track elapsed time When a CD is pla...

Page 13: ...rder To set random mode Press the RANDOM button on the remote control repeatedly to switch Random mode on or off RANDOMwillbedisplayedandthetracksontheCDwillplayin arandomsequence INTRO You can play the intro first 10 seconds of each track to find a track that you like Pressthe INTRObuttonontheremotecontroltoplaythe intro of each track in the compilation INTROwillbedisplayed If you hear a track yo...

Page 14: ...o play a compilation from a docked USB drive Press the CD iPod USB CARD button repeatedly until USB is displayed To play a compilation from a docked SD Card Press the CD iPod USB CARD button repeatedly until CARD is displayed Oncethemodehasbeenselected thecompilationwillbereadand thecontentsofthedisc drive cardwillbedisplayed MP3 WMA PLAYBACK PAUSE Press the PLAY PAUSE SCAN button to start playing...

Page 15: ...willbedisplayed LISTENING TO MP3 WMA COMPILATIONS STORED ON CD ROM USB DRIVE OR SD CARD INTRO You can play the intro first 10 seconds of each track to search for a track that you like Pressthe INTRObuttonontheremotecontroltoplaythe intro of each track in the compilation INTROwillbedisplayed If you hear a track you want to play press the INTRO button again Intromodewillbecancelledandnormalplaywills...

Page 16: ...ttonontheremotecontrol to select this folder Youcannowselectthetrackyouwantwithinthisfolder Press the or button to select the track number within this folder for the track you want to program Folder number Program position Track number Press the or button to select the track number for the first track you want to program Pressthe ID3 MEM C ADJ buttontostorethistrackinto the program memory The trac...

Page 17: ... of your iPod refer to this web link http support apple com kb HT1353 You can then browse the iPod accessories page on the Apple website to find an adaptor for your iPod model that can be purchased on line iPod ADAPTORS Before docking your iPod you must first check if your iPod has a docking connector Early iPod models do not have one and cannot be docked to your unit The docking connector is loca...

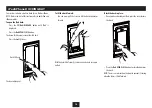
Page 18: ...willslideopentorevealtheiPoddock Press the dock tilt lever Theleverwillpopout To tilt the dock forward You can now pull the lever to tilt the dock connector forward Withthedocktiltedforward itismucheasiertodockorremove aniPod To lock the dock in place Once you have docked your iPod press the lever to close the dock Pressthe iPodOPEN CLOSEbuttontoclosethedoorover the dock NOTE There is an interlock...

Page 19: ...orrandommodessetwillbedisplayedontheiPod DOCKING AN iPod DOCKINGYOUR iPod To dock your iPod Referring to the diagrams on the previous page Press the iPod OPEN CLOSE button ThedoorwillslideopentorevealtheiPoddock Press the dock tilt lever Theleverwillpopout Pull the lever to tilt the dock connector forward Check that the correct iPod adaptor is fitted to the docking bay Dock the iPod onto the docki...

Page 20: ...e expires To cancel Sleep mode Now press the SLEEP button repeatedly until the display shows SLEEP OFF TIMER SWITCH ON TIME TIMER SOURCE TIMER VOLUME TIMER SWITCH OFF TIME To change the digits or option displayed press the or button To save a setting and move on to the next setting press the TIMER button Activating the timer When timer setting is complete the timer can be switched on or off by pre...

Page 21: ...eset the radio NOTE If you reset the radio all preset station memories and timer settings will be lost To reset the system Set the system to Standby Press and hold the STOP MENU INFO button on the front panel After a short delay the unit will reset all settings WhennextusedthesystemwillscantheDABbandandstore all stations found EQUALISER You can change the equalisation of the sound to suit your tas...

Page 22: ...EM Set to Standby Switch the unit off at the mains and unplug it if you are leaving it unattended for a long period holidays etc CARE AND CLEANING All care and cleaning operations should be carried out with the unit unplugged from the mains power Occasionally wipe the cabinet with a lint free duster Never clean the unit with liquids or solvents Loudspeaker grilles can be cleaned carefully with a s...

Page 23: ......

Page 24: ...Tesco Stores Ltd Delamare Road Cheshunt Herts EN8 9SL Technika Helpline 0845 456 6767 Calls cost up to 4p per minute from a BT landline other providers may vary MC121IDABV0 1 ...

Reviews: