background image

English

Instruction for use

13

Warning: 

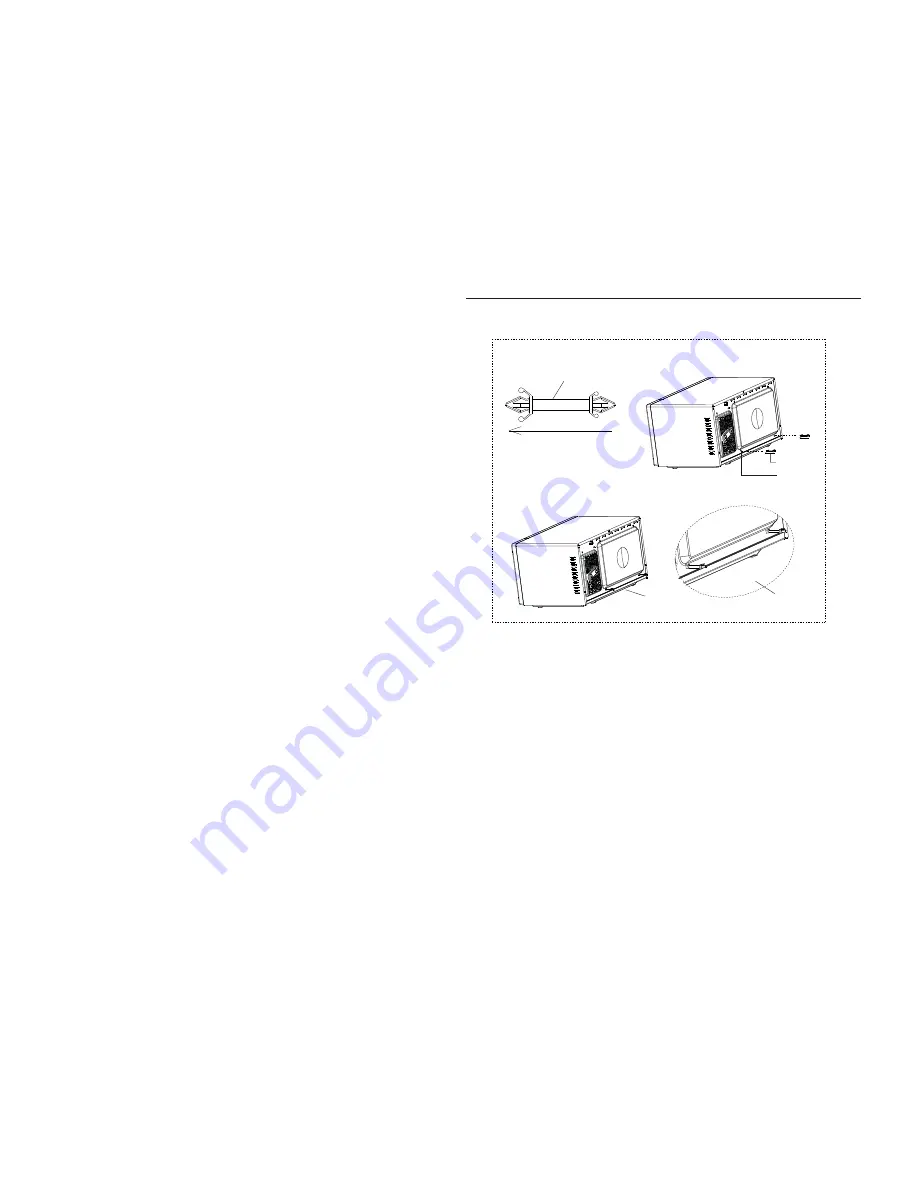
For your use safety, before installing this model of microwave oven, please take 

out the locating spacer rods from the cavity (as illustrated in Figure 1 of the verso), and 

insert them respectively into the two locating holes at lower part of the cavity rear panel as 

illustrated, so as to ensure good ventilation between the microwave oven and back wall

F I G 1

Spacer Rod

(a)

(b)

(c)

Cavity Holes

Fix spacer rod here

Enlarged view

Spacer Rods

I n s t alling th e s pacer ro a d s

Summary of Contents for WD700

Page 1: ...Specific No 0050502453F TECHNIKA TOLL FREE 1800 333 244 E MAIL service technika com au 91 115 LINK DRIVE CAMPBEllFIELD VIC 3061 Household Microwave Oven Model WD700...

Page 2: ...om the cavity as illustrated in Figure 1 of the verso and insert them respectively into the two locating holes at lower part of the cavity rear panel as illustrated so as to ensure good ventilation be...

Page 3: ...metal objects into the interlock hole at the front of the cavity It may cause microwave 3 Do not add excessive force to opposite direction on the door Otherwise the door may be deformed 4 Do not cook...

Page 4: ...ke it out steam bubbles may unexpectedly and suddenly form and the liquid in the serving dish may unexpectedly boil over Danger to get severely scalded Before removing the serving dish observe if the...

Page 5: ...is also equipped with a fan or a grill function make sure the dishes you use have a high heat resistance 1 Before installing your new appliance you need to check as for visible external damage Under...

Page 6: ...may get very hot within the space of the above mentioned minimum clearances The microwave oven should thus be installed so that no objects sensitive to heat or moisture are located near the minimum c...

Page 7: ...rning Under no circumstances should you continue to use the appliance if you have detected any damage on the door seal or on the adjoining surfaces The same applies to damage detected on the door itse...

Page 8: ...out the burnt food only when you can no longer detect any smoke desired cooking mode desired cooking time 2 You can pause operation at any time by 3 Setting the operating mode power level 4 Setting th...

Reviews: