background image

www.technimount.com

SAS UG 202205-01

13

Return To Table of Contents

Introduction

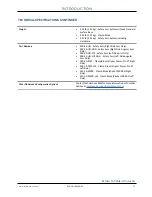
TECHNICAL SPECIFICATIONS CONTINUED

Weight

• 

3.35 lb (1.52 kg) - Safety Arm System without Standard 

Surface Base

• 

2.92 lb (1.32 kg) - Clamp Block

• 

5.57 lb (2.53 kg) - Safety Arm System including 

Hardware

Part Numbers

• 

400-20-UN - Safety Arm (Right Side Arm Only)

• 

400-20-UN-ANG - Safety Arm (Right Side Angular Arm 

Only)

• 

400-20-UN-LFS - Safety Arm (Left Side Arm Only) 

• 

400-20-UN-LFS-ANG  - Safety Arm (Left Side Angular 

Arm Only)

• 

500-10-PFXT - Clamp Block (Stryker Power-Pro XT Right 

Side)

• 

500-10-PFXT-LFS - Clamp Block (Stryker Power-Pro XT 

Left Side)

• 

530-10-MXPR - Clamp Block (Stryker MX-PRO Right 

Side)

• 

530-10-MXPR-LFS - Clamp Block (Stryker MX-PRO Left 

Side)

Other Models and Configuration Options

Contact Technimount EMS for more information or for other 

options at  

customerservice@technimount.com

Summary of Contents for SAFETY ARM SYSTEM 500

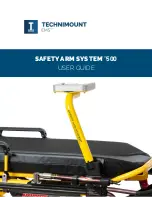
Page 1: ...SAFETY ARM SYSTEMTM 500 USER GUIDE ...

Page 2: ...orm or by any means without the written permission of Technimount or its affiliate companies Trademark Attributions Technimount System and Technimount EMS are registered trademarks of Technologies CGC Inc Safety Arm System is a Trademark of Technologies CGC Inc Stryker stretcher models and numbers are registered trademarks of Stryker In order to ensure continuous improvements to our products and s...

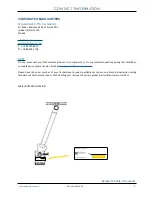
Page 3: ...product its components or for any technical questions during the installation or maintenance please send an Email to techsupport technimount com Please have the serial number of your Technimount product available as shown on picture below when calling Technimount Customer Service or Technical Support Include the serial number in all written communications SERIAL NUMBER LOCATION Contact Information...

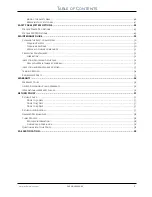
Page 4: ...ion 20 Cot Stretcher Orientation Diagram 21 Preparing the Cot Stretcher for Installation 22 Removing the IV Pole or Changing the Side of the IV Pole 22 Safety Arm System Installation 25 Position on the Cot Stretcher 25 Patient Right and Left Installation 25 Position on the Cot Stretcher Continued 26 Patient Right Installation 26 Installing the Clamp Block Patient Right 27 Preparing the IV Pro Adap...

Page 5: ...intenance 51 Lubrication 51 Inspection Process and Schedule 52 Preventive Maintenance Program 52 inspection and Maintenance Record 53 Training Record 54 Replacement Parts 55 WARRANTY 56 Warranty Policy 56 Limited Responsibility and Warranty 56 International Warranty Clause 56 RETURN POLICY 57 Return Policy 57 Prior to 30 Days 57 Prior to 45 Days 57 Prior to 60 Days 57 Return Authorization 57 Damag...

Page 6: ... system Bracket Pro Serie it allows the medical crew to see and use the unit during transport as well as during patient loading and unloading INTENDED USE OF THE PRODUCT The Safety Arm System 500 is a secure mounting system for medical devices designed to be installed on a stretcher Stryker Stretchers MX PRO and Power PRO models The mount is intended to support and transport medical equipment duri...

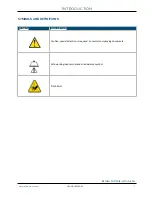
Page 7: ...G 202205 01 7 Return To Table of Contents Introduction SYMBOLS AND DEFINITIONS SYMBOL DESCRIPTION Caution special attention is required Consult accompanying documents Safe working load symbol and Load balance symbol Pinch Point ...

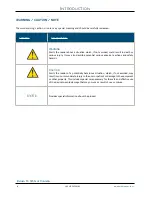
Page 8: ...erious injury It may also describe potential serious adverse reactions and safety hazards Caution Alerts the reader of a potentially hazardous situation which if not avoided may result in minor or moderate injury to the user or patient or damage to the equipment or other property This includes special care necessary for the safe and effective use of the device to avoid damage that may occur as a r...

Page 9: ...Safety Arm System inside the clamp block It goes through the clamp block and the bottom of the arm locking the arm inside the clamp block SAFETY PIN The fixed safety pin is identified by the red round handle mechanism used for locking the arm in the upper position a Side Lock Pin Aperture b Safety Pin with red handle LOCK PIN WITH FINGER RING a b CLAMP BLOCK WITH SAFETY PIN Introduction ...

Page 10: ...s are attached with four 4 stainless steel hexagon socket pan head screws as shown in picture on the right CLAMP BLOCK BEFORE ASSEMBLY CLAMP BLOCK AFTER ASSEMBLY SAFETY ARM BASE MOUNT UPPER PLATE AND B HARDWARE FOR INSTALLATION OF THE BASE TO THE PLATE YELLOW SAFETY ARM SAFETY ARM The base mount upper plate is welded onto the safety arm as shown in picture on the right The yellow safety arm goes i...

Page 11: ...ABLE 1 The yellow color is the standard color for the Safety Arm System 2 Straight and Angled arm models for left and right side of the stretcher are available for additional configuration options 3 To install the IV Pole on the same side of the Safety Arm Stretcher an IV Pro Adapter plate is required to support it Contact Customer Service for more information customerservice technimount com INSTA...

Page 12: ...tion Mounting System Retained on Stretcher with Clamp Block Lock Pin and Red Handle Safety Pin Transportation Compatibility Systems Compatible with Technimount s Standard Surface Base Bracket Pro Serie Product Line with a Standard Bottom Disc IV Pro Adapter with or without Knee Gatch Patient Left Patient Right Features Top down Movable Arm for Patient Loading Unloading on Both Sides Dual Locking M...

Page 13: ...m Only 400 20 UN ANG Safety Arm Right Side Angular Arm Only 400 20 UN LFS Safety Arm Left Side Arm Only 400 20 UN LFS ANG Safety Arm Left Side Angular Arm Only 500 10 PFXT Clamp Block Stryker Power Pro XT Right Side 500 10 PFXT LFS Clamp Block Stryker Power Pro XT Left Side 530 10 MXPR Clamp Block Stryker MX PRO Right Side 530 10 MXPR LFS Clamp Block Stryker MX PRO Left Side Other Models and Confi...

Page 14: ...t E M S Holding Inc Regulatory Affairs 3770 Jean Marchand Street Suite 100 C Quebec City QC G2C 1Y6 Canada T 1 581 700 6613 TF 1 888 639 2758 technimount com legal technimount com WARNING The end users and administrators are responsible to validate regulations and standards for safety in their region in order to comply with applicable safety regulations Techninmount is not responsible to inform th...

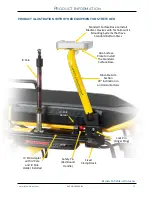
Page 15: ...e Base to Install Medical Devices with Technimount s Mounting Systems that have Standard Bottom Discs IV Pole Lock Pin Finger Ring Fixed Clamp Block Movable Arm Section 90 Inclination in an Horizontal Axis Safety Pin Red Round Handle Arm Surface Plate to Install the Standard Surface Base IV Pro Adapter with IV Pole and IV Pole Holder Installed IV Pole Holder ...

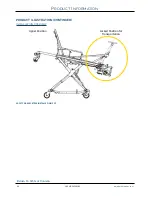
Page 16: ...2205 01 www technimount com Return To Table of Contents PRODUCT ILLUSTRATION CONTINUED INSTALLATION OVERVIEW SAFETY ARM SYSTEM INSTALLED ON COT Upper Position Locked Position for Transportation Product Information ...

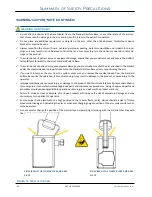
Page 17: ...ck before re moving the arm from the cot stretcher or lowering the arm to the unlocked position 9 Verify that both pins Safety Pin and Lock Pin are always pushed into the holes of the clamp block and the arm base is in the locked position Regardless of how the arm is loaded or unloaded with a medical device injury to the patient or operator and or damage to the arm may occur 9 Practice changing ar...

Page 18: ...rface Base prior to repositioning the arm 9 If you want to remove the arm from the system make sure you remove the medical device from the Standard Surface Base prior the operation failure of removing it may result in damage to the product or cause injury to the operator 9 Improper maintenance can cause injury or damage to the product Maintain the Safety Arm System as described in this user guide ...

Page 19: ...d on either side of the stretcher with the use of the right or the left Safety Arm System patient right or left When ordering it is important to identify which side the Safety Arm is to be located The Safety Arm System cannot be reversed as the clamp block has been designed for a specific side 9 A preventive maintenance program should be established for all Technimount equipment Preventive mainten...

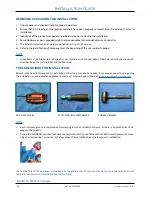
Page 20: ... of the Safety Arm System and cot stretcher Keep the cot stretcher and the floor clear TOOLS REQUIRED FOR INSTALLATION Below are the basic tools required for installation Other tools may also be needed If you have any questions regarding the installation or need assistance please contact our Technical Support team at techsupport technimount com NOTE 9 Electrical tools are not recommended for screw...

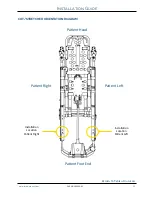
Page 21: ... UG 202205 01 21 Return To Table of Contents COT STRETCHER ORIENTATION DIAGRAM Patient Head Installation Location Patient Right Patient Right Patient Left Patient Foot End Installation Location Patient Left Installation Guide ...

Page 22: ...pole on the same side as the Safety Arm System does not interfere with the installation or the operation of the arm 9 You will need to validate the location of the installation before removing the IV pole hardware 9 Technimount has two 2 different Safety Arm models The standard 400 model for Ferno cots or the 500 model for Stryker cots 9 The installation procedure provided in this user guide is fo...

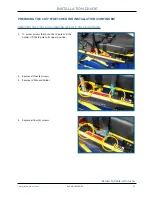
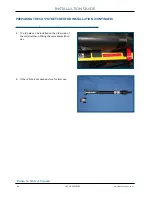
Page 23: ...hat hold the IV pole and the holder lift the IV pole to its upper position 2 Remove all four 4 screws 3 Remove IV Pole and holder 4 Replace all four 4 screws REMOVING THE IV POLE OR CHANGING SIDE OF IV POLE CONTINUED Installation Guide PREPARING THE COT STRETCHER FOR INSTALLATION CONTINUED ...

Page 24: ... THE COT STRETCHER FOR INSTALLATION CONTINUED REMOVING THE IV POLE OR CHANGING SIDE OF IV POLE CONTINUED 5 The IV pole can be installed on the other side of the cot stretcher utilizing the same bracket hol der 6 If the IV Pole is not needed store for later use Installation Guide ...

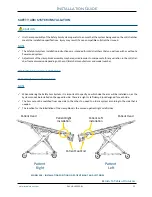
Page 25: ...me dimension depending on the cot stretcher manufacturer and model number POSITION ON THE COT STRETCHER Patient Right and Left Installation NOTE 9 When ordering the Safety Arm System it is important to specify on which side the arm will be installed on as the System cannot be installed on the opposite side There is a right or left clamp block designed for each side 9 The Arm cannot be switched fro...

Page 26: ... STRETCHER CONTINUED Patient Right Installation POSITION OF THE CLAMP BLOCK ON THE SIDE RAIL FRAME PATIENT RIGHT POSITION OF SAFETY ARM SYSTEM PATIENT RIGHT PATIENT RIGHT SAFETY ARM SYSTEM INSTALLED AND IN UPPER POSITION LOCKED Installation Guide Patient Head Patient Foot End Patient Right Patient Right Patient Left Patient Left ...

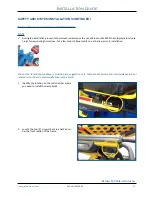
Page 27: ...se ning of screws during normal use Put a few drops of Blue Loctite on each screw prior to installation Blue The LoctiteTM Brand shown above is provided as a suggestion only Technimount System and its subsidiaries are not related to nor does it commercially endorse this brand 1 Identify the location on the cot stretcher where you need to install the clamp block 2 Locate the two 2 screws that are a...

Page 28: ...aces this part 5 Loosen the 2 screws that are on the opposite side of the stretcher to facilitate the installation of the clamp block 6 Unscrew the four 4 stainless steel hexagon socket open head screws of the clamp block with the 3 16 in Allen key 7 Use the part with the fixed red handle to place vertically on the inside of the cot stretcher frame SAFETY ARM SYSTEM INSTALLATION CONTINUED INSTALLI...

Page 29: ...LING THE CLAMP BLOCK PATIENT RIGHT CONTINUED 8 Position the clamp block under the black plate of the frame 9 Align with the two 2 screw holes 10 Add a couple of drops of blue Loctite 2400 to the screws before installation 11 Tighten screws while alternating screwheads 12 Tighten the screws located on the opposite side of the stretcher ...

Page 30: ...ion the other side of the clamp block A tiny yellow line of the frame should remain visible 14 Add a couple of drops of blue Loctite 2400 to the screws before installation 15 Tighten all four 4 stainless steel hexagon socket pan head screws while alternating with all four 4 screws 16 Once the clamp block is properly installed you are ready to install the Safety Arm into the clamp block ...

Page 31: ...ith pointed end 2 Using screwdriver with a star bit tighten all 4 screws 2 on each block 3 Insert screws from the bottom of the IV Pro Adapter plate NOTE 9 Installation of the blocks is performed under neath of the plate in order to have the blocks on the upper side once installed 4 IV Pro Adapter plate with the 2 blocks installed Short Block Long Block Front End goes next to clamp block NOTE 9 Th...

Page 32: ...The following 4 steps are for the installation of the Micro Base onto the IV Pro Adapter plate If not applicable proceed to the following page Page 33 1 Five 5 screws are provided to install the Micro Base onto the IV Pro Adapter plate 2 Align with the five 5 screw holes 3 Add a couple of drops of blue Loctite to the screws before installation 4 Tighten screws while alternating screwheads ...

Page 33: ...fy the location on the cot stretcher where you need to install the IV Pro Adapter NOTE 9 Make sure the IV Pro Adapter will correspond to the feature of the stretcher cot with or wit hout the knee gatch The knee gatch feature will require two 2 recesses on the IV Pro Adapter plate the one without knee gatch will have only one 1 long recess to obtain the proper fit on the stretcher cot 2 Pull and ho...

Page 34: ...UED INSTALLING THE IV PRO ADAPTER CONTINUED Installation Guide 3 When pliers are secured in place on the screw to hold the Safety Pin open turn the red round han dle counter clockwise to unscrew and remove the red round handle 4 Remove the red round handle 5 Locate all 4 screw holes on the stretcher frame ...

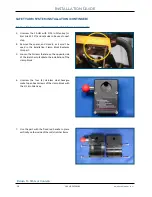
Page 35: ...n order to put some blue Loctite onto the safety pin screw WARNING 9 Use safety glasses to protect the eyes Use imper meable gloves and protective clothing as neces sary to prevent skin contact 11 Put a few drops of blue Loctite onto the screw before replacing the red round handle This will prevent premature loosening of the screws du ring normal use 12 Replace the red round handle while turning c...

Page 36: ...ONTINUED INSTALLING THE IV PRO ADAPTER CONTINUED 13 Screw in tightly 1 Locate the 2 blocks on either side of the IV Pro Adapter plate 2 Install the IV Pro Holder onto the block located near the Clamp Block 3 Align with the two 2 screw holes 4 Tighten both screws INSTALLING THE IV POLE AND HOLDER ONTO THE IV PRO ADAPTER ...

Page 37: ... ONTO THE IV PRO ADAPTER CONTINUED Installation Guide 5 Install the IV pole onto the IV Pro Adapter plate second block 6 Align with the two 2 screw holes 7 Use the same screws provided with the IV Pole or similar screws provided with same threads and length 8 Tighten both screws 9 When not in use lower the IV pole and clip it into its holder ...

Page 38: ...h the hole of the triangle at the base of the arm 2 Push the Lock pin in until the finger ring is flat against the wall of the clamp 3 The fixed safety pin red round handle and side lock pin finger ring should be fully inserted and locked when the arm is in the upper position Locked WARNING Failure to insert the side safety pin properly may result in injury to the patient or operator and or damage...

Page 39: ...re that the Safety Arm System is in the upper position Locked 2 Identify the desired location of the surface base on the upper plate 3 Keep in mind the position of the red quick re lease mechanism for easy access to the medical device The base can be installed in 2 different positions according to desired configuration and protocol Can be turned in the other direction 180 Installation Guide ...

Page 40: ...urface Base on the opposite side of the red quick release button 4 Align the two 2 stainless steel screws 10 32 in x 1 3 4 in with the two 2 pre drilled holes in the back of the upper plate and the Standard Surface Base Use Loctite on the four 4 bolts to avoid potential loosening of the screws due to vibra tion 5 Repeat the same step with the other two 2 stainless steel screws 10 32 in x 1 1 4 in ...

Page 41: ... Arm System can cause injury to the patient or operator Operate the product only as described in this user guide 9 Do not allow untrained staff to assist in the operation of the arm Untrained technicians staff can cause injury to the patient or themselves 9 Always hold the arm securely when you manipulate it not to drop the safety arm Dropping the arm could cause injury to the operator or patient ...

Page 42: ...an be placed into two 2 positions Locked Upper position Unlocked Lower po sition 9 It is recommended that operators use the system in the upper or locked position while the cot stretcher is mobile or while the vehicle is moving 9 Always verify the fixed lock pin is secure priori and during use of the Safety Arm System 9 Always verify if the side safety pin is firmly pu shed and locked into positio...

Page 43: ...even with the weight of the medical device in order to not damage the tip of the triangle head Improper positioning of the arm can cause premature damage or cause improper functioning of the system RECOMMENDED HANDLING POSITIONS 9 Hold the arm s tubular frame at the center or close to the top near the base 9 Avoid placing your hands too close to the clamp block base due to pinch points that may ca...

Page 44: ... to the system 9 Ensure proper hand placement on the tubular pole or surface plate Hands should be clear of the black clamp block and arm pivot points while loading and unloading the medical equipment or whenever changing height of the arm with two or more operators Operation Guide RECOMMENDED HANDLING POSITIONS CONTINUED NOTE 9 The tip of the triangle head is used to stop the arm from movement i ...

Page 45: ... its ful lest extent lift the arm upwards in the same axis as the arm to reduce friction or resistance when lifting 3 Lower the arm until it is in the horizontal posi tion parallel with the cot stretcher frame 4 Release the fixed safety pin WARNING 9 Always remove or check if the device is correctly secured into the Standard Surface Base if lowering the unit 9 Always hold the arm securely when you...

Page 46: ...al position and make sure the triangle head is cor rectly seated into the clamp block 4 Release the safety pin to lock the Safety Arm in its vertical position for transport WARNING 9 Always use the system with the lock pin pin with finger ring in the system 9 Always hold the arm securely when you manipulate it 9 Always pull and hold the safety pin red handle until it reaches the final upper positi...

Page 47: ...cal device from the Standard Surface Base on the Safety Arm System WARNING Ensure that the medical device has been removed from the Standard Surface Base prior to removing the Safety Arm from the clamp block Failure to do so can cause injury to the patient or operator and damage to the equipment and medical device 3 Remove the fixed lock pin by pulling outwards 4 Pull and hold the Safety Pin red r...

Page 48: ...ERATING THE SAFETY ARM SYSTEM CONTINUED Operation Guide REMOVING THE SAFETY ARM CONTINUED 5 While Securely holding the arm pull upward in order to disengage the triangle head from the clamp block 6 Once the Safety Arm is removed put the lock pin back into the clamp block ...

Page 49: ...00 10 PFXT LFS IV Pro Adapter IV Pole Support Patient Left Installation Without Knee Gatch 511 00 UN LFS WHKG IV Pro Adapter IV Pole Support Patient Left Installation With Knee Gatch 511 00 UN LFS KG IV Pro Adapter IV Pole Support Patient Right Installation Without Knee Gatch 511 00 UN RHS WHKG IV Pro Adapter IV Pole Support Patient Right Installation With Knee Gatch 511 00 UN RHS KG STRYKER MX PR...

Page 50: ...oid over saturation and ensure that the product does not stay wet longer than the cleaner manufacturer s gui delines for proper disinfecting WARNING 9 When cleaning always use appropriate personal protection equipment PPE based on established protocols e g gloves eye wear etc CAUTION 9 Do not steam clean or use ultrasonic cleaners on the system or any of its components 9 Do not immerse the metal p...

Page 51: ...l increase the risk of exposure to blood borne pa thogens and may cause injury to the patient or the operator PREVENTIVE MAINTENANCE A preventive and regular maintenance program should be established for all Technimount equipment Preventive maintenance may be required more frequently based on the usage level of the product The Safety Arm System requires regular preventive maintenance Establish and...

Page 52: ...nt maintenance practices and protocols ITEM ROUTINE 1 M OR 2 H 3 M OR 6 H 6 M OR 12 H 12 M OR 24 H Clamp Block 9 Inspect the 4 hexagon screws of the clamp block If loose or unscrewed tighten screw If broken the screw must be replaced 9 Inspect and tighten the 2 bolts under the clamp block that hold the system on the cot stretcher frame 9 Check fixed safety lock Ensure it is working properly and th...

Page 53: ...www technimount com SAS UG 202205 01 53 Return To Table of Contents Maintenance Guide INSPECTION AND MAINTENANCE RECORD PREVENTIVE MAINTENANCE PERFORMED BY DATE TIME ...

Page 54: ...AS UG 202205 01 www technimount com Return To Table of Contents Maintenance Guide TRAINING RECORD TRAINING DATE TRAINING METHOD USER GUIDE IN SERVICE IN CLASS ETC TRAINEE NAME BASIC TRAINING TRAINING UPDATE ...

Page 55: ...998 9820 or at customerservice technimount com for availability and pricing DESCRIPTION PART NUMBER Clamp Block for the Stryker Cot Stretcher Patient Right Installation 500 10 PFXT Tubular Arm with Triangular Base Patient Right Installation with Yellow Powder Coated Finish 400 20 UN Stainless Steel Lock Pin Without Color 910 00 UN Stainless Steel Lock Pin Red Anodized Finish 910 00 PTR Fixed Safet...

Page 56: ...aced after the Warranty Period has expired the Warranty Period for the repair or replacement will expire three 3 months after the date of repair or replacement LIMITED RESPONSIBILITY AND WARRANTY The Limited Warranty does not apply to normal wear that should result from normal use It does not apply when the Hardware or any component is opened disassembled or repaired by someone not authorized by T...

Page 57: ...45 DAYS Product must be unused undamaged and in its original packaging The product return request must be provided in writing and it must be approved by TECHNIMOUNT prior to retur ning the product Returns will not be approved on modified or damaged item Charges may apply if damaged or missing items Customer is responsible for a 25 restocking fee PRIOR TO 60 DAYS Product must be unused undamaged an...

Page 58: ...in the RMA form online at https www technimount com service support service support overview REQUIRED INFORMATION Serial number Invoice number Identification of the issue Upload the pictures of the issue Submit the form A confirmation of the receipt of the claim will be sent to you within 2 business days If you have not received a confirmation Email by then please contact techsupport technimount c...

Page 59: ...www technimount com SAS UG 202205 01 59 Return To Table of Contents SAE Certification ...

Page 60: ...matters most Technimount E M S Holding Inc 3770 Jean Marchand Street Suite 100 C Quebec QC G2C 1Y6 Canada T 1 581 700 6613 TF 1 888 639 2758 technimount com info technimount com 2022 Technimount E M S Holding Inc All Rights Reserved Printed in Canada ...

Page 61: ......

Page 62: ...SAFETY ARM SYSTEMTM USER GUIDE ...

Reviews: