7
Installation
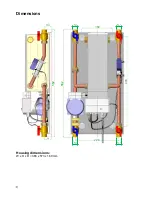
Mounting position: Only
vertical
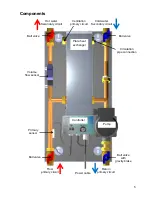
Pull off the cowling in a forwards direction.
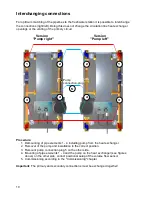
If necessary: Interchange the right/left connections (see chapter "Interchanging con-
nections").
Mark the fastening points, insert rawlplugs, fasten the station to the wall.
Fitting and connection of the pipe connections (3/4" outside thread connector). Plan for
as short as possible pipes in the primary circuit (tank -> freshwater station).
Electrical connection
The freshwater station is pre-wired ready for installation, connection to the electricity
mains takes place on site:
- using a plug in a wall socket or
- using a double pole isolator with a permanent connection.
Commissioning
Before filling the system, thoroughly flush both the primary and secondary side sys-
tems. To do this the locking bolt of the return valve with the gravity brake is placed in a
45° position so that it is non-operational.
Slowly
fill the house system with drinking water via the secondary side ball valves.
Vent the house system at the draw-off valves.
Slowly
fill the system with hot water via the ball valves in the primary flow.
Vent the primary circuit using the venting opening of the plate heat exchanger.
Set the pump to continuous operation and check pump running. Audible background
noise during operation of the circulating pump indicates air in the system.
Warning!
Only start the pump when it is filled.
Check all connections, including in the freshwater station, for correct seating and leak-
tightness. If necessary, retighten to the necessary torque.
Activate the gravity brake at the primary system return valve (place locking bolt verti-
cally)
Place the cowling on the bottom part
Set the pump in automatic mode and select the setpoint temperature.


