background image

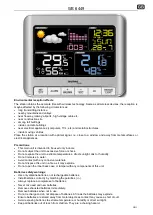
WS 6449


GB 3 


Quick setup 

1.  Keep your weather station and wireless outdoor transmitter next to each other. 


2.  Make sure the Channel selector switch on sensor is at 1 position.


3.  Open the battery cover at the back of your wireless outdoor transmitter and insert 2 x AAA new alkaline 

batteries to the battery compartment. Replace the battery cover.


4.  Connect the included power supply with the socket on the backside of the weather station or alternatively 

you can use batteries: Open the battery cover at the back of your weather station and insert 2x AAA new 

alkaline batteries to the battery compartment. Replace the battery cover. Please note, without adapter and 

only batteries the backlight is always set off and you need to 

press the “

SNOOZE/LIGHT

” button to turn on 

backlight for 10 seconds.


5.  Make sure Channel 1 is displayed on the weather station. Your weather station will receive data signal 

from the outdoor transmitter in a few seconds.


6.  Place your outdoor transmitter in a dry and shaded area once the weather station receives the data of this 

sensor.


Power On: 

1.  Display full segment for 2 second. 

2.  The weather station searching starts wireless sensor via 433MHz. 

3.  If the outdoor temperature is not displayed after 3 minutes, hold the 

CH

” button on the main unit to search 

for outdoor sensor. Then press the 

TX

” button on the sensor to send signal. If it still does not receive the 

outdoor temperature, remove the batteries from the transmitter and go back to step 1 of the set up 

Sensor Reception


Press and hold the

 CH/+ 

button for 3 seconds while viewing an empty channel to search for the sensor.


The strength signal icon will flash until the sensor signal is received or for 3 minutes if no signal available.


Adding additional sensors 

1.  Make sure Channel 2 or 3 is displayed on the weather station. Press the 

“CH”

 button to change channels 

on the weather station. 

2.  Make sure the Channel selector switch on the sensor is at 2 or 3 position 

3.  Once the Channel numbers on weather station and sensor are the same, proceed by opening the battery 

cover  at  the  back  of  your  wireless  sensor  and  insert  2  x  AAA  new  alkaline  batteries  to  the  battery 

compartment. Replace the battery cover. 

4.  Your weather station will receive the data signal from the outdoor transmitter in a few seconds. 

5.  Place your outdoor transmitter in a dry and shaded area once the weather station receives the data of this 

sensor.


Note: 


If  the  weather  station  is  used  with  2  or  3  transmitters,  press 

“CH”

  button  shortly  to display  Channel  1, 

Channel 2, Channel 3 or cyclic display. 


In cyclic display, the channel will be changed every 25 seconds in overview all channels in a short period of 

time 


Deleting sensors / clearing channels 


Press and hold the


“CH” 

button for 3 seconds to clear the current channel to re-register 


Summary of Contents for WS 6449

Page 1: ...e force or shock Do not expose the unit to extreme temperatures direct sunlight dust or humidity Do not immerse in water Avoid contact with any corrosive materials Do not dispose this unit in a fire as it may explode Do not open the inner back case or tamper with any components of this unit Batteries safety warnings Use only alkaline batteries not rechargeable batteries Install batteries correctly...

Page 2: ...eneral household waste when it reaches the end of its useful life Take your unit to your local waste collection point or recycling centre This applies to all countries of the European Union and to other European countries with a separate waste collection system Features Calendar Date month 2000 2099 Default Year 2016 Indoor Temperature and Humidity Outdoor Temperature and Humidity 12 24 h time for...

Page 3: ...or sensor Then press the TX button on the sensor to send signal If it still does not receive the outdoor temperature remove the batteries from the transmitter and go back to step 1 of the set up Sensor Reception Press and hold the CH button for 3 seconds while viewing an empty channel to search for the sensor The strength signal icon will flash until the sensor signal is received or for 3 minutes ...

Page 4: ...and hold the SET button for 3 seconds in normal display mode to enter time setting mode 2 12Hr or 24Hr will flash Press the or button to select between the 12 hour or 24 hour time format Press the SET button to confirm and continue 3 The time zone will flash on the display Press the or button to set the desired time zone setting range is 0 12 0 12 Press the SET button to confirm and continue 4 The...

Page 5: ... long as the alarm is activated and the alarm icon will no longer be displayed as soon as the alarm is deactivated 3 Press the ALARM button once again to confirm and return to the normal display mode ALM will no longer be shown on the display Alarm setting 1 Press and hold the ALARM button for 3 seconds in normal display mode to enter alarm setting mode 2 The alarm hour will flash Press the or but...

Page 6: ... be automatically cleared at every midnight 0 00 Barometer and bar and data of history for the past 12 hour of air pressure Air pressure history can be displayed in hPa for the past 12 hours The bar graph indicates the air pressure history trend over the last 12 hours in 6 intervals 0h 1h 2h 3h 6h and 12h The 0h represents the current full hour air pressure recording The columns represent the hPa ...

Page 7: ...F Resolution 0 1 degree Celsius When above 50 C 122 F the LCD will display HI When below 9 9 C 14 F the LCD will display LO Indoor Humidity Operating humidity range 20 RH to 95 Accuracy 5 RH Resolution 1 RH Outdoor temperature Operating temperature range 40 C to 60 C 40 F to 140 F Accuracy 1 degrees Celsius from 0 C to 50 C 32 F to122 F Accuracy 1 5 degrees Celsius 40 C to 0 C 40 F to 32 F and 50 ...

Reviews: