


Návod k
použití budíku WT538
CZ10
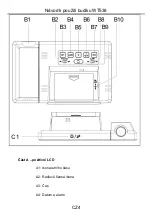
data. Nyní můžete tlačítky „
+
“ a „
-
“ nastavit zobrazení data ve formátu Měsíc/den nebo
Den/měsíc.
Stiskněte tlačítko „
SET
“ pro potvrzení vašeho nastavení, začne blikat displej Rok
2015. Nyní pomocí tlačítek „
+
“ a „
−
“ nastavte rok.
Stiskněte tlačítko „
SET
“ pro potvrzení vašeho nastavení, začne blikat displej Měsíc.
Nyní pomocí tlačítek „
+
“ a „
−
“ nastavte měsíc.
Stiskněte tlačítko „
SET
“ pro potvrzení vašeho nastavení, začne blikat displej Datum.
Nyní můžete použít tlačítka „
+
“ a „
-
“ pro nastavení data.
Stisk
něte tlačítko „
SET
“ pro potvrzení vašeho nastavení, začne blikat výběr jazyka pro
zobrazení Dne v
týdnu. Nyní pomocí tlačítek „
+
“ a „
−
“ vyberte jazyk.
Němčina, Angličtina, Francouzština, Italština, Španělština, Nizozemština, Dánština
Stiskněte tlačítko „
SET
“ pro potvrzení vašeho nastavení a pro ukončení procesu
nastavování.
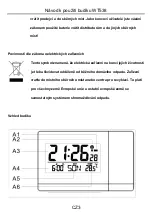
Upozornění:
Po 20 sekundách se hodiny bez stisknutí jakéhokoliv tlačítka automaticky přepnou z
nastaveného režimu do normálního časového režimu.
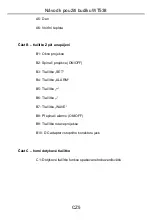
Nastavení denního buzení:
Přesuňte přepínač alarmu do polohy „ON“, na LCD displeji se objeví ikona „
“ a
ZAPNE se funkce alarmu. Přesuňte přepínač alarmu do polohy „OFF“, ikona „
“
Summary of Contents for WT538
Page 4: ...WT538 Bedienungsanleitung DE4 Produktaufbau ...
Page 30: ...Guide d utilisation WT538 FR4 Aspect du produit ...
Page 44: ...WT538 Manual ES4 Aspecto del producto ...
Page 58: ...Gebruiksaanwijzing WT538 DU4 Uiterlijk van het product ...