JOG NOW : Service & maintenance manual - rev. 6.2
Page 7.16
7.4.
DISASSEMBLING THE KEYBOARD / TOUCH SCREEN
7.4.1.
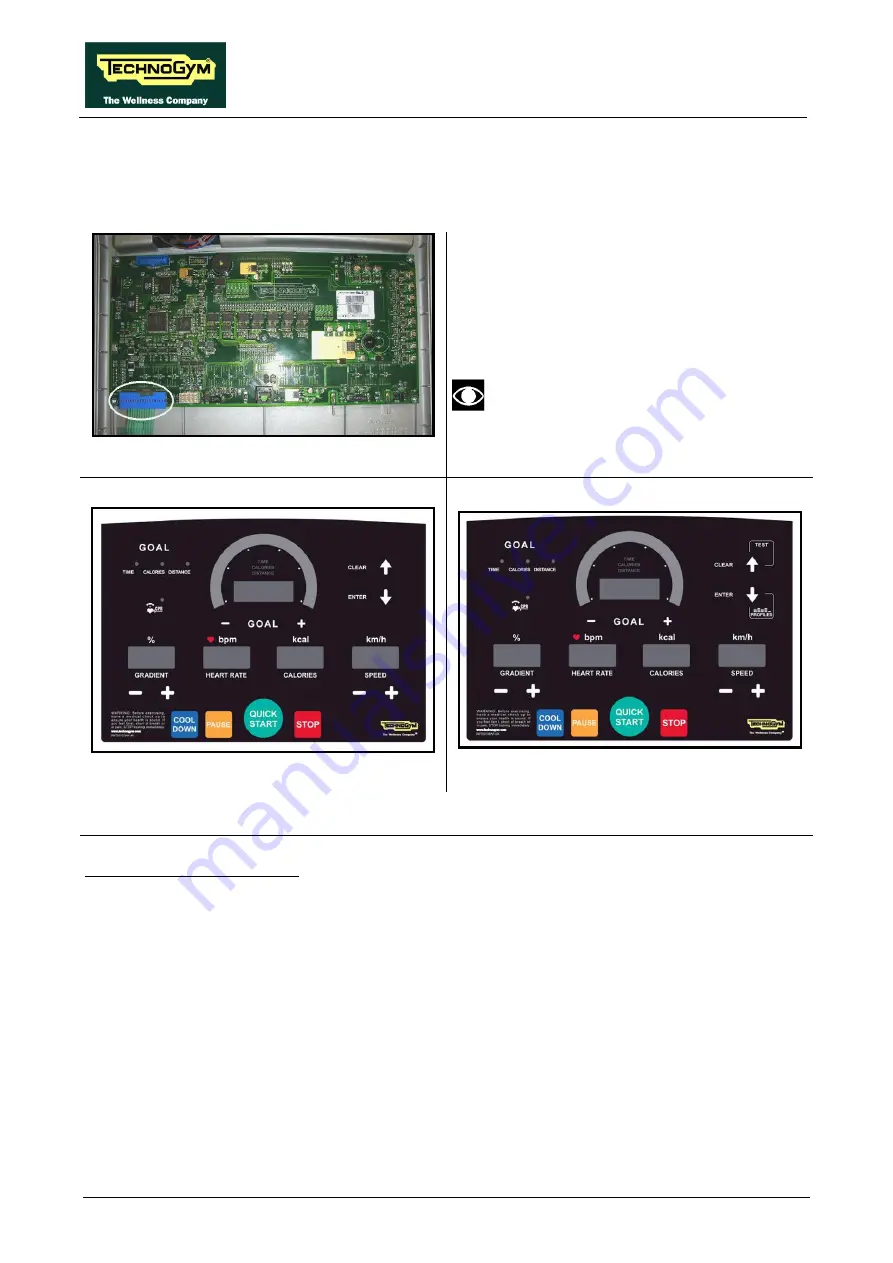
LED
K
EYBOARD
Figure 7.4-1
Carry out the procedure described in paragraph:
7.1. “Disassembling the ”.
1.
Bring the display assembly on a work bench
and disconnect the connector of the keyboard
After the reassembling of the board,
remember to fix the keyboard connector
using a drop of hot glue.
500 LED
Figure 7.4-2
700 LED
Figure 7.4-3
2.
Use a sharp tool to lift up and detach a corner of the keyboard.
To assemble a new keyboard:
1.
Remove the backing film which protects the adhesive.
2.
Insert the connector in the special slot on the display and connect it to the Display Board.
3.
Apply the adhesive part, starting from the left and working toward the right, without bending the
keyboard.
4.
Remove the protective film.
Continued on following page
→
Summary of Contents for Jog Now Excite+ 700
Page 2: ......
Page 4: ...JOG NOW Excite Service maintenance manual rev 6 2...
Page 29: ...JOG NOW Excite Service maintenance manual rev 6 2 Page 2 17 UNITY Version...
Page 31: ...JOG NOW Excite Service maintenance manual rev 6 2 Page 2 19 UNITY Version...
Page 186: ...JOG NOW Excite Service maintenance manual rev 6 2 Page 8 6 Page intentionally left blank...
Page 222: ...JOG NOW Excite Service maintenance manual rev 6 2 Pagina 12 2 Blank page...
Page 224: ...JOG NOW Excite Service maintenance manual rev 6 2 Pagina 13 2 Blank page...
Page 226: ......
Page 227: ......


