background image

7

RUN EXCITE LIVE

L

M

H

H

K

N

G

E

P

P

R

T

Q

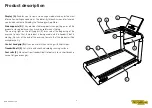
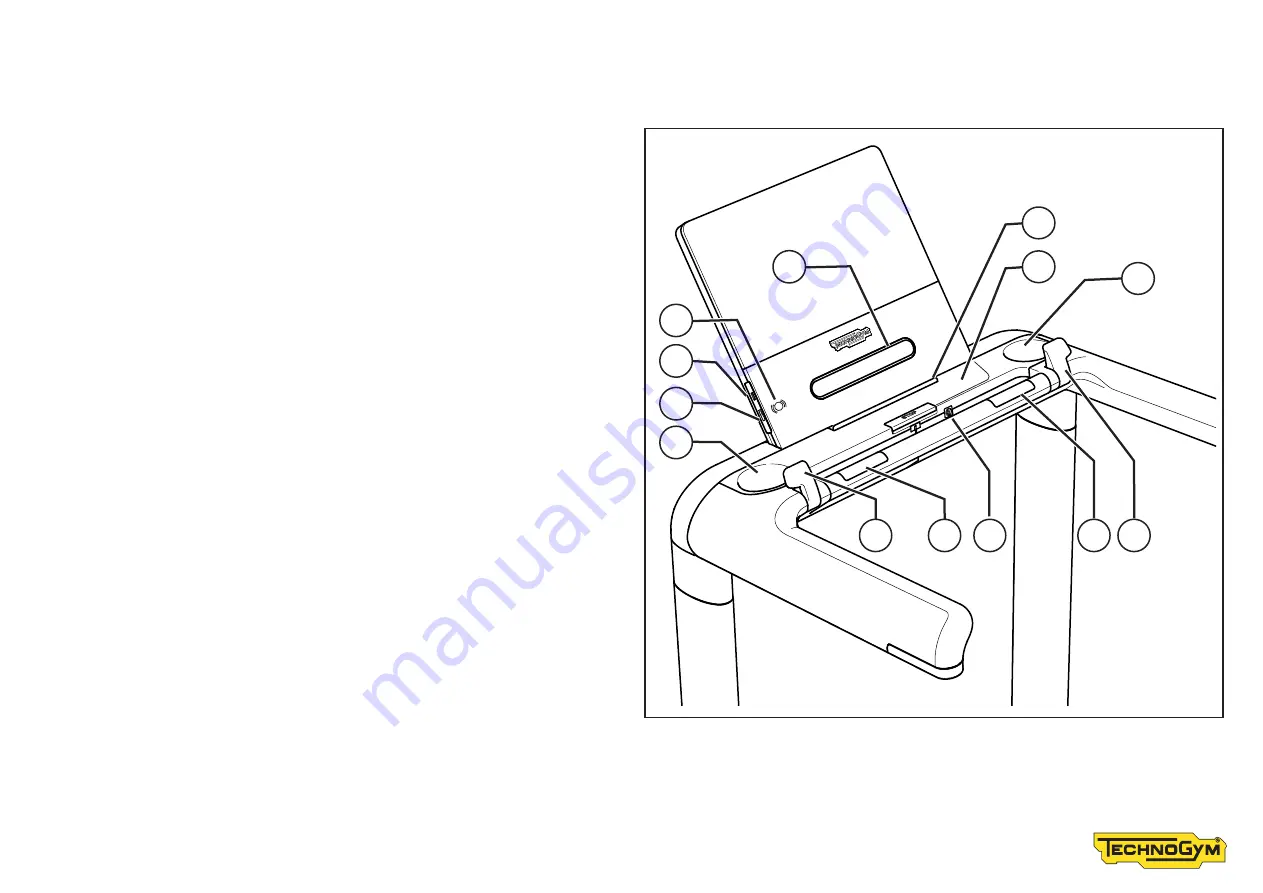
Fast Track Control (G)

. Enable you to change the treadmill belt speed and 

gradient during the exercise.

Hand sensor (H)

. Metal plate sensors continuously monitor your heart rate. 

Headphone plug (K)

. To connect your headphones and listen to audio 

content. Headphones with microphone can also be used.

NFC sensor / RFID reader (L)

.

USB port (M)

.

Technogym key slot (N). 

The device reads workout data from the Technogym 

key and saves the results of the current exercise.

Water bottle holder (P)

Fan (Q)

.

Phone support (R)

.

Wireless Charger (T)

.

Summary of Contents for RUN EXCITE LIVE 5000

Page 1: ...RUN EXCITE LIVE User Manual...

Page 2: ...11 Using the wireless charger 12 Technical specifications 13 Safety devices 15 Turning the product ON and OFF 18 Place of usage 19 Moving the product 20 Levelling the product 21 Electrical connection...

Page 3: ...se before cleaning it and before installing or removing electrical parts Do not allow children to have unsupervised access to the product Close supervision by qualified personnel is necessary when the...

Page 4: ...the product before use Check the product before each use Do not continue to use the product if it is not working properly Assemble and use the product only on a solid and flat surface Keep all of the...

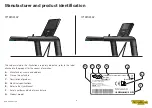
Page 5: ...FKUAQ020000153 03 20 Massage and exercise machine 2AD3 Item Code DFKUAQ5TAN00FF10 RUN EXCITE LIVE C B A G E F D The values stated in the illustration are purely indicative refer to the label attached...

Page 6: ...t or losing balance they may be useful when striding The warning light on the left support C turns red at the beginning of the exercise to warn that the product is being used and the treadmill belt is...

Page 7: ...rs continuously monitor your heart rate Headphone plug K To connect your headphones and listen to audio content Headphones with microphone can also be used NFC sensor RFID reader L USB port M Technogy...

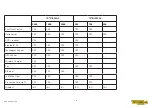
Page 8: ...ES YES YES ANT receiver YES _ _ YES _ _ Bluetooth 5 0 YES YES YES YES _ _ Technogym key slot YES YES YES YES _ _ NFC sensor YES YES YES YES _ _ Wireless Charger YES _ _ _ _ _ Fan YES YES _ YES YES _ E...

Page 9: ...ning surface from the rear keep your gaze forward and place your feet on the foot rails From this rest position use one hand to hold on to the handgrip and the other to set a programme on the display...

Page 10: ...ake you lose your stability and balance Do not walk or run backwards Use by two people at the same time is forbidden To step down at the end of the exercise hold on to the side supports place feet on...

Page 11: ...g a workout it is very important that your heart rate never goes above 90 of your maximum rate unless you are an athlete engaged in competitive sport The sole function of the heart rate monitor is to...

Page 12: ...k correctly through thick phone cases If your case is thick remove it before placing the phone on the wireless charger Do not leave your phone unattended on the charger Do not leave your phone chargin...

Page 13: ...cal specifications Model 9000 7000 5000 900 700 500 Maximum capacity of water bottle holder 2 kg 4 lbs Maximum weight of user 220 kg 485 lbs Weight of the product 162 kg 357 lbs 160 kg 353 lbs 1740 mm...

Page 14: ...th 100 Vac Maximum input power 0 8 20 km h 1600 VA Speed with 120 Vac Maximum input power 0 8 22 km h 2000 VA Speed with 240 Vac Maximum input power 0 8 25 km h 2200 VA 0 8 22 km h 2000 VA Peak power...

Page 15: ...nough to trigger the emergency switch The emergency device is triggered when the user moves too far away from the display i e when the cord is pulled To restore product functionality after an emergenc...

Page 16: ...s excessive the protection device opens preventing damage to the internal electronics Treadmill belt marks F The marks on either side of the treadmill belt indicate whether or not the treadmill belt i...

Page 17: ...on the right side Serious injuries can occur on this equipment Do not allow children unsupervised access to the equipment Close supervise teenagers Before using the equipment read all the warnings and...

Page 18: ...essing the main switch to the 0 position OFF Turn the product off after exercising only when it is in stand by If you do not expect to use the product for some time turn it off at the switch and take...

Page 19: ...x3 feet free safety space as shown in the illustration A flat stable and vibration free surface that is capable of supporting the weight of both the product and the user The location where the product...

Page 20: ...amaging the dashboard Due to its size and weight more than one person is needed to move the product If the condition of the floor makes it impossible to use the wheels move the product with normal lif...

Page 21: ...t the foot as shown in the illustration in order to level the product Remove panel A Loosen the lock nut B with a 24 mm wrench Turn C with a 16 mm wrench to screw or unscrew the foot D until you bring...

Page 22: ...identification label Plug the power cable into the product socket first and then into the wall socket WARNINGS The wall socket must be located in a place where the product may be easily and safely pl...

Page 23: ...includes a cable with earthing conductor and plug The plug must be inserted in a properly installed socket connected to the earth in accordance with local codes and regulations WARNINGS Improper conne...

Page 24: ...an F type connector for the product The wall socket for the antenna cable must be located in a position where the plug can be inserted and removed with ease Fasten the cables with a cable tie Secure...

Page 25: ...ck if the treadmill belt stops If the emergency switch and or STOP button are not operating properly put the product out of order and contact the Technogym Technical Support Service To replace defecti...

Page 26: ...of the wall socket Clean the display using a damp not wet cloth Clean the entire product once a week Turn off the product by moving the switch to the 0 position Take the product s power plug out of th...

Page 27: ...ate of wear of the treadmill s drive belt C Running surface maintenance At the end of the left side support D the warning light that indicates that the treadmill belt is moving is also a Preventive Ca...

Page 28: ...centre it Perform the adjustment while the treadmill belt is moving Remove the cap A by pressing it at one end Turn the tension screw as shown in the illustration using the wrench supplied until the m...

Page 29: ...wo buttons near the switch all the way down to ensure they are closed Excessive internal noise The product is not level Check and level using the rear levelling foot Bearings are damaged Contact the T...

Page 30: ...Technogym Technical Support Service provides telephone consultation information about which services are covered by the warranty and which must be paid for on site servicing supply of original spare...

Page 31: ...llection regulations in force Waste deriving from electrical and electronic equipment must not be disposed of as urban waste A specific disposal system involving suitable processing recovery and recyc...

Page 32: ...RUN_EXCITE_LIVE_en_AA 0SM01162...

Reviews: