RUNRACE : Service & Maintenance Manual - rev. 2.0
Page 6.34
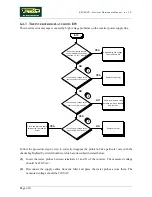
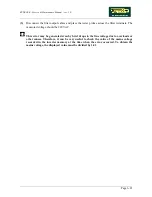
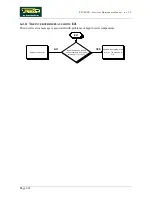
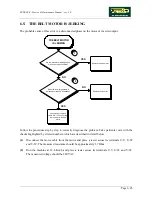
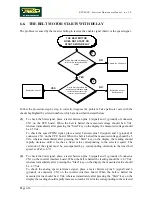
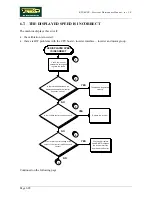
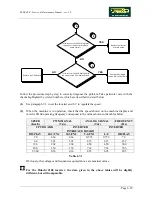
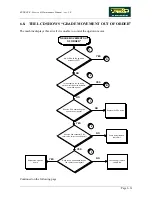
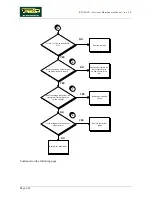
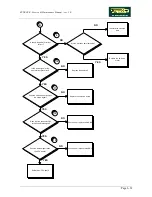
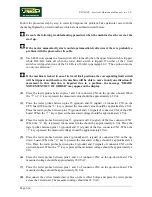
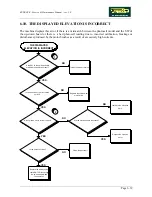
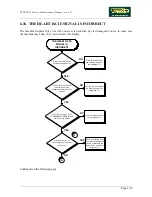
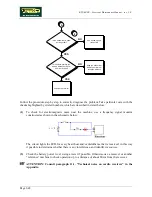
Follow the procedure step by step to correctly diagnose the problem. Take particular care with the
checks highlighted by circled numbers, which are described in detail below:
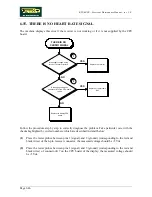
Execute the following troubleshooting procedure when the machine does the reset at the
start up.
If the motor momentarily starts and stops immediately afterward, there is probably a
problem with the photocell or its cable.
(1)
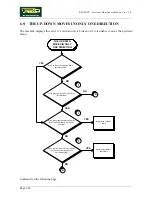
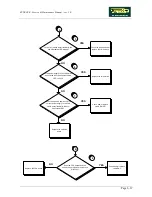
Each LED corresponds to a limit switch. DL1 turns off when the upper limit switch is tripped,
while DL3/DL2 turns off when the lower limit switch is tripped. If neither of the 2 limit
switches is tripped and one of the 2 LEDs is off, refer to paragraph 6.9. “The up-down moves
in only one direction”.
If the machine is locked in one of its travel limit positions, the corresponding limit switch
will be tripped, and therefore the machine will be able to move in only one direction. If
movement in this direction is impeded due to a problem, the message “GRADE
MOVEMENT OUT OF ORDER” may appear on the display.
(2)
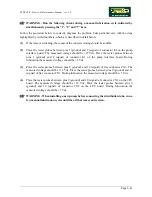
Place the tester probes between pins 1 and 2 of connector CN3 on the up-down board. When
the “
↑
” or “
↓
” key is pressed the measured value should be approximately 48 Vdc.
(3)
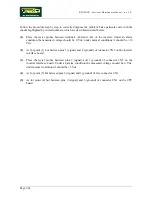
Place the tester probes between pins 15 (ground) and 14 (signal) of connector CN1 on the
CPU board. When the “
↓
” key is pressed the measured value should be approximately 4 Vdc.
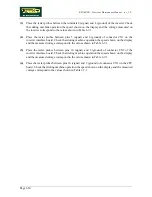
Place the tester probes between pins 15 (ground) and 13 (signal) of connector CN1 of the CPU
board. When the “
↑
” key is pressed the measured voltage should be approximately 4 Vdc.
(4)
Place the tester probes between pins 15 (ground) and 14 (signal) of the free connector CN1.
When the “
↓
” key is pressed the measured value should be approximately 4 Vdc. Place the
tester probes between pins 15 (ground) and 13 (signal) of the free connector CN1. When the
“
↑
” key is pressed the measured voltage should be approximately 4 Vdc.
(5)
Place the tester probes between pins 4 (ground) and 3 (signal) of connector CN2 on the up-
down. board. When the “
↓
” key is pressed the measured voltage should be approximately 4
Vdc. Place the tester probes between pins 4 (ground) and 2 (signal) of connector CN2 on the
up-down board. When the “
↑
” key is pressed the measured voltage should be approximately 4
Vdc.
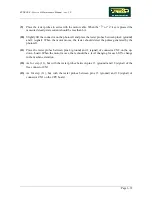
(6)
Place the tester probes between pins 1 and 2 of connector CN4 on the up-down board. The
measured voltage should be approximately 220 VAC.
(7)
Place the tester probes between pins 1 and 2 of connector CN6 on the up-down board. The
measured voltage should be approximately 50 Vdc.
(8)
Disconnect the yellow transformer cables on the rectifier bridge and place the tester probes
across the 2 terminals. The measured voltage should be 38 VAC.
Summary of Contents for Runrace
Page 1: ...SERVICE MAINTENANCE MANUAL REV 2 0 ...
Page 2: ......
Page 4: ......
Page 28: ...RUNRACE Service Maintenance Manual rev 2 0 Page 2 18 Page intentionally left blank ...
Page 144: ...RUNRACE Service Maintenance Manual rev 2 0 Page 8 12 Page intentionally left blank ...
Page 160: ...RUNRACE Service Maintenance Manual rev 2 0 Page 9 16 Page intentionally left blank ...
Page 182: ...RUNRACE Service Maintenance Manual rev 2 0 Page 11 16 Page intentionally left blank ...
Page 183: ......

