WS9050-DCF Manual
We recommend a minimum distance of 2.5 meters to all sources of interference,
such as televisions or computer monitors
Radio reception is weaker in rooms with concrete walls (e.g.: in cellars) and in
offices. In such extreme circumstances, place the system close to the window.
During the DCF reception mode, only the
"SNOOZE/LIGHT" and
“
WAVE
” button function, other buttons have no
function.
If you want to use other functions , please press the
“
WAVE
” button to
exit the DCF reception mode.
Manual settings:
Please go through the manual settings after the first start up and after every
restart, to set the weather forecast symbol and if needed relative air pressure.
Press and hold the “
SET/HISTORY”
button for 2 seconds,“2015Yr” starts to
flash. No
w use “
UP
” and “
DOWN
” buttons to set the year.
Press “
SET/HISTORY”
button to confirm your setting, the month starts to flash.
Now use “
UP
” and “
DOWN
” buttons to set the month.
Press “
SET/HISTORY”
button to confirm your setting, the date starts to flash.
Now use “
UP
” and “
DOWN
” buttons to set the date.
Press “
SET/HISTORY”
button to confirm your setting, the Month and Date icon
starts to flash. Now use “
UP
” and “
DOWN
” buttons to set the date display on
Month/Date or Date/Month.
Press “
SET/HISTORY”
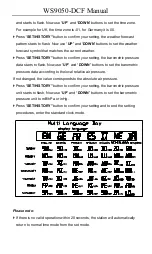
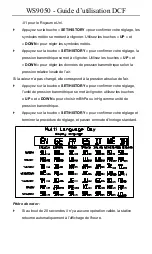
button to confirm your setting, the language for the day
of week is display and starts to flash. Now use “
UP
” and “
DOWN
” buttons to
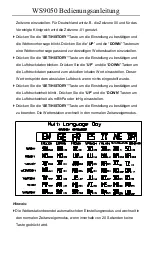
choose the language. For a list of all languages see below graphic.
Press “
SET/HISTORY”
button to confirm your setting, the 12/24 hour mode is
display and starts to flash. Now use “
UP
” and “
DOWN
” buttons to switch
between 12/24 hour mode.
Press “
SET/HISTORY”
button to confirm your setting, the hour starts to flash.
Now use “
UP
” and “
DOWN
” buttons to set the hour.
Press “
SET/HISTORY”
button to confirm your setting, the minute starts to flash.
Now use “
UP
” and “
DOWN
” buttons to set the minute.
Press “
SET/HISTORY”
button to confirm your setting, the time zone is display

