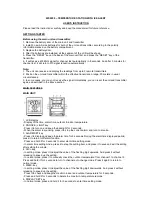
1. The default displayed channel is channel 1. In
normal mode, press “+CH” key to check the outdoor
temperature from channel 1 to channel 3.
2. Press and hold “+/CH” key for 3 seconds to turn to channel auto-change mode that the channels
change automatically.
3. Press “+/CH” key again to return to normal mode.
Note:
In channel auto-change mode, channel and its outdoor temperature changes automatically in every 4
second.
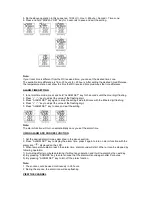
READING INDOOR&OUTOOR TEMPERATURE RECORDS
1. Slide “°C/°F” switch to change the temperature unit to Celsius or Fahrenheit.
2. Press “CH/+” key to change the channels among 3 channels and check their temperature.
Note:
1. Once the channel is assigned to one transmitter, you can only change it by removing the batteries
or resetting the unit.
2. If no signals are received or the transmission is
interfered, “---” will appear on the LCD.
3. Relocate the clock or the transmitter in other positions and make sure the transmission is within the
effective range of 30 meters approx.
4. After several trials in vain, please reset the temperature station thoroughly. Try out where your
multifunctional alarm clock receives the signals best.
CHECKING AND DELETING MAX./MIN. TEMPERATURE REOCRDS
1. Press “MEM/-” key to check and keep the maximum / minimum temperature record for 5 seconds.
2. Press and hold the “MEM/-” key for 3 seconds to delete the maximum and minimum temperature
records.
Note:
Once you reset or re-install batteries for the main unit, all the value will be return to default.
ICE ALERT
When the outdoor temperature is in the range of -
2°C~3°C (28°F~37°F), the flashing ice icon “
” on
the LCD make you aware the dropping temperature and the ice may be present or forcoming.
BATTERY REPLACEMENT
When the LCD becomes dim, replace with 2 AA size batteries at once; while if the low battery indicator
“
” displays in the outdoor window, it indicates that the battery power of the transmitter is not
enough, and you should replace with 2 AA size batteries at once.
SUGGESTION


