


ATEX heating kit – Air System
Assembly instruction
Pagina
4
di 4
Istruzione n°
220
- Rev.
00
del 05/11/2018
EN
Copyright © 2018 Tecmec S.r.l.
ISTRUZIONI ORIGINALI
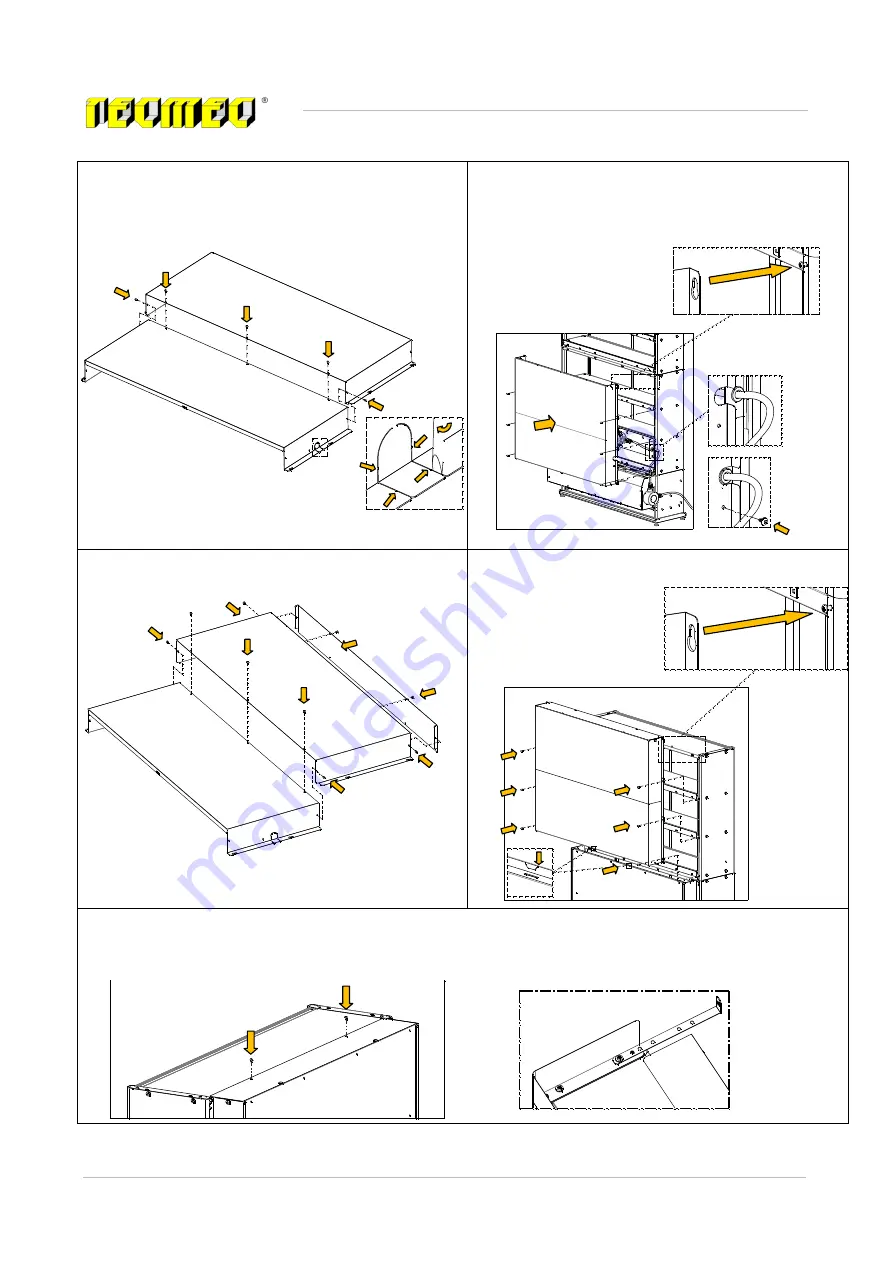
15.
Assemble the lower panel using five Ø3.9x6.5 screws.
16.
Remove the side closing putting a screwdriver in the
slot and turn it for break the four joints. Then bend the
closing more times for break the bigger joint.
17.
Hook the panel to the lower screws of cabinet and fix
it with six Ø3.9x13 screws.
18.
Fix the thermostat plate using a Ø4.8x9.5 black screw.
19.
Assemble the upper panel using nine Ø3.9x6.5 screws.
20.
Hook the panel to the upper screws of cabinet.
21.
Pay attention to insert
the metal tab in the
lower panel slot.
22.
Put the others six
Ø3.9x13 screws for
fixing of the panel.
23.
Fix the upper of panel with two Ø3.9x6.5 screws.
24.
Fix the cabinet to wall using the mounting brackets as in figure.
15
16
17
17
18
20
21
22


