background image

TFNET

22

??

USB

PROG

USB

ENABLE

START
STOP

LOW

VOLTAGE

PROG32

RS485

RS232
OUT

B
A
-
+

USB

PROG

USB

ENABLE

START
STOP

LOW

VOLTAGE

PROG32

RS485

RS232
OUT

B
A
-
+

- UTS V, UTS...

- UTS 4.3 PROX.

- PROG NET3...

USB

PROG USB

Ethernet

Port

Ip address

192.168.0.10

File:

10001

Autoscan COM1-16

Autoscan COM1-16


Uscita

File : C:\Desktop\Documenti\UTS43_rel_0.2.00.hex


Firmware upgrade

Send 

fi

 rmware

Send 

fi

 rmware

Send 

fi

 rmware

Exit

File

Firmware upgrade

- Select 

fi

 rmware 

fi

 le (*.hex)

F:\Firmware\Prog

- For speci

fi

 c instructions see manual of the device

 Tecnoboot 

Libraries

Documents
Images
Music
Video

Desktop
Downloads

Favorites

Local Disk (C:)

Computer

 Computer Local Disk C: 

  Documents                                                                                         

Firmware

TFNET_rel_0.1.00.hex

TFNET_rel_0.1.00.hex

File name:

Organise

New Folder

Search fi les

Name

Last change

Type

Size

Open

Cancel

Exit

Reading OK

Find device on IP: 192.168.0.10 port: 10001

Tecnoboot status requested

Status: BOOT_READY   Type: PROG GSM   Version: 0.4

Block dim.: 1024 mult. 4   Address: 8010000 – 8080000    crc32: bfe53c88

Waiting for 

fl

 ash clearing

Updating…

Process completed successfully

WAIT until restart has been completed, then press <Exit>

Send Firmware Tecnoboot IP

File : C:\Documents\TFNET_rel_0.1.00.hex

Send Firmware Tecnoboot IP

Send Firmware Tecnoboot IP

The Firmware update window opens
Click on the File button
Browse and select the update 

fi

 le

Click the Open button

Go to the PROG NET3 pane, check that the IP 
address is 192.168.0.10
The update starts, click Send Firmware

Wait for the end of the update process, click the 
Exit button

At the end of the 

fi

 rmware update procedure, the device TFNET wakes up automatically. 

C:Documents\TFNET_rel_0.1.00.hex

- Select 

fi

 rmware 

fi

 le (*.hex)

- For speci

fi

 c instructions see manual of the device

 Tecnoboot 

Summary of Contents for TecnoFire TFNET

Page 1: ...by Installation Document version 0 3 FW version 1 0 00 HW version TFNET Setup SW version 5 2 Update date 12 2016 Language English TFNET Communication interface...

Page 2: ...TFNET 2 TFNET TFAXFIRE Systems Compatibility TFA1 298 Ver 1 3 09 TFA2 596 Ver 1 3 09 TFA4 1192 Ver 1 3 09...

Page 3: ...4 INSTALLATION NOTES 4 1 Assembly view 11 4 2 Installation 12 4 3 Connection cables 12 5 USER INTERFACE 5 1 Front panel 13 5 2 LED 13 6 OPERATING MODES OF THE SYSTEM 6 1 Access levels and codes 15 6 2...

Page 4: ...TFNET 4...

Page 5: ...horough knowledge of the product acquired attending specific training courses at the premises of Tecnofire fire systems division of Tecnoalarm S r l Environmental requirements The TFNET communication...

Page 6: ...TFNET 6...

Page 7: ...gnificant checks should include at least Functional state of power supply units and accumulators APS of the control panel and of the system power supply modules State of the batteries of the self powe...

Page 8: ...TFNET 8...

Page 9: ...1999 05 EC class 1 TTE Standards EN 50136 1 1 EN 50136 2 1 Approved for use with TFA1 298 TFA2 596 and TFA4 1192 control panels General speci cations Model TFNET Description Ethernet interface Protoco...

Page 10: ...TFNET 10...

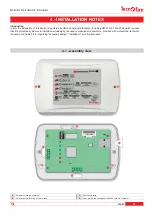
Page 11: ...tor 4 INSTALLATION NOTES Introduction In Italy the installation of this device is regulated by UNI and national standards including DM 37 of 22 Jan 2008 which requires that fire protection systems are...

Page 12: ...ation interface is an expansion device for the TFAXFIRE control panels and is connected to them via the Master and or Slave RS485 BUSES The BUS can be connected in open loop or closed loop mode In the...

Page 13: ...pply status of the device Off Power supply off On Power supply on Green Indicates the status of the connections of the channels SERVER 1 SERVER 2 TECNOALARM TECNOSERVER TECNOALARM SERVICE Off No commu...

Page 14: ...TFNET 14...

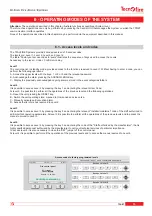
Page 15: ...sing the RESET key B Switch the unit operating state manned to Unmanned and vice versa C Manually activate an Evacuation alarm D Access the list of menus reserved to Level 2 Level 3 It is possible to...

Page 16: ...is the selection pointer The pointer can be moved using the arrow keys up or down The choice of the menus can also be done by entering the quick selection number 6 2 Access level 2 The control panel...

Page 17: ...he device is the last device connected on the Bus Of course only if the connection Bus is in open line configuration Identification Normal condition Function JP1 RESET Open Hardware reset JP2 BOOT Ope...

Page 18: ...TFNET 18...

Page 19: ...TFABILMODBUS Note The option numbers not mentioned have not yet been assigned Enabling of software options Enabling of software options can only be performed from the control panel setting menu Repeat...

Page 20: ...TFNET 20...

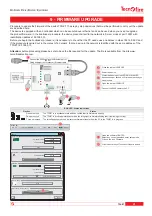
Page 21: ...ce in the network is identified with the same address of the TFNET 192 168 0 10 Attention before proceeding please be sure to have the file required for the update The file is available from the site...

Page 22: ...change Type Size Open Cancel Exit Reading OK Find device on IP 192 168 0 10 port 10001 Tecnoboot status requested Status BOOT_READY Type PROG GSM Version 0 4 Block dim 1024 mult 4 Address 8010000 808...

Page 23: ...TFNET 23 NOTES...

Page 24: ...842 Via Ciri 38 10099 San Mauro T se Torino Italy Production Unit Strada del Cascinotto 139 54 10156 Torino Italy Tel 39 011 22 35 410 Fax 39 011 27 35 590 info tecno redetection com www tecno redetec...

Reviews: