background image

8

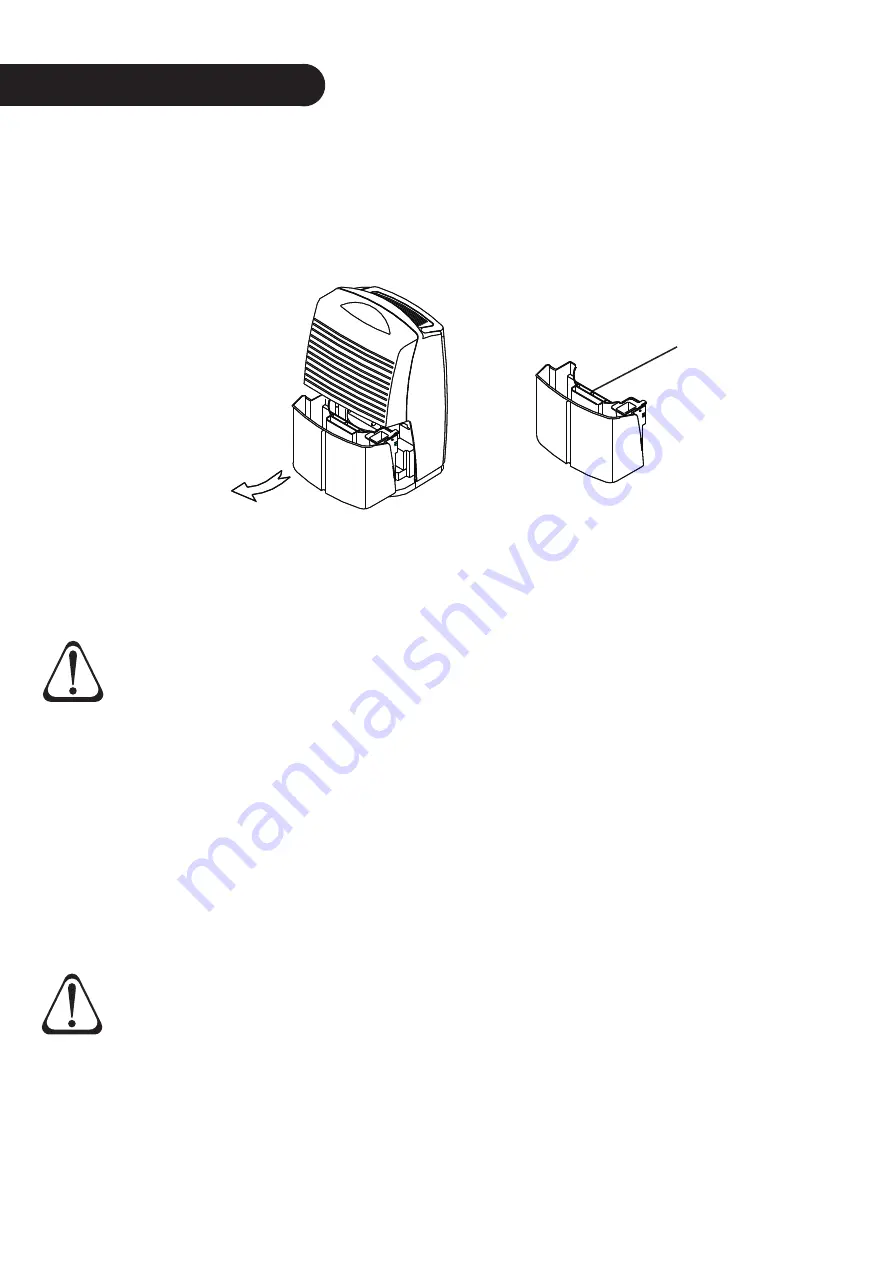
Using the Water Tank

When using the water tank to drain water, once full, the dehumidifi er will stop. The FULL LED will be 

displayed. Carefully remove the water tank and dispose of collected water. 

CAUTION

Fig. 6

Removing 
the water 
tank. 
Grasp sides 
and pull 
forward.

CAUTION

DRAINAGE

Note

: When using the continuous drain feature, make sure the drain tube is laid fl at horizontally and 

fastened in place; avoid overlapping or depressing, and make sure it lays lower than the drain hole.

Water tank 
handle

NOTE

: Drainage of collected water must comply with local council regulations.

Once the water tank is empty, replace and ensure it is securely back inside the dehumidifi er. The appliance 

will resume operating.

Caution

 - The dehumidifi er can be damaged if the water tank is not replaced correctly or if it is 

removed and replaced frequently. Only remove the water tank when full or when the dehumidifi er 

is off .

Using Continuous Drainage

     In situations of extremely high humidity or for convenience, you may fi nd connecting continuous 

     drainage more suitable. To connect continuous drainage, remove the water tank.

Carefully remove the continuous drainage outlet cover from the rear of the dehumidifi er (refer to page 6 

     Fig.4).

Insert a PVC pipe with a Ø14mm ID (fi eld supplied) into the drainage outlet. Ensure a tight fi t so that no 

     water leaks from the dehumidifi er. 

Replace the water tank.

The dehumidifi er can now be operated with continuous drainage.

     NOTE

: Drainage of collected water must comply with local council regulations.

Do not drain water continuously if there is a possibility that temperature around the hose could 

     drop to freezing point. Water inside the hose may freeze and prevent the water in the drainage 

     tank from fl owing out. The water may leak from the unit and damage surrounding objects.

Summary of Contents for TD-12M1

Page 1: ...DEHUMIDIFIER User s Manual Model TD 12M1 Please read these instructions carefully before using your dehumidifier After reading keep in a safe place for future reference ...

Page 2: ......

Page 3: ...pproved for use with non flammable R134a refrigerant The appliance is specifically constructed for domestic and light office use The appliance has not been designed or manufactured for professional use Teco declines all responsibility for damage deriving from improper use of the appliance The dehumidifier has undergone the necessary tests on the tightness of the refrigeration circuit and complies ...

Page 4: ...Chapter Page No Safety Precautions 3 4 How does it work 5 Positioning the Dehumidifier 5 Part Identification 6 Control Panel 7 Operating instructions 7 Drainage 8 Maintenance 9 Troubleshooting 10 Specifications 11 ...

Page 5: ...vices such as stoves fan heaters etc The plastic parts may melt causing fire Wipe dust off the power plug and insert the plug firmly into the power outlet socket If the plug is not fully inserted in the power outlet socket dust may gather on the connectors which in turn may cause fire and or electric shock Use 220 240V AC power outlet sockets with a current rating shown on the rating plate attache...

Page 6: ... drain water continuously if there is a possibility that the temperature around the drainage hose field supplied could drop to freezing point Water inside the hose may freeze and prevent the water in the tank from flowing out The water may leak from the appliance and damage surrounding objects Do not block the drainage outlet or continuous drainage hose field supplied If using the appliance after ...

Page 7: ...s and circulate the air around the room If you have an area or location that is specifically in need of dehumidifying place the appliance in the affected area until the humidity is reduced then relocate the dehumidifier to a more central location for best air circulation When placing the dehumidifier ensure it is on a flat and level surface The dehumidifier may vibrate or operate less efficiently ...

Page 8: ...CATION Control Panel Air Inlet Grille Air filter located behind grille Air Outlet Handle Fig 3 Fig 4 Continuous Drainage Outlet Wheel Electrical Cord Electrical Cord Holder Water Tank Handle Water Tank Full Tank Float ...

Page 9: ...ehumidifying LED 3 The DEHUMIDIFYING LED indicates when the dehumidifier is functioning and the compressor is running This light goes out when the appliance cycles off when the selected humidity level has been met or the power is off Control Knob 4 The Control Knob 4 is used to select a relative humidity level to set continuous dehumidifying or to turn off the appliance Operating Instructions Note...

Page 10: ... it is removed and replaced frequently Only remove the water tank when full or when the dehumidifier is off Using Continuous Drainage In situations of extremely high humidity or for convenience you may find connecting continuous drainage more suitable To connect continuous drainage remove the water tank Carefully remove the continuous drainage outlet cover from the rear of the dehumidifier refer t...

Page 11: ...ses are free of kinks and obstructions Removing and cleaning the filter Remove the water tank Locate the base of the filter and pull vertically down in the direction of the arrow on the filter Fig 8 To clean the filter use a vacuum cleaner or tap the filter lightly to remove dust and dirt If the filter is unable to be cleaned by vacuum use warm water with a small amount of medium strength detergen...

Page 12: ...hat the dehumidifier is placed on a flat stable and secure surface The dehumidifier is leaking Check that the dehumidifier is in good working order and the cabinet and water tank is not cracked NOTE If problems persist switch off the dehumidifier and unplug from the main power source Contact TECO Australia Service as soon as possible Never attempt to repair the appliance It is hazardous for anyone...

Page 13: ... Hz 50 Rated Power Input W 355 Rated Run Current A 1 8 Weight Kg 13 3 Rated dehumidifying capacity 12L 24 Hr 30o C DB 80 RH Dimensions mm H 561 W 320 D 276 Operating temperature range 5o C 35o C Water tank capacity L 3 6 Note Data shown in this table is subject to change without prior notice ...

Page 14: ...www teco com au HBB PV ...

Reviews: