21
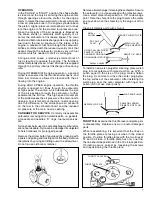
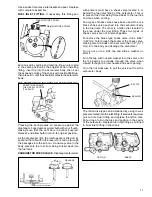
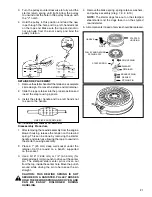
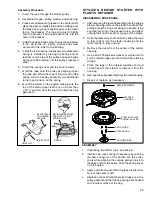
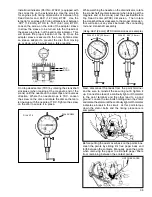
3. Turn the pulley counterclockwise to fully wind the
starter return spring until tight. Allow the pulley
to unwind until the hole in the pulley lines up with
the "V" notch.
4. Hold the pulley in this position and feed the new
rope through the hole and tie a left-handed knot
on the rope end. Make sure the rope and knot do
not protrude from the knot cavity and bind the
pulley rotation.
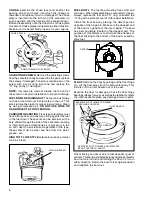
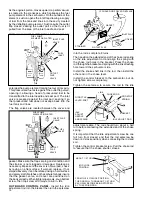
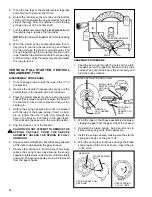
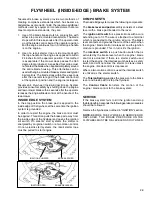
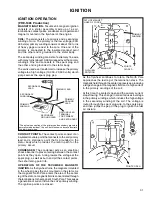
4. Remove the brake spring, spring retainer, washers,
and pulley assembly (diag. 7, 8, 9 & 10)
NOTE:
The starter dogs face out on the stamped
steel starter and the dogs face in on the stylized
rewind starter.
5. All components in need of service should be replaced.
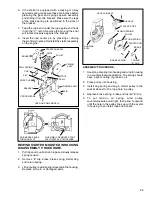
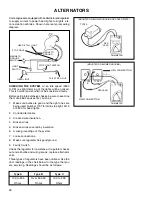
RETAINER REPLACEMENT
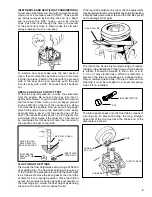
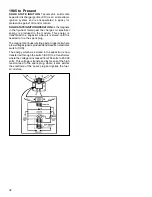
1. Remove the starter handle if the retainer is a complete
circle design. Remove the staple and old retainer.
2. Slide the rope retainer into the proper position and
insert the staple using a pliers.
3. Install the starter handle and tie a left hand knot
to secure the handle.
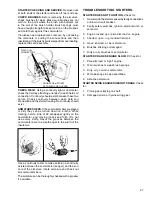
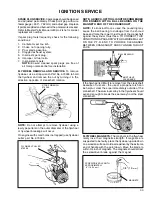
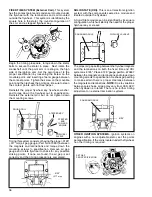
ONE PIECE ROPE RETAINER
LEFT-HAND
KNOT
ROPE
HANDLE
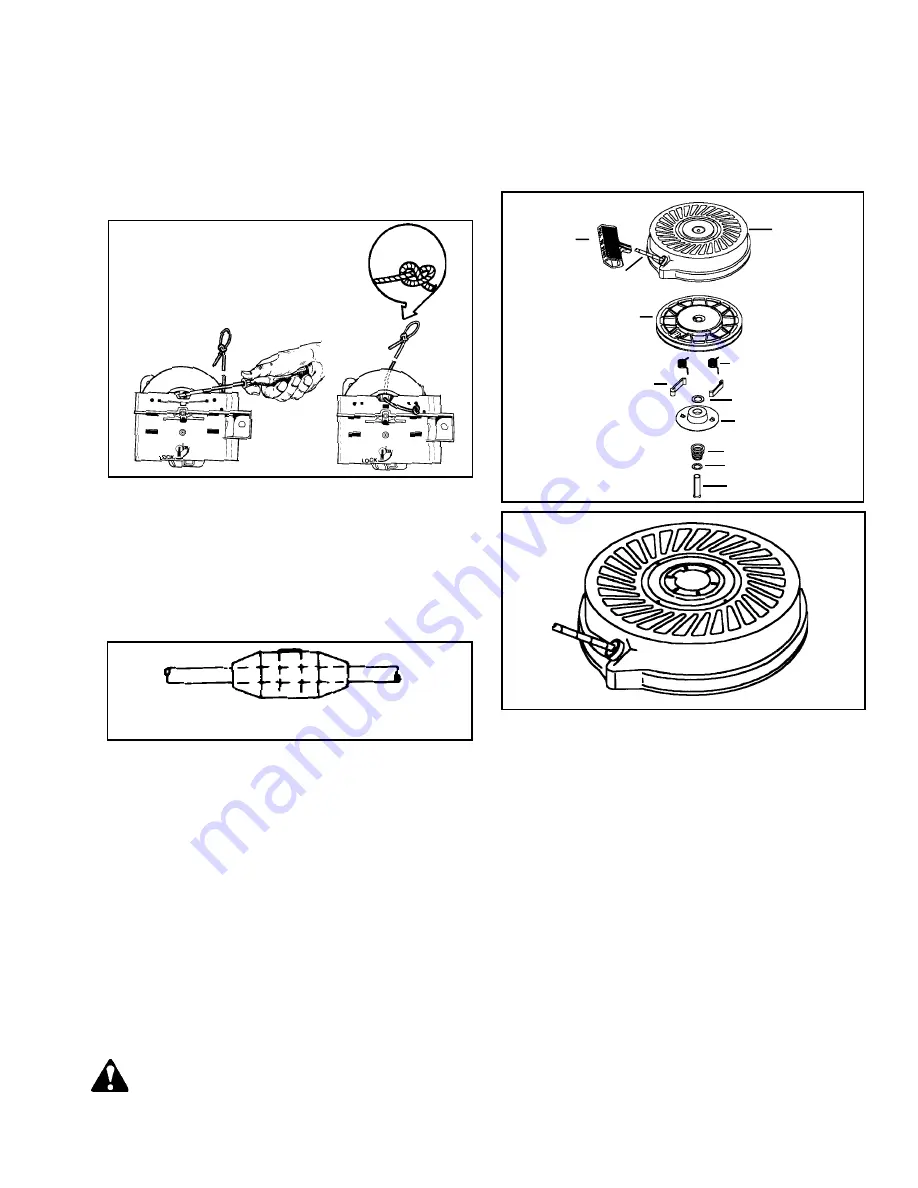
STARTER DOG
PULLEY AND REWIND
SPRING ASSY.
STARTER
HOUSING
DOG SPRING
WASHER
RETAINER
BRAKE SPRING
WASHER
SPRING PIN
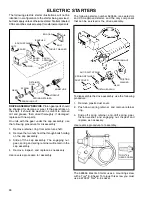
STYLIZED REWIND STARTER
Disassembly Procedure
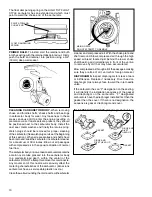
1. After removing the rewind assembly from the engine
blower housing, release the tension on the rewind
spring. This can be done by removing the starter
handle and carefully allowing the rope to unwind in
the starter housing assembly.
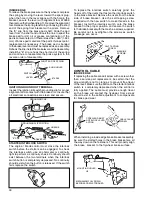
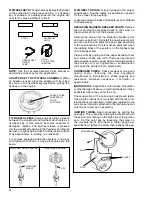
2. Place a 1" (25 mm) deep well socket under the
retainer. Set the rewind on a bench, supported
on the socket.
3. Use a 5/16" (7.938 mm) or 1/4" (6.35 mm) (for
stamped steel) roll pin punch to drive out the center
pin. The stamped steel center pin is driven out
from the top, inside the center hole. Move the punch
around while driving the pin to help keep the pin
straight.
CAUTION: THIS REWIND SPRING IS NOT
SECURED IN A CANISTER. PULLEY BOSSES
HOLD THE REWIND SPRING AND COVER, AND
CAN BE EASILY DISLODGED DURING
HANDLING.
Summary of Contents for AH520 -
Page 67: ...64...

