FIGURE 4
CONSOLE ASSEMBLY
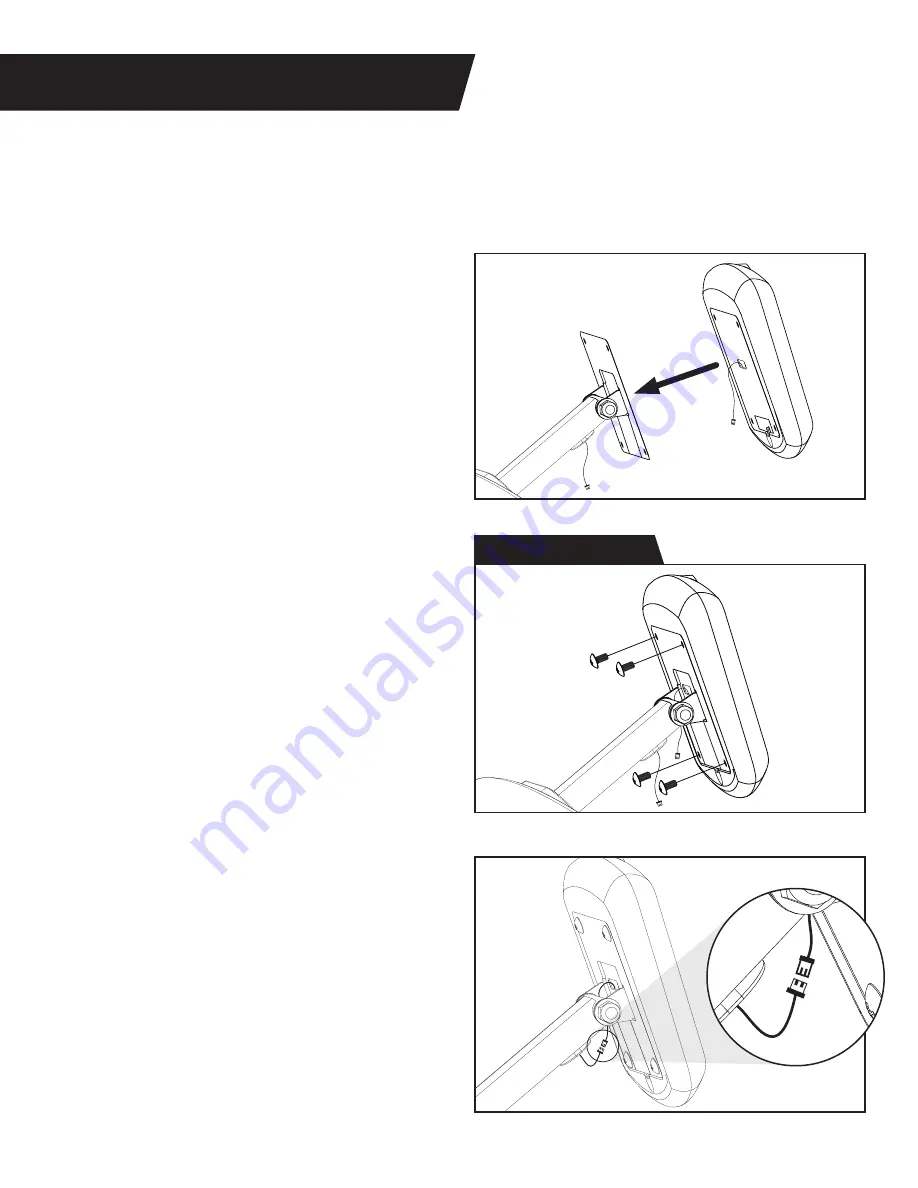
Figure 27
Figure 28
Figure 29
IMPORTANT
: The batteries can be installed and replaced without removing the console . However, for
easier access, we recommend inserting the batteries before installing the console . Open the Battery
Compartment located on the back of the console . Ensure that the battery contacts and compartment are
clean . Locate the 2 × included batteries (AA 1 .5 V Alkaline) and install them in the back of the Console in the
Battery Compartment, noting (+) and (-) symbols .
Step 13 Hardware Kit
15
IMPORTANT:
Use caution to ensure the Sensor
Wire on the Console does not get pinched or
pulled during assembly .
Figure 27
: Guide the Sensor Wire through the
opening in the Console Support while aligning
the Console .
Figure 28
: Use the
Step 13 Hardware Kit
to attach the Console .
Hand tighten 4 × Bolts through the Console
and into the Console Support .
Proceed to fully tighten all 4 × Bolts with
the Phillips Screwdriver .
Figure 29
: Connect the Console Cables by
snapping together the two ends of the
Cables .


