USER ADJUSTMENTS
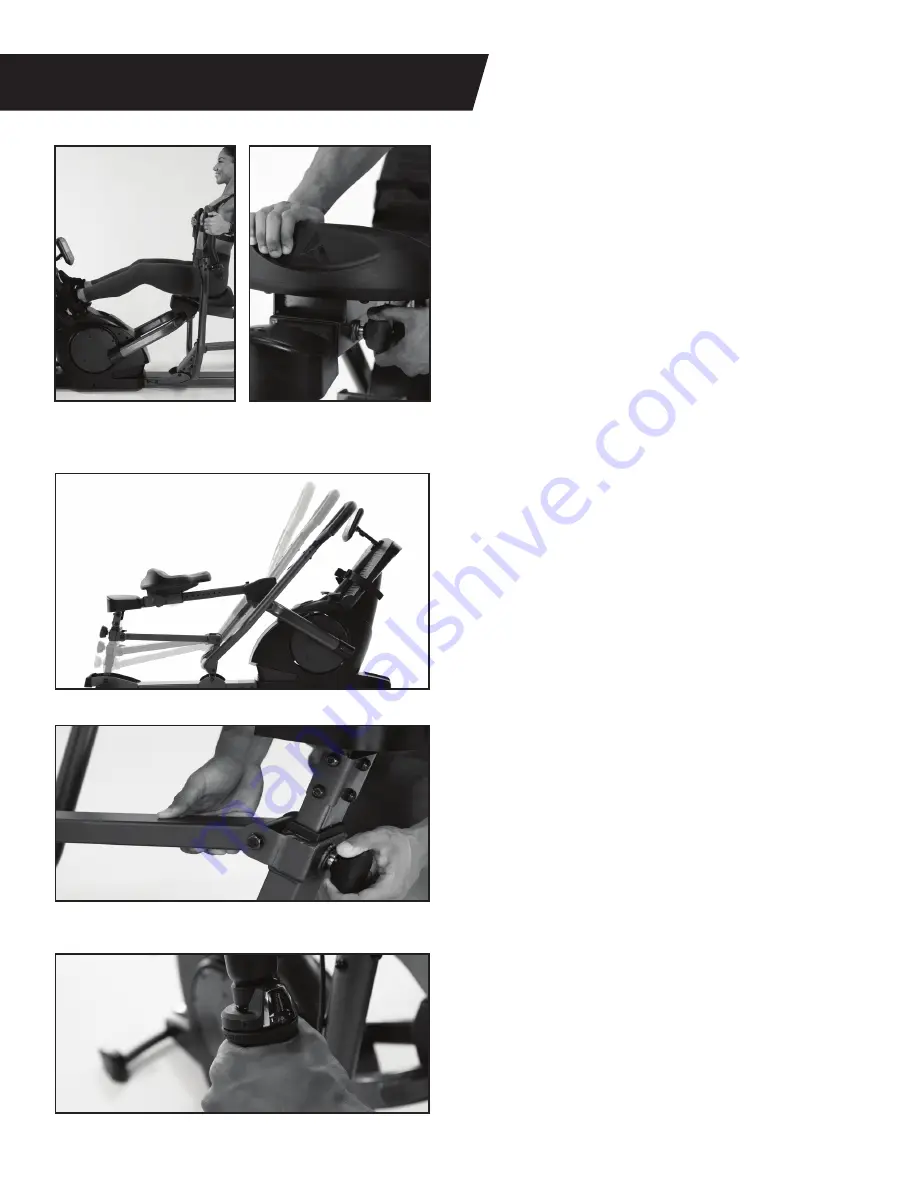
Figure 30
Figure 33
Figure 34
Figure 31
Figure 32
18
Seat Adjustment
The seat offers twelve (12) settings to accommodate
various heights . To ensure a safe and comfortable
experience, adjust the seat to a setting that allows
for a slight bend in your knees at full extension
(Figure 30) . Your legs should not be locked out at full
extension to avoid injury .
Figure 31:
Turn the Seat Adjustment Knob
counterclockwise to loosen . Pull out on the knob as
you slide the seat to your selected height setting .
Release the knob and ensure it is fully engaged into
a hole setting before turning it clockwise to tighten .
Handle Adjustment
Figure 32:
The handles can be adjusted into three
(3) settings to control their depth of movement at
the finish of the stroke . Once you find your seat
setting, you’ll want to test the handle setting to fit
your body type and amount of layback (lean of the
upper body) you desire . The A setting offers the
greatest movement; the C setting offers the least .
Figure 33:
Turn the Handle Adjustment Knob
counterclockwise to loosen . Pull out on the Handle
Adjustment Knob with one hand as you assist the
movement of the Handle Adjustment Bar with
your other hand . Release the knob and ensure it
is fully engaged into a hole setting before turning
it clockwise to tighten .
Note:
it is easier to slide up
and down when the handles are pushed forward all
the way so the rear post is straight up and down .
Resistance Adjustment
Figure 34:
The Resistance Adjustment Dial can be
adjusted from setting 1 (least resistance) to setting
7 (greatest resistance) . Turn the dial until your
desired resistance level is visible in the window .
You can easily adjust your resistance during your
workout at any time .


