background image

KO

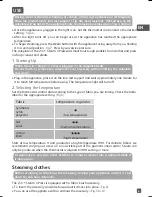
• 

구김이


있는


옷을


옷걸이에


거십시오

.

• 

옷에


스팀이


가해질


부분에서


멀리


떨어진


곳을


손으로


잡고


당기면서


구김이


있는


부분에


제품을


대고

옷의


위쪽에서부터


스팀을


가하십시오

.

스팀은  매우  뜨겁습니다.  절대로  옷을  입고  있는  상태에서  주름을  펴지  마십시오.옷은 
항상 옷걸이에 거십시오.

•  

스팀이


나오게


하려면


스팀


버튼을


계속


누르십시오

(

그림

 8)

저온(•) 혹은 중온 (••)에서 스팀 사용 시, 누수로 인한 화상의 위험이 있을 수 있습니다. 
안전한 제품 사용을 위해 스팀은 반드시 최대 온도로(••• ) 설정 후  사용해 주십시오. 

스팀의 연속 사용 시, 사용 중간에 온도 지시등이 켜지며 자동 예열이 시작될 수 있습니다. 
이  때  스팀  버튼을  누르게  되면  누수가  발생할  수  있으니,  온도  지시등이  켜져  있을 
경우에는 온도 지시등이 꺼질 때까지 스팀 사용을 잠시 멈추고 기다려 주십시오. 

•  

스팀과


액세서리의


작용으로


인해


구김이


부드럽게


제거됩니다

.

•  

구김을


제거한


후에는


옷을


옷걸이에


걸어


식힌


입으십시오

.

유용한


정보

옷의


라벨에


있는


권장


사항을


확인하십시오

옷의


보이지


않는


부분에


있는


원단에


테스트를


실시하여


원단이


뜨거운


스팀에


손상되지


않는지


확인하는


것이


좋습니다

.

옷의


보이지


않는


부분

(

안쪽


솔기

)


있는


원단의


색상이


변하지


않는지


테스트하십시오

실크나


벨벳에


스팀


헤드가


닿지


않도록


하십시오

일부


원단은


안쪽


면에


스팀을


가하는


것이


좋을


있습니다

두꺼운


원단은


반복해서


스팀


처리해야


있습니다

항상


주의를


기울이십시오

옷의


손상을


방지하려면


스팀


헤드와


원단


사이에

 2.3cm 

정도의


간격을


유지해야


합니다

제품을


최초로


사용하기


전에


또는


일정


기간


보관한


후에는


오래된


옷에


스팀


분사


테스트를


해보는


것이


좋습니다

.

보풀


제거


패드

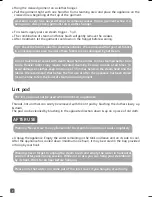
보풀 제거 패드는 부착한 상태에서 사용하지 마십시오.

보풀


제거


패드를


옷의


위아래로


천천히


문지르면


보풀


머리카락을


손쉽게


제거할


있습니다

.

패드는


오래된


천에


위아래로


문질러


청소할


있습니다

.

사용


경고: 스팀 헤드와 제품이 완전히 식은 후 보관 해 주십시오.

•  

제품의


플러그를


빼십시오

물탱크에


남아있는


물을


비우고


물탱크를


옆으로


기울여


놓아


식도록


하십시오

제품이


식은


(

최소

 1

시간


)

에는


제공된


백에


넣거나


제품


고리를


이용해


걸어


보관할


있습니다

.

16

Summary of Contents for DV86 series

Page 1: ...9100018172 03 05 18...

Page 2: ...DV86XX www tefal com...

Page 3: ...1 2 8 3 4 5 6 12 7 9 10 11...

Page 4: ...fig 1 fig 2 fig 3 fig 4b fig 5 fig 6 fig 7 fig 8 fig 4a...

Page 5: ...and the guarantee will not apply To protect against a risk of electric shock do not immerse the appliance in water or other liquids Do not direct steam at people animals or iron clothes while they ar...

Page 6: ...ended while plugged in or while it is still hot Close supervision is necessary for any appliance being used by or near children Care should be taken when using the appliance due to the emission of ste...

Page 7: ...from the socket before the water tank is filled with water Do not allow cord to touch hot surfaces Let Appliance cool completely down before putting away Loop cord loosely around appliance when stori...

Page 8: ...voltage may cause irreversible damage to the iron and will invalidate the guarantee The surfaces which are marked or close to with this sign are very hot during the use of the appliance Do not touch t...

Page 9: ...ter If your water is very hard check with your local water authority it is possible to mix tap water with store bought distilled or demineralised water in the following proportions 50 untreated tap wa...

Page 10: ...in the appliance place it on the iron rest support and wait approximately one minute for it to reach full temperature before using The temperature light will turn off 2 Selecting the temperature Set t...

Page 11: ...lothes keep a distance of 1 5 inches between the steam head and the fabrics We recommend that before the first use or after the appliance has been stored for some time to test the burst of steam on an...

Page 12: ...am button trigger successively for a few seconds to begin steaming When the appliance is new press the steam button trigger a few times Ensure that the water tank snaps in when put into place full loc...

Page 13: ...n fill the tank with 50 of vinegar and 50 of water to maximum level Set the tank cap then set the tank on the appliance lock it Plug the appliance set thermostat knob to max temperature Wait the light...

Page 14: ...10 KO...

Page 15: ...11...

Page 16: ...12 KO 8 8 8...

Page 17: ...13 220 240V...

Page 18: ...14 KO 1 2 3 4 5 6 7 8 9 10 11 12 13 14 100 50 50 1 Max 2 3 3...

Page 19: ...15 4b 4a 7 1 1 2 5 1 6 5 8...

Page 20: ...KO 8 2 3cm 1 16...

Page 21: ...17 1 i 60 3 60...

Page 22: ...18 KO 6 50 50 Max MAX 100 MAX...

Page 23: ...domestique et l int rieur seulement En cas d utilisation commerciale inappropri e ou non conforme au mode d emploi le fabricant d cline toute responsabilit et la garantie ne s applique pas Pour r dui...

Page 24: ...s pr vu pour tre utilis par des personnes y compris des enfants dont les capacit s physiques sensorielles ou mentales sont r duites ou des personnes manquant d exp rience ou de connaissances sauf si e...

Page 25: ...l mentaires doivent tre prises pour s assurer que personne ne tr buche sur le cordon La fiche doit tre retir e de la prise avant que le r servoir d eau ne soit rempli d eau vitez que le cordon ne touc...

Page 26: ...ION La tension de votre installation lectrique doit correspondre celle du fer 220 240 V Une connexion la mauvaise tension peut causer des dommages irr versibles au fer et rend la garantie invalide La...

Page 27: ...au du robinet non trait e Si votre eau est tr s calcaire v rifiez aupr s de votre autorit locale de l eau il est possible de m langer l eau du robinet avec de l eau distill e ou d min ralis e achet e...

Page 28: ...rer Lorsque le Steam n Press 2 en 1 est branch la semelle chauffe Ne pas toucher ou retirer l accessoire de couverture de la semelle sans laisser la semelle refroidir Branchez l appareil placez le sur...

Page 29: ...tissus ne sont pas endommag s par la vapeur chaude Ne pas toucher de soie ou de velours avec la t te de vapeur Certains articles peuvent tre mieux soumis la vapeur de l int rieur Les tissus lourds peu...

Page 30: ...samment chaud L appareil est satur de calcaire V rifiez bien que votre appareil est bien branch Retirez le r servoir et remplissez le Pressez le d clencheur du bouton vapeur plusieurs fois pendant que...

Page 31: ...u niveau maximal Placez le bouchon du r servoir puis placez le r servoir sur l appareil et verrouillez le Branchez l appareil r glez le bouton du thermostat la temp rature max Attendez que le voyant l...

Reviews: