ARRI 3-S
24VDC
LED Surface Monopoint
415-504-3536
•
•
415-504-3536 TG-INS-ARRI-3-S 8/16/18
info@teganlighting.com
www.teganlighting.com
2
Tegan Trac
Installation Instructions
M
ec
hani
cal Ins
tall
ati
o
n
1.
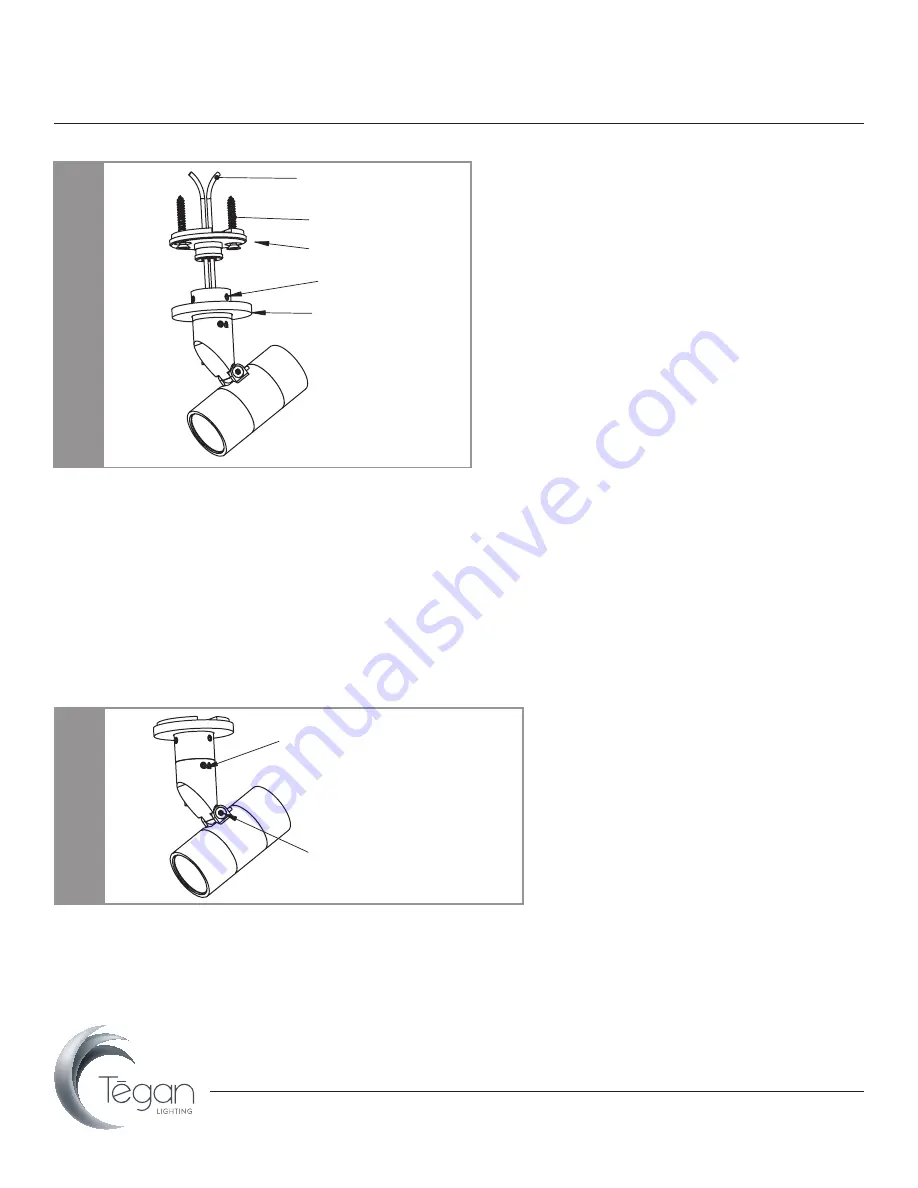
1. Mechanical Installation
• Loosen the 3 set Screws and cover to disassemble the ARRI 3-S.
• Make wire connections inside ceiling or wall with wires passing through base.
• Use screws to install base onto ceiling or wall.
• Tighten 3 set screws onto Base. then thread cover over base.
• Installer must use the correct wire size to ensure proper electrical operation with no voltage drop. Refer to power supplies
Spec Sheet 13 for details.
NOTE: Do not exceed maximum number of Spotlights per driver wattage rating, doing so will damage system.
Do not use less than minimum number of Pico 1-S per driver wattage minimum. Doing so will result in strobing or
flickering. Confirm 0-10V dimming controls compatibility with Driver Manufacturer.
• Replace canopy by screwing clockwise to secure.
• Tighten until snug, overtightening can cause damage.
.
A
d
jus
tm
ent
2.
2. Locking the ARRI-3-S in Horizontal and Vertical Adjustment
• Adust to desired position, using angle gauge if required.
• Lock in position with Allen key. Note: Only adjust position when unlocked.
3x Set Screws
Cover
Wires
Screws
Base
Horizontal
Vertical (both sides)


