background image

77

Bedienungsanleitung 

Deutsch 

Mit Fleischthermometer 
garen

Das Fleischthermometer misst die Innentempe-
ratur des gebratenen Fleischs. Sobald das Ther-
mometer eine zuvor ausgewählte Temperatur 
erkennt, schaltet sich der Ofen automatisch aus.
Das Garen mit Fleischthermometer stellt unab-
hängig von der Art des gegarten Fleischs oder 
Fischs optimale Ergebnisse sicher.

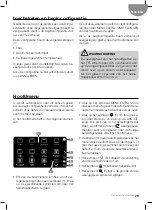
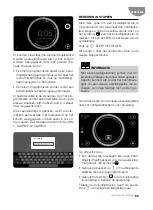
SO STECKEN SIE DAS  
FLEISCHTHERMOMETER EIN

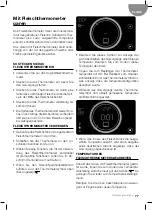
•  Verwenden Sie nur das Originalfleischthermo-

meter.

•  Stecken Sie das Thermometer ein, bevor Sie 

den Garvorgang starten.

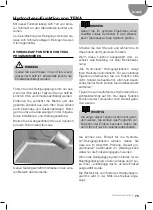
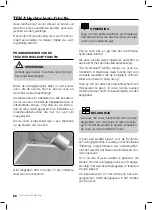
• Stecken Sie das Thermometer so durch eine 

Seite des zu bratenden Fleischs, dass die Spit-
ze in der Mitte des Fleischstücks sitzt.

•  Stecken Sie das Thermometer vollständig bis 

zum Griff hinein.

•  Die Spitze des Thermometers darf weder Kno-

chen noch fettige Stellen berühren. Außerdem 
darf sie sich nicht in hohlen Bereichen (bspw. 
bei Geflügel) befinden.

FLEISCHTHERMOMETER VERWENDEN

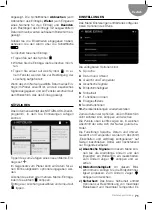
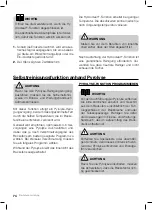
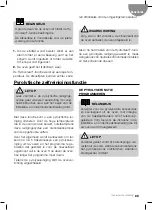
•  Geben Sie das Fleischstück mit eingestecktem 

Fleischthermometer in den Ofen. 

•  Schließen Sie das Thermometer an den An-

schluss oben links im Ofen an.

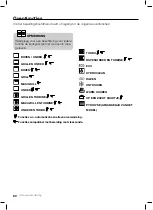
•  Wählen Sie eine Funktion, die mit der Verwen-

dung des Fleischthermometers kompatibel 
ist (kompatible Funktionen finden Sie im Ab-
schnitt „Ofenfunktionen“ auf Seite 4).

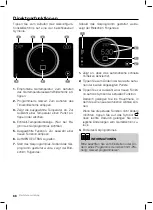
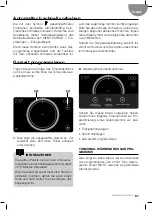
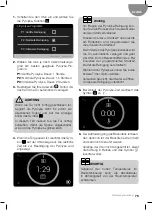
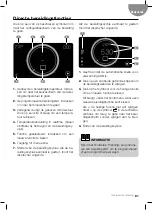
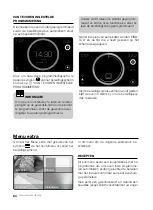
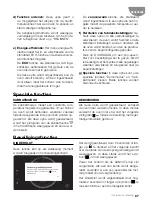
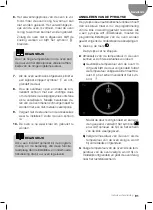
•  Wenn Sie den Garkonfigurationsbildschirm 

aufrufen, wird das Thermometersymbol oben 
links angezeigt 

:

•  Berühren Sie dieses Symbol zur Anzeige der 

zum Abschließen des Garvorgangs empfohlenen 
Temperatur. Berühren Sie zum Ändern dieser 
Temperatur den Kreis.

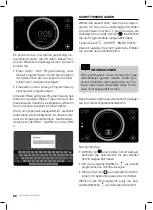
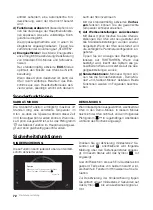
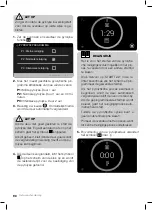
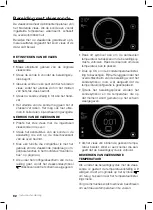
•  Tippen Sie zum Bestätigen der Thermometer-

temperatur auf OK. Bei Rückkehr zum Garüber-
sichtsbildschirm ist das Thermometersymbol rot, 
was anzeigt, dass die Temperaturkonfiguration 
akzeptiert wurde.

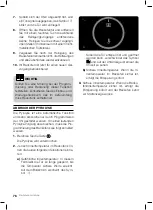
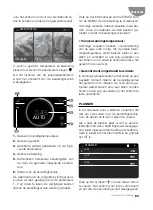
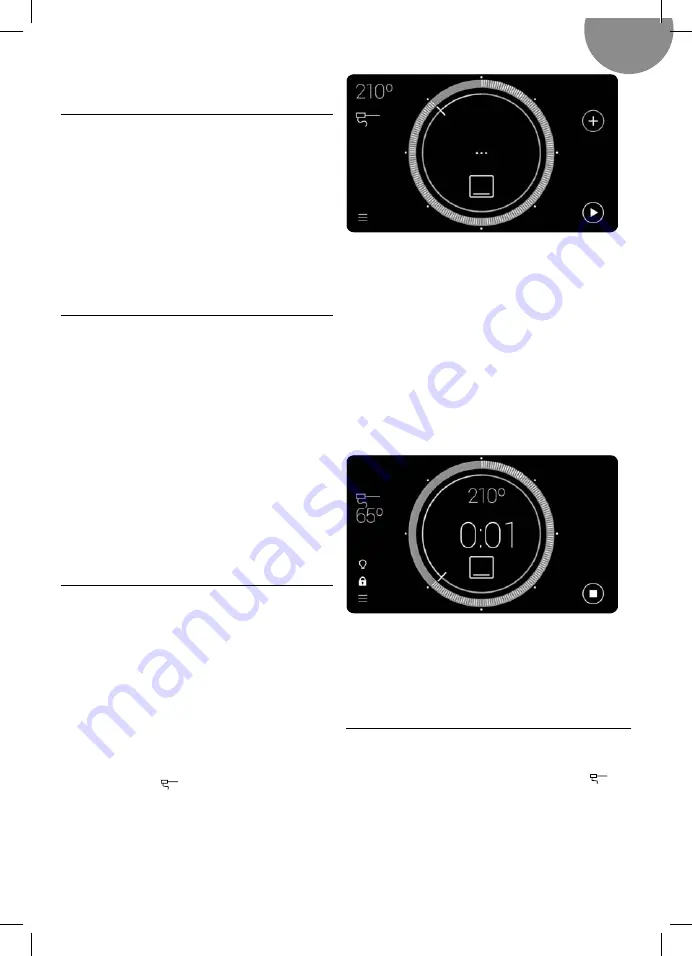
•  Während des Garvorgangs werden Thermome-

tersymbol und aktuell gemessene Temperatur 
am Bildschirm angezeigt.

•  Wenn das Innere des Fleischstücks die ausge-

wählte Temperatur erreicht, wird durch Ausgabe 
eines akustischen Alarms angezeigt, dass der 
Garvorgang abgeschlossen ist.

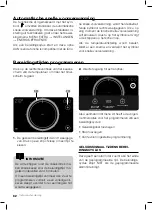
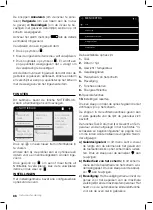
TEMPERATUR DES  
FLEISCHTHERMOMETERS BEARBEITEN

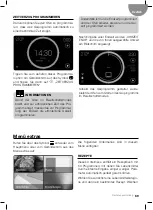
Sobald das Garen mit Fleischthermometer gestar-
tet wurde, tippen Sie zum Ändern der Temperatu-
reinstellung einfach erneut auf das Symbol 

. So 

gelangen Sie wieder zum Tempertaureinstellungs-
menü.
Befolgen Sie die oben beschriebenen Anweisun-
gen zur Eingabe einer neuen Temperatur.

Summary of Contents for IOVEN

Page 1: ...User Manual IOVEN IOVEN P www teka com ES PT EN FR DE NL EL ...

Page 2: ...ment les instructions d installation et d entretien fournies avec votre four Selon les modèles il est possible que les accessoires fournis avec votre four soient différents de ceux indiqués sur les images DEUTSCH Bevor Sie den Backofen zum ersten Mal verwenden lesen Sie bitte die zu Ihrem Backofen gehörenden Einbau und Wartungsanweisungen aufmerksam durch Je nach Modell können die Zubehörteile Ihr...

Page 3: ...os 3 Resistencia de grill 4 Conector sonda de carne 5 Multicook 6 Soporte bandejas 7 Bandeja pastelera 8 Parrilla 9 Bandeja profunda 10 Bisagra 11 Cristal interior 12 Salida de aire de refrigeración 13 Interruptor de puerta solo para modelos NO pirolíticos 14 Lámpara solo para modelos pirolíticos 15 Fijación al mueble 16 Iluminación LED solo para modelos NO pirolíticos 17 Panel trasero 18 Turbina ...

Page 4: ...RAS AJUSTES desde el menú principal Una vez haya finalizado u omitido la configu ración inicial accederá al menú principal del horno ATENCIÓN La sensibilidad del área touch de la pantalla TFT se adapta continuamente a las condi ciones ambientales Al conectar el horno a la red tenga la precaución de que la super ficie de cristal del frontal de mandos esté limpia y libre de cualquier obstáculo Media...

Page 5: ...ERMENTAR DESCONGELAR MANTENER CALOR A FUEGO LENTO PIROLISIS SEGÚN MODELO ATENCIÓN Para una descripción de uso de cada una de las funciones consulte la guía de cocinados incluida en su horno Por medio del menú principal de cocinado usted podrá acceder a las siguientes funciones de horno Funciones que incorporan precalentamiento rápido automático Funciones compatibles con el cocinado con sonda de ca...

Page 6: ... programar o modificar una programa ción consulte el apartado Planificación programación temporizada de cocinado Funciones directas de cocinado Pulsando sobre uno de los símbolos descritos accederá a la pantalla de configuración de co cinado 1 Temperatura de cocinado sugerida Pulse para acceder a la pantalla de selección de temperatura de cocinado 2 Tiempo de cocinado programado Pulse para acceder...

Page 7: ... precalen 1 2 2 Acceso directo a opciones adicionales Una vez accedido a este menú usted dispone de las siguientes opciones de temporización para programar un cocinado Añadir aviso sonoro Añadir paso Programación en diferido AVISO SONORO DURANTE EL COCINA DO Genera una alarma que sonará al terminar el tiempo programado El cocinado NO se detendrá Programación temporizada de cocinado En la pantalla ...

Page 8: ... opción si desea realizar un cocinado con hasta tres pasos independientes en un mismo cocinado se puede realizar pulsando el símbolo desde la pantalla de cocinado SÓLO una vez seleccionado la duración del mismo Pulsamos sobre el símbolo AÑADIR PASO Tras pulsarlo se accederá al menú principal en el que seleccionaremos la función del nuevo paso INFORMACIÓN No todas las funciones de cocinado son com ...

Page 9: ...gramado únicamente una duración de cocinado Una vez haya incluido una hora de finalización en la pantalla se observará la indicación HORA FIN y la hora que usted haya seleccionado Una vez inicie el cocinado el horno permane cerá a la espera de iniciar el cocinado En este menú encontrará los siguientes sub menús RECETAS En este submenú encontrará un recetario con 50 programas con los que introducie...

Page 10: ...ntradas de calendario estableci das Cada una de las entradas contará con un botón deslizante en azul si está activado o en gris si no lo está Para añadir una nueva entrada pulsaremos so bre el símbolo mostrándose la pantalla de introducción de fecha y hora de activación del recordatorio En esta pantalla aparecerán los botones Cancelar para cancelar la introduc bles y pulse sobre la receta que dese...

Page 11: ...se da la posibilidad al usuario de modi ficar la intensidad de brillo de la pantalla del horno Usted podrá modificarlo pulsando y ción de la entrada Siguiente para introducir un nombre a la entrada y Finalizar para vali dar la entrada con la fecha hora seleccionada Una vez añadido active la entrada mediante el botón En el caso de querer borrar una de las entra das Pulsar sobre el símbolo Seleccion...

Page 12: ...ciencia energética El menú de eficiencia energética permite la activación desactiva ción de los funcionamientos por defecto del Se activa pulsando el símbolo durante 2 o más segundos indicándonos el siguiente men saje de la situación de bloqueo del teclado y puerta En esta situación el símbolo se pre sentará en color rojo Tanto la pantalla como el botón ON OFF que darán bloqueados Si realiza cualq...

Page 13: ...nicamente podrá introducir una hora de finalización Se haya o no elegido un tiempo de finalización al iniciar el proceso de limpieza se emitirá el beep de validación 2 beep largos y 2 cortos En el centro de la circunferencia se mostrará el tiempo restante hasta la finalización del proce so de limpieza Función TEKA Hydroclean Esta función facilita la limpieza de la grasa y los restos de suciedad qu...

Page 14: ... al inicio del libro de Instalación y Mantenimiento Esta función le permite realizar un ciclo de lim pieza por pirólisis durante el cual debido a las altas temperaturas que se alcanzan en el interior del horno se produce un proceso de carbonización de las grasas acumuladas En general se recomienda realizar una pirólisis cada 4 5 cocinados y utilizar el programa más adecuado al nivel de suciedad de...

Page 15: ...ostrará el tiempo restante para la finali zación de la pirólisis 1 29 P2 IMPORTANTE Antes de iniciar el ciclo de limpieza pi rolítica tiene la posibilidad de diferir el proceso eligiendo una hora de inicio di ferente Para ello pulse sobre la indicación HORA INICIO en la esquina superior derecha de la pantalla y programe la hora de inicio que desee Una vez que inicie el proceso de pirolisis la puer...

Page 16: ...o la ceniza producida durante el ciclo de limpieza En zonas de difícil acceso del interior del horno será necesario limpiar con algún estropajo de fibra no metálica 9 Una vez limpio el interior del horno no ol vide instalar de nuevo los soportes y sus accesorios 10 El horno ya está preparado para un nuevo cocinado IMPORTANTE Si detecta alguna incidencia en la progra mación y manejo de esta función...

Page 17: ... sonda de carne Puede consultar las funciones compati bles en el apartado Funciones del horno en la página 4 Al acceder a la pantalla de configuración de co cinado en la zona superior izquierda de la pan talla aparecerá el símbolo de la sonda de carne Tocando sobre este símbolo podrá ver la temperatura recomendada por el horno para finalizar el cocinado Tocando sobre el círculo podrá modificar dic...

Page 18: ...tência do grill 4 Conector do termómetro da carne 5 Tabuleiro multicook 6 Apoio do tabuleiro 7 Tabuleiro para forno 8 Grill 9 Tabuleiro profundo 10 Dobradiça 11 Vidro interior 12 Saída de ar de refrigeração 13 Interruptor da porta apenas para modelos NÃO pirolíticos 14 Iluminação apenas para modelos pirolíticos 15 Fixação ao móvel 16 Iluminação LED apenas para modelos NÃO pirolíticos 17 Painel tra...

Page 19: ...o MENU EXTRAS A JUSTES a partir do menu principal Quando tiver concluído ou avançado a con figuração inicial irá para o menu principal do forno AVISO A sensibilidade da área táctil do ecrã TFT ajusta se continuamente às condições am bientais Quando o forno estiver ligado à fonte de alimentação certifique se de que a superfície de vidro do painel de controlo frontal está limpa e desobstruída Pressi...

Page 20: ...ROCLEAN FERMENTAR DESCONGELAÇÃO MANTER CALOR A BAIXA TEMPERATURA PIRÓLISE DEPENDENDO DO MODELO NOTA Para obter uma descrição detalhada sobre como usar cada uma das funções consul te o guia de cozinhar fornecido juntamente com o forno As seguintes funções do forno são acedidas através do menu principal de cozinhar Funções que incluem pré aquecimento automático rápido Funções compatíveis com cozinha...

Page 21: ...ÇÃO Para programar ou modificar um programa consulte a secção Planeamento progra mação do tempo de cozinhar Funções de cozinhar diretas Pressione um dos símbolos descritos para ace der ao ecrã de configuração de cozinhar 1 Temperatura de cozinhar recomendada Pressione para aceder ao ecrã de seleção da temperatura de cozinhar 2 Tempo de cozinhar programado Pressione para aceder ao ecrã do temporiza...

Page 22: ...s adicionais Após entrar neste menu dispõe das seguintes opções de temporizador para programação de um ciclo de cozinhar Adicionar aviso sonoro Adicionar passo Pré programação AVISO SONORO DURANTE O CICLO DE COZINHAR Isto cria um aviso sonoro que é emitido no fi nal do tempo programado O ciclo de cozinhar NÃO para quando o tempo de aviso sonoro programado termina Programação de tempos de cozinhar ...

Page 23: ...AR POR PASSOS Selecione esta opção para programar um ciclo de cozinhar com até três passos independen tes no mesmo ciclo pressionando o símbolo no ecrã cozinhar APENAS após selecionar a duração do ciclo Pressione ADICIONAR PASSO Isto direciona o para o menu principal Agora selecione o novo passo da função INFORMAÇÃO Nem todas as funções de cozinhar po dem ser utilizadas com a função cozinhar por p...

Page 24: ...ido programado Após introduzir um hora de finalização a HORA FIM e o tempo que selecionou são apresentados no ecrã Assim que o ciclo de cozinhar tiver iniciado o forno mantém se no modo de espera para ini ciar o ciclo de cozinhar Menu Extras Aceda ao Menu Extras utilizando o símbolo a partir do menu principal ou do ecrã cozinhar Estão disponíveis os seguintes submenus nes te menu RECEITAS Este sub...

Page 25: ...a e a hora para cada um Quando aceder ao planeador é apresentada uma lista de entradas de calendário estabele cidas Para cada uma destas entradas existe um botão deslizante azul se ao alarme estiver LIGADO e cinzento se estiver DESLIGADO Para adicionar uma nova entrada pressione o símbolo É apresentado o ecrã para intro duzir a data e a hora do lembrete Os botões Cancelar para cancelar a entrada S...

Page 26: ...sione e arraste sobre o pon teiro c Segurança O menu segurança inclui op ções para limitar o tempo máximo de fun cionamento e a temperatura máxima Inclui para introduzir um nome para a entrada e Fi nalizar para confirmar a entrada com a data hora selecionada são apresentados neste ecrã Quando os dados estiverem introduzidos ative o aviso sonoro utilizando o botão Para eliminar uma entrada Pression...

Page 27: ... optimiza a utilização do forno quan do não estiver em utilização Se esta opção estiver desativada o forno pode ser ativado a partir do modo de es pera apenas tocando no ecrã no entanto o É ativada pressionando durante mais de 2 segundos sendo apresentada a seguinte men sagem sobre o estado do botão de bloqueio Neste estado o símbolo é apresentado a vermelho O ecrã e o botão LIGAR DESLIGAR ficam b...

Page 28: ...oduzida a hora de finalização Apesar de ter sido selecionada uma hora de finalização quando o processo de limpeza co meçar será ouvido um sinal de confirmação 2 sinais longos e 2 curtos O tempo restante até ao fim do processo de limpeza é apresentado no centro do circulo Função TEKA Hydroclean Esta função permite a limpeza de gordura ou de outra sujidade presentes nas paredes do forno Para facilit...

Page 29: ... de Instalação e Manutenção Esta função permite lhe realizar um ciclo de limpeza por pirólise durante o qual se produz um processo de carbonização das gorduras acumuladas devido às elevadas temperaturas que são atingidas no interior do forno Em geral recomenda se a realização de uma pirólise a cada 4 ou 5 cozinhados e a utilização do programa mais adequado ao nível de suji dade do seu forno Em cas...

Page 30: ...erá apresentado o tempo restante para a finali zação da pirólise 1 29 P2 IMPORTANTE Antes de iniciar o ciclo de limpeza pirolí tica é possível variar o processo selecio nando uma hora de início diferente Para tal pressionar HORA DE INÍCIO no canto superior direito do ecrã e progra mar a hora de início pretendida Uma vez iniciado o processo de pirólise a porta irá bloquear automaticamente e o forno...

Page 31: ...e manutenção fornecido com o seu forno CANCELAMENTO DA PIRÓLISE A pirólise é uma função automática e como tal só pode ser acionada através da programação do relógio Para cancelar um processo de piró lise em curso é necessário desprogramar o forno seguindo estas instruções 1 Prima a tecla A pirólise é interrompida 2 Dependendo da temperatura do interior do forno podem ocorrer estas duas situações a...

Page 32: ...no Selecione uma função que seja compatí vel com o uso do termómetro para carne Consultar funções compatíveis na secção Funções do forno na página 4 Quando vai para o ecrã de configuração de cozinhar o símbolo do termómetro para carne é apresentado no lado su perior esquerdo do ecrã Toque neste símbolo para ver a temperatura re comendada para completar o ciclo de cozinhar Toque no circulo para mod...

Page 33: ...nly for pyrolytic models 3 Grill resistor 4 Meat thermometer connector 5 Multicook 6 Tray support 7 Baking tray 8 Grill 9 Deep tray 10 Hinge 11 Inner glass 12 Cooling air outlet 13 Doo r switch only for NON pyrolytic models 14 Light only for pyrolytic models 15 Attachment to fitting 16 LED lighting only for NON pyrolytic models 17 Rear panel 18 Fan 19 Oven door seal 20 Meat thermometer 21 Door 1 4...

Page 34: ...ing to the EXTRAS MENU SETTINGS from the main menu When you have completed or skipped the ini tial configuration you will go to the oven main menu WARNING The sensitivity of the touch area of the TFT screen continuously adjusts to the environ mental conditions When the oven is con nected to the power supply make sure that the glass surface of the control front panel is clean and unobstructed Press...

Page 35: ...AN ECO HYDROCLEAN PROVE DEFROST KEEP WARM SLOWCOOK PYROLYSIS DEPENDING ON MODEL NOTE For a description of how to use each of the functions please see the cooking guide pro vided with the oven The following oven functions are accessed via the main cooking menu Functions which include automatic fast preheating Functions compatible with cooking with meat thermometer ...

Page 36: ...cooking cycle INFORMATION To programme or modify a programme please see the section Planning program ming cooking time Direct cooking functions Press on one of the symbols described to go to the cooking configuration screen 1 Recommended cooking temperature Press to go to the cooking temperature selection screen 2 Programmed cooking time Press to go to the timer screen 3 Represents the selected te...

Page 37: ... 1 2 2 Direct access to additional options One you have entered this menu you have the following timer options for programming a cooking cycle Add minute minder Add step Delayed programming MINUTE MINDER DURING COOKING CYCLE This creates an alarm which buzzes at the end of the programmed time The cooking cycle does NOT stop when the programmed alarm time ends Programming cooking times Press on the...

Page 38: ...PS Select this option to programme a cooking cy cle with up to three independent steps in the same cycle by pressing the symbol from the cooking screen ONLY after selecting the length of the cycle Press ADD STEP This takes you to the main menu Now select the new step function INFORMATION Not all the cooking functions can be used with the cooking in steps function There fore when you go to the main...

Page 39: ...en will function as if only a cooking time had been programmed After entering an end time END TIME and the time you have selected are displayed on the screen Once the cooking cycle has started the oven remains on standby to start the cooking cycle Extras Menu Go to the Extras Menu using the symbol either from the main menu or from the cooking screen The following sub menus are available in this me...

Page 40: ...ist of the estab lished calendar entries is displayed For each of these entries there is a sliding button in blue if the alarm is ON and in grey if it is OFF To add a new entry press on the symbol The screen for entering the date and time of the reminder is displayed The buttons Cancel to cancel the entry Next to enter a name for the entry and Finish to confirm the entry with screen to scroll thro...

Page 41: ...ness To modify press and drag over the pointer c Security The security menu includes the options for limiting the maximum operating time and the maximum temperature It also includes the automatic child lock function when the oven is not in use the date time selected are displayed on this screen Once the details have been entered activate the alarm using the button To delete an entry Press on the s...

Page 42: ...he oven can be activated from standby just by touching the screen but the energy consumption is higher It is activated by pressing for 2 or more se conds and the following message about the button lock status is displayed In this status the symbol is displayed in red Both the screen and the ON OFF button are locked If either of these are touched a pop up window appears advising of the situation To...

Page 43: ...e end time can be entered Regardless of whether an end time has been selected when the cleaning process starts a confirmation beep is heard 2 long and 2 short beeps The time remaining until the end of the cleaning process is displayed in the centre of the circle TEKA Hydroclean function This function permits grease and other dirt at tached to the oven walls to be cleaned more easily To make cleani...

Page 44: ...uctions found at the beginning of the Installation and Maintenance booklet This feature allows you to run the pyrolytic cleaning cycle during which built up grease deposits are burned off by the high temperatures inside the oven Generally a pyrolytic cycle is recommended after every 4 5 uses choose the most suitable programme depending on how dirty your oven is For very dirty ovens choose a longer...

Page 45: ... is locked the symbol will light up on the clock display and the time remaining until the end of the cycle will be shown 1 29 P2 IMPORTANT Before starting the pyrolytic cleaning cy cle it is possible to vary the process by selecting a different start time To do so press START TIME in the upper right corner of the screen and pro gramme the required start time Once the pyrolysis process has started ...

Page 46: ...klet includ ed with your oven CANCELLING THE PYROLYSIS Pyrolysis is an automatic function and as such can only be activated using the timer programme To cancel the pyrolysis the oven has to be reset following the instructions below 1 Press the button The pyrolysis will stop 2 Two situations can arise in relation to the inside temperature of the oven a Dangerous inside temperature In this case the ...

Page 47: ...e upper left side of the oven Select a function which is compatible with the use of the meat thermometer Consult compatible functions in the section Oven functions on page 4 When you go to the cooking configuration screen the meat thermometer symbol is displayed in the upper left of the screen Touch this symbol to see the recommended temperature to complete the cooking cycle Touch the circle to mo...

Page 48: ... gril 4 Raccord de thermomètre à viande 5 Multicuisson 6 Support de plateau 7 Plaque de cuisson 8 Grill 9 Plateau de cuisson creuse 10 Charnière 11 Panneau de verre intérieur 12 Sortie d air de refroidissement 13 Commutateur de porte seulement sur les modèles sans pyrolyse 14 Lumière seulement sur les modèles avec pyrolyse 15 Dispositif de fixation 16 Éclairage à LED seulement sur les modèles sans...

Page 49: ...menu principal Une fois que vous terminez la configuration initiale ou lorsque vous l ignorez vous passez directement au menu principal du four AVERTISSEMENT La sensibilité de la zone tactile de l écran TFT s adapte en permanence aux condi tions environnementales Une fois le four sous tension assurez vous que la surface en verre du panneau de commande avant est propre et non obstruée Appuyez sur l...

Page 50: ...AN FERMENTATION DÉCONGÉLATION CONSERVER CHALEUR CUISSON À FEU DOUX PYROLYSE SELON LE MODÈLE REMARQUE Pour une description de l utilisation de cha cune des fonctions référez vous au guide de cuisson fourni avec le four Les fonctions suivantes du four sont accessibles via le menu principal de cuisson Fonctions qui incluent un préchauffage rapide automatique Fonctions compatibles avec la cuisson à l ...

Page 51: ...S Pour définir ou modifier un programme re portez vous à la section Planification pro grammation du temps de cuisson Fonctions de cuisson directe Appuyez sur l un des symboles décrits ci des sous pour accéder à l écran de configuration de cuisson 1 Température de cuisson recommandée Ap puyez pour accéder à l écran de sélection de la température de cuisson 2 Temps de cuisson programmé Appuyez pour ...

Page 52: ... options supplémentaires Une fois que vous accédez à ce menu vous disposez des options de minuterie suivantes pour programmer un cycle de cuisson Ajouter bip sonore Ajouter étape Programmation différée BIP SONORE PENDANT LE CYCLE DE CUISSON Cela crée une alarme qui retentit à la fin de l heure programmée Le cycle de cuisson ne s arrête PAS lorsque l heure d alarme program mée arrive à sa fin Progr...

Page 53: ...un cycle de cuisson pouvant comporter jusqu à trois étapes indépendantes en appuyant sur le symbole de l écran de cuisson SEULE MENT après avoir sélectionné la durée du cy cle Appuyez sur AJOUTER ÉTAPE Le menu principal s affiche Sélectionnez main tenant de la nouvelle étape INFORMATIONS Toutes les fonctions de cuisson ne peuvent pas être utilisées avec la fonction de cuisson par étapes Lorsque vo...

Page 54: ...ous n aviez programmé que le temps de cuisson Après avoir entré une heure de fin HEURE FIN et l heure que vous avez sélectionnée s affichent à l écran Une fois le cycle de cuisson lancé le four passe en mode veille Menu fonctions supplémentaires Accédez aux Menu fonctions supplémentaires en appuyant sur le symbole soit à partir du menu principal soit à partir de l écran de cuisson Les sous menus s...

Page 55: ...calendrier préétablie s affiche Chacune des entrées est dotée d un bou ton coulissant qui s illumine en bleu lorsque l alarme est activée et en gris lorsque l alarme est désactivée Pour ajouter une nouvelle entrée appuyez sur le symbole L écran d entrée de date et heure de rappel s affiche Les boutons Annuler annuler l entrée Suivant nommer l entrée et Terminer confirmer l entrée avec l heure date...

Page 56: ... options de limitation du temps de fonction nement maximal et de la température maxi male Il inclut également la fonction auto matique de sécurité enfants qui permet de verrouiller le four lorsque celui ci n est pas utilisé et heure sélectionnées s affichent à cet écran Une fois que vous avez entré tous ces détails activez l alarme à l aide du bouton Pour supprimer une entrée Appuyez sur le symbol...

Page 57: ... être remis en marche tout juste en tou chant l écran ce qui entraîne toutefois une consommation d énergie plus élevée Vous pouvez l activer en appuyant sur pen dant au minimum 2 secondes puis le message suivant relatif au verrouillage des touches s affi che Dans cet état le symbole s affiche en rouge L écran et le bouton MARCHE ARRÊT sont ver rouillés Si vous touchez l un ou l autre une fe nêtre ...

Page 58: ... l exception que seule l heure de fin peut être configurée Nonobstant la configuration d une heure de fin lorsque le processus de nettoyage commence un avertissement de confirmation retentit 2 bips longs et 2 bips courts Le temps restant avant la fin du processus de nettoyage s affiche dans le centre d un cercle Fonction TEKA Hydroclean Cette fonction permet de nettoyer plus facile ment les graiss...

Page 59: ... début du manuel d installation et d entretien Cette fonction vous permet de réaliser un cy cle de nettoyage par pyrolyse durant lequel en raison des hautes températures atteintes à l intérieur du four se produit un processus de carbonisation des graisses accumulées Il est généralement recommandé de réaliser une pyrolyse toutes les 4 5 cuissons et d uti liser le programme le plus approprié au nive...

Page 60: ... écran de l horloge et le temps restant avant la fin de la pyrolyse est indiqué 1 29 P2 IMPORTANT Avant de commencer le cycle de netto yage par pyrolyse il est possible de faire varier le processus en sélectionnant une heure de démarrage différente Pour ce faire appuyez sur DÉMA RRAGE dans le coin supérieur droit de l écran et programmez l heure de déma rrage souhaitée Une fois que le processus de...

Page 61: ...retien fourni avec votre four ANNULATION DE LA PYROLYSE La pyrolyse est une fonction automatique elle se met donc uniquement en marche par le biais de la programmation de l horloge Pour annuler une pyrolyse en cours il est nécessaire de dé programmer le four en suivant les instructions suivantes 1 Appuyez sur la touche La pyrolyse s arrête 2 En fonction de la température intérieure du four ces deu...

Page 62: ...compatible avec l utilisation de la sonde à viande Consultez la liste des fonctions compatibles dans la sec tion Fonctions du four à la page 4 Lorsque vous arrivez à l écran de configu ration de la cuisson le symbole de la sonde à viande s affiche dans le coin supérieur gauche de l écran Touchez le symbole pour voir la température re commandée pour terminer le cycle de cuisson Touchez le cercle po...

Page 63: ...chalter nur bei Pyrolyse Modellen 3 Grillwiderstand 4 Fleischthermometer Anschluss 5 Mehrfachgaren 6 Einschub 7 Backblech 8 Grill 9 Tiefes Blech 10 Scharnier 11 Innenglas 12 Abluftöffnungen 13 Türschalter nur bei Nicht Pyrolyse Modellen 14 Beleuchtung nur bei Pyrolyse Modellen 15 Montageanbringung 16 LED Beleuchtung nur bei Nicht Pyrolyse Modellen 17 Rückblende 18 Gebläse 19 Türdichtung 20 Fleisch...

Page 64: ...eren Wenn Sie die Erstkonfiguration abgeschlossen oder übersprungen haben gelangen Sie zum Hauptmenü des Ofens WARNUNG Die Empfindlichkeit des Berührungsbereichs am TFT Bildschirm passt sich kontinuierlich an die Umgebungsbedingungen an Stellen Sie bei Anschluss des Ofens an die Strom versorgung sicher dass die Glasfläche des Bedienfeldes sauber und frei ist Tippen Sie zum Aufrufen des Menüs mit a...

Page 65: ...NTERHITZE MIT UMLUFT ECO HYDROCLEAN AUFGEHEN AUFTAUEN WARMHALTEN NIEDERTEMPERATUR GAREN PYROLYSE JE NACH MODELL HINWEIS Eine Beschreibung zur Nutzung der einzel nen Funktionen entnehmen Sie bitte der mit gelieferten Garanleitung Folgende Ofenfunktionen sind über das Hauptgarmenü zugänglich Funktionen mit automatischem schnellen Vorheizen Mit dem Garen mit Fleischthermometer kompatible Funktionen ...

Page 66: ...ogrammes INFORMATIONEN Bitte beachten Sie zum Einstellen oder Än dern eines Programms den Abschnitt Pla nung Garzeit programmieren Direktgarfunktionen Tippen Sie zum Aufrufen des Garkonfigura tionsbildschirms auf eine der beschriebenen Symbole 1 Empfohlene Gartemperatur Zum Aufrufen des Gartemperaturauswahl Bildschirms an tippen 2 Programmierte Garzeit Zum Aufrufen des Timerbildschirms antippen 3 ...

Page 67: ...mpatibel ist 1 2 2 Direktzugriff auf Zusatzoptionen Sobald Sie dieses Menü aufgerufen haben stehen Ihnen folgende Timeroptionen zur Pro grammierung eines Garprogramms zur Aus wahl Tonsignal hinzufügen Schritt hinzufügen Zeitversetzt programmieren TONSIGNAL WÄHREND DES GARPRO GRAMMS Dies sorgt für einen Alarm der bei Abschluss der programmierten Zeit ertönt Das Garpro gramm stoppt NICHT wenn die pr...

Page 68: ...AREN Wählen Sie diese Option wenn Sie ein Garpro gramm mit bis zu drei unabhängigen Schritten programmieren möchten Tippen Sie dazu am Garbildschirm auf das Symbol NACHDEM Sie die Programmdauer ausgewählt haben Tippen Sie auf SCHRITT HINZUFÜGEN Dadurch gelangen Sie ins Hauptmenü Wählen Sie nun die neue Schrittfunktion INFORMATIONEN Beim schrittweisen Garen können nicht alle Garfunktionen genutzt w...

Page 69: ...programmiert und der Ofen arbeitet als wäre nur die Gar zeit programmiert worden Nach Eingabe einer Endzeit werden UHRZEIT ENDE und die von Ihnen ausgewählte Uhrzeit am Bildschirm angezeigt Sobald das Garprogramm gestartet wurde bleibt der Ofen zum Starten des Garprogramms im Bereitschaftsmodus Menü extras Rufen Sie über das Symbol entweder vom Hauptmenü oder vom Garbildschirm aus das Menü extras ...

Page 70: ...nn Sie den Planer aufrufen erscheint eine Liste der eingerichteten Kalendereinträge Bei jedem dieser Einträge gibt es einen Regler der bei eingeschaltetem Alarm blau und bei ausge schaltetem Alarm grau ist Tippen Sie zum Zufügen eines neuen Eintrags auf das Symbol Der Bildschirm zur Einga be von Datum und Uhrzeit der Erinnerung wird Sie mit Ihrem Finger zum Blättern durch mög liche Optionen horizo...

Page 71: ...nd wischen c Sicherheit Das Menü Sicherheit enthält Optionen zur Beschränkung von maximaler Betriebszeit und maximaler Temperatur Es angezeigt Die Schaltflächen Abbrechen zum Abbrechen des Eintrags Weiter zum Eingeben eines Namens für den Eintrag und Beenden zum Bestätigen des Eintrags mit ausgewähltem Datum Uhrzeit werden auf diesem Bildschirm an gezeigt Sobald Sie die Einzelheiten eingegeben hab...

Page 72: ... bei Nicht benutzung Wenn diese Option deaktiviert ist kann der Ofen durch einfaches Berühren des Bild schirms aus dem Bereitschaftsmodus akti viert werden allerdings erhöht sich dadurch Drücken Sie zur Aktivierung mindestens 2 Se kunden auf anschließend wird folgende Meldung über den Tastensperrstatus angezei gt In diesem Status wird das Symbol rot angezeigt Sowohl Bildschirm als auch Ein Austast...

Page 73: ...mmieren beschrieben vor Allerdings kann dabei nur die Endzeit eingegeben werden Wenn das Reinigungsprogramm startet ist ein Bestätigungssignal zu hören 2 lange und 2 kur ze Töne unabhängig davon ob eine Endzeit ausgewählt wurde Die Restzeit bis zum Ende des Reinigungspro gramms wird in der Mitte des Kreises ange zeigt Hydroclean Funktion von TEKA Mit dieser Funktion lassen sich Fett und ande rer S...

Page 74: ...rtungshandbuch aufmerksam lesen Mit dieser Funktion erfolgt ein Pyrolyse Reini gungsvorgang bei dem das angesammelte Fett durch die heißen Temperaturen die im Backo feninneren entstehen verbrannt wird Generell wird empfohlen nach jeweils 4 5 Gar vorgängen eine Pyrolyse durchzuführen und dabei das je nach Verschmutzungsgrad des Backofens am besten geeignete Programm zu wählen Bei stärkerer Verschmu...

Page 75: ...CHTIG Aufgrund der hohen Temperaturen im Backofeninneren kann die Abkühldauer in Abhängigkeit von der Raumtemperatur schwanken 1 Schalten Sie den Ofen ein und wählen Sie die Pyrolyse Funktion PIROLISIS PROGRAMA P1 Limpieza suave P2 Limpieza normal P3 Limpieza intensiva Pyrolyse Programm P1 Sanfte Reinigung P2 Normale Reinigung P3 Intensive Reinigung Abbrechen Annehmen 2 Wählen Sie das je nach Vers...

Page 76: ...tzer 9 Vergessen Sie nach der Reinigung des Backofeninnenraums nicht die Halterungen und alle Zubehörteile wieder einzubauen 10 Ihr Backofen ist jetzt für einen neuen Gar vorgang betriebsbereit WICHTIG Sollten Sie eine Störung bei der Program mierung oder Bedienung dieser Funktion feststellen konsultieren Sie das Einbau und Wartungshandbuch das im Lieferumfang Ihres Backofens enthalten ist ABBRUCH...

Page 77: ... oben links im Ofen an Wählen Sie eine Funktion die mit der Verwen dung des Fleischthermometers kompatibel ist kompatible Funktionen finden Sie im Ab schnitt Ofenfunktionen auf Seite 4 Wenn Sie den Garkonfigurationsbildschirm aufrufen wird das Thermometersymbol oben links angezeigt Berühren Sie dieses Symbol zur Anzeige der zum Abschließen des Garvorgangs empfohlenen Temperatur Berühren Sie zum Än...

Page 78: ...len 3 Grillweerstand 4 Aansluiting vleesthermometer 5 Multikoken 6 Bakbliksteun 7 Bakplaat 8 Grill 9 Diep blik 10 Scharnier 11 Binnenglas 12 Uitlaat afkoellucht 13 Deurslot alleen voor NIET pyrolytische modellen 14 Verlichting alleen voor pyrolytische modellen 15 Hulpstuk voor fitting 16 Ledverlichting alleen voor NIET pyrolytische modellen 17 Achterpaneel 18 Turbine 19 Afdichting ovendeur 20 Aans...

Page 79: ...heeft voltooid of overgeslagen gaat u naar het hoofdmenu van de oven WAARSCHUWING De gevoeligheid van het tiptoetsgebied op het TFT scherm past zich voortdurend aan op de omgevingscondities Zorg ervoor dat als de oven op de stroom wordt aangeslo ten het glazen oppervlak van het bedie ningspaneel schoon en vrij is Druk op het symbool MENU EXTRA 2 om naar een menu te gaan met automatische re cepten ...

Page 80: ...E ECO HYDROCLEAN RIJZEN ONTDOOIEN WARM HOUDEN OP EEN ZACHT VUURTJE PYROLYSE AFHANKELIJK VAN HET MODEL OPMERKING Raadpleeg voor een beschrijving voor iedere functie de kookgids die met de oven is mee geleverd Via het bereidingshoofdmenu heeft u toegang tot de volgende ovenfuncties Functies o a automatische snelle voorverwarming Functies compatibel met bereiding met vleessonde ...

Page 81: ...in het hoofdstuk Planning programme ren van bereidingstijd om te programmeren of een programma te wijzigen Directe bereidingsfuncties Druk op een van de beschreven symbolen om naar het configuratiescherm van de bereiding te gaan 1 Aanbevolen bereidingstemperatuur Indruk ken om naar het keuzescherm van de berei dingstemperatuur te gaan 2 Geprogrammeerde bereidingstijd Indrukken om naar het timersch...

Page 82: ...GEN GELUIDSSIGNAAL TOEVOEGEN 0 00 210º VAN TEVOREN INGESTELDE PROGRAMMERING Als u eenmaal in dit menu zit heeft u de volgen de timeropties voor het programmeren van een bereidingscyclus Geluidssignaal toevoegen Stap toevoegen Van tevoren ingestelde programmering GELUIDSSIGNAAL TIJDENS BEREI DINGSCYCLUS Deze geeft een alarm dat zoemt aan het einde van de geprogrammeerde tijd De bereidings cyclus st...

Page 83: ...TAPPEN Kies deze optie om een bereidingscyclus te programmeren met maximaal drie onafhanke lijke stappen binnen dezelfde cyclus door op het symbool van het bereidingsscherm te drukken Dit kan ALLEEN na het kiezen van de cycluslengte Druk op STAP TOEVOEGEN Dit brengt u naar het hoofdmenu Kies nu de nieuwe stappenfunctie INFORMATIE Niet alle bereidingsfuncties kunnen met de bereiding in stappenfunct...

Page 84: ...neren alsof al leen de bereidingstijd is geprogrammeerd Na het invoeren van een eindtijd worden EIND TIJD en de tijd die u heeft gekozen op het scherm weergegeven 210º 3 30 18 00 EINDTIJD Als de bereidingscyclus eenmaal wordt gestart blijft de oven in stand by om de bereidingscy clus te starten Functies Instellingen Planner Recepten Menu extra Ga naar het Menu extra met gebruik van het symbool via...

Page 85: ...st van wat u heeft ingevoerd weergege ven Ieder ingevoerd item heeft een schuifknop deze is blauw als het alarm AAN is en grijs als het UIT is 5september2015 Onderwerp 13februari2016 Onderwerp 4juli2016 Onderwerp 12 00 10 00 12 00 PLANNER Druk op het symbool om een nieuw item in te voeren Het scherm voor invoer van datum en tijd van de herinnering wordt weergegeven over het scherm om door de versc...

Page 86: ...k de automatische kinderslotfunctie voor als de oven niet in gebruik is De knoppen Annuleren om de invoer te annu leren Volgende om een naam aan de invoer te geven en Beëindigen om de invoer te be vestigen met gekozen datum tijd worden op dit scherm weergegeven Activeer het alarm met knop als de details eenmaal zijn ingevoerd Verwijderen van een ingevoerd item Druk op symbool Kies de ingevoerde it...

Page 87: ...de oven vanuit stand by worden ingeschakeld door alleen maar het scherm aan te raken maar het energieverbruik is hoger Het wordt geactiveerd door 2 seconden of lan ger op te drukken en het volgende bericht over de status van de knopvergrendeling wordt weergegeven In deze status wordt het sym bool in rood weergegeven Zowel het scherm als de AAN UIT knop zijn vergrendeld Als een van beide wordt aang...

Page 88: ...eindtijd kan wor den ingevoerd Of er nu wel of geen eindtijd is gekozen het starten van het reinigingsproces wordt aange kondigd met een bevestigingspiep 2 lange en 2 korte piepen De resterende tijd tot het einde van het reini gingsproces wordt aangegeven in het midden van de cirkel TEKA Hydroclean functie Deze functie zorgt ervoor dat vet en ander vuil dat zich op de ovenwanden bevindt eenvoudi g...

Page 89: ...aandachtig de veilig heidsinstructies die u aan het begin van de installatie en onderhoudshandleiding vindt Met deze functie kunt u een pyrolytische rei niging uitvoeren Door de hoge temperaturen die in de oven worden bereikt ontstaat tijdens deze reinigingscyclus een carbonisatieproces van de opgehoopte vetten Over het algemeen wordt aanbevolen om tel kens na 4 à 5 bakprocessen een pyrolyserei ni...

Page 90: ...peren Als dit gebeurt sluit dan de deur goed zodat de vergrendeling in werking treedt en de py rolyse kan beginnen 4 Als de deur is vergrendeld licht het symbool op het scherm van de klok op en wordt de resterende tijd voor de beëindiging van de pyrolyse getoond 1 29 P2 BELANGRIJK Het is voor het starten van de pyrolytis che reinigingscyclus mogelijk om het pro ces te variëren door een andere star...

Page 91: ...dt hij on middellijk ontgrendeld en gaat de oven terug naar het ruststandscherm 6 Het verwarmingsproces van de oven is vol tooid maar de oven is nog te warm en kan niet worden gebruikt Het verwarmingspro ces van de oven is voltooid maar de oven is nog te warm en kan niet worden gebruikt Zolang de oven niet is afgekoeld blijft de koeling werken en blijft het symbool branden BELANGRIJK Door de hoge ...

Page 92: ...bel is met het gebruik van de vleessonde raadpleeg com patibele functies in het hoofdstuk Ovenfunc ties op pagina 4 Als u naar het configuratiescherm van de be reiding gaat wordt het vleessondesymbool linksboven aan het scherm weergegeven Raak dit symbool aan om de aanbevolen temperatuur te bekijken om de bereidingscy clus te voltooien Raak de cirkel aan om deze temperatuur aan te passen Druk op O...

Page 93: ...τας μόνο για πυρολυτικά μοντέλα 3 Αντίσταση γκριλ 4 Σύνδεσμος θερμομέτρου κρέατος 5 Πολυμάγειρας 6 Υποστήριγμα δίσκων 7 Δίσκος ψησίματος 8 Σχάρα 9 Βαθύς δίσκος 10 Μεντεσές 11 Εσωτερικό τζάμι 12 Έξοδος αέρα ψύξης 13 Διακόπτης πόρτας μόνο για ΜΗ πυρολυτικά μοντέλα 14 Φως μόνο για πυρολυτικά μοντέλα 15 Σύνδεση σε εξάρτημα 16 Φωτισμός LED μόνο για ΜΗ πυρολυτικά μοντέλα 17 Πίσω πλαίσιο 18 Ανεμιστήρας 1...

Page 94: ...ταβείτε στο κύριο μενού του φούρνου ΠΡΟΕΙΔΟΠΟΙΗΣΗ Η ευαισθησία της περιοχής αφής της οθό νης TFT προσαρμόζεται συνεχώς στις συν θήκες του περιβάλλοντος Κατά τη σύνδε ση του φούρνου στην παροχή ρεύματος βεβαιωθείτε ότι η γυάλινη επιφάνεια του πίνακα χειρισμού είναι καθαρή και χωρίς εμπόδια Πατήστε το σύμβολο ΕΞΤΡΑ ΜΕΝΟΥ 2 για να μεταβείτε σε ένα μενού με αυτόματες συ νταγές και διάφορες πρόσθετες λ...

Page 95: ... ΑΕΡΑΣ ECO HYDROCLEAN ΦΟΥΣΚΩΜΑ ΖΥΜΗΣ ΑΠΟΨΥΞΗ ΔΙΑΤΗΡΗΣΗ ΖΕΣΤΟΥ ΠΙΑΤΟΥ ΑΡΓΟ ΜΑΓΕΙΡΕΜΑ ΠΥΡΟΛΥΣΗ ΕΞΑΡΤΑΤΑΙ ΑΠΟ ΤΟ ΜΟΝΤΕΛΟ ΣΗΜΕΙΩΣΗ Για περιγραφή του τρόπου χρήσης κάθε μιας από τις λειτουργίες ανατρέξτε στον οδηγό μαγειρέματος που συνοδεύει το φούρνο Από το κύριο μενού μαγειρέματος έχετε πρόσβαση στις ακόλουθες λειτουργίες του φούρνου Λειτουργίες που περιλαμβάνουν αυτόματη γρήγορη προθέρμανση Λειτουργ...

Page 96: ...τίσετε ή να τροποποιή σετε ένα πρόγραμμα δείτε την ενότητα Ημερολόγιο προγραμματισμός χρόνου μαγειρέματος Συμβατικές λειτουργίες μαγειρέματος Πατήστε ένα από τα σύμβολα που περιγράφο νται για να μεταβείτε στην οθόνη διαμόρφω σης μαγειρέματος 1 Συνιστώμενη θερμοκρασία μαγειρέματος Πατήστε το για να μεταβείτε στην οθόνη επιλογής θερμοκρασίας μαγειρέματος 2 Προγραμματισμένος χρόνος μαγειρέματος Πατήσ...

Page 97: ...ΧΗΤΙΚΗΣ ΕΙ ΟΠΟΙΗΣΗΣ 0 00 210º ΠΡΟΓΡΑΜΜΑΤΙΣΜΟΣ ΛΗΞΗΣ ΜΑΓΕΙΡΕΜΑΤΟΣ Αφού εισέλθετε στο μενού αυτό έχετε τις εξής επιλογές χρονομέτρου για προγραμματισμό ενός κύκλου μαγειρέματος Προσθήκη ηχητικής ειδοποίησης Προσθήκη βήματος Προγραμματισμός λήξης μαγειρέματος ΗΧΗΤΙΚΗ ΕΙΔΟΠΟΙΗΣΗ ΚΑΤΑ ΤΟΝ ΚΥΚΛΟ ΜΑΓΕΙΡΕΜΑΤΟΣ Παράγει ένα ηχητικό σήμα ως ειδοποίηση στο τέλος του προγραμματισμένου χρόνου Ο κύκλος μαγειρέμα...

Page 98: ...Κάντε αυτή την επιλογή αν θέλετε να προ γραμματίσετε έναν κύκλο μαγειρέματος με έως τρία ανεξάρτητα βήματα στον ίδιο κύκλο πατώντας το σύμβολο από την οθόνη μα γειρέματος ΜΟΝΟ αφού επιλέξετε τη διάρ κεια του κύκλου Πατήστε ΠΡΟΣΘΗΚΗ ΒΗΜΑΤΟΣ Έτσι μεταφέρεστε στο κύριο μενού Τώρα επι λέξτε τη λειτουργία του νέου βήματος ΠΛΗΡΟΦΟΡΙΕΣ Δεν μπορούν να χρησιμοποιηθούν όλες οι λειτουργίες μαγειρέματος με τη...

Page 99: ...να έχει προγραμματιστεί μόνο χρόνος μαγειρέματος Αφού καταχωρήσετε μια ώρα λήξης στην οθόνη εμφανίζονται η ένδειξη ΩΡΑ ΛΗΞΗΣ και η ώρα που έχετε επιλέξει 210º 3 30 18 00 ΩΡΑ ΛΗΞΗΣ Αφού ολοκληρώσετε τις ρυθμίσεις και πατή στε το πλήκτρο έναρξης ο φούρνος παρα μένει σε αναμονή για να ξεκινήσει ο κύκλος μαγειρέματος Εφαρμογές Ρυθμίσεις Ημερολόγιο Συνταγές ΕΞΤΡΑ ΜΕΝΟΥ Μεταβείτε στα Έξτρα Μενού χρησιμο...

Page 100: ...ολογιακές καταχωρίσεις που έχετε δημιουργήσει Για κάθε μία από αυ τές τις καταχωρήσεις υπάρχει ένα συρόμενο κουμπί μπλε αν η ειδοποίηση είναι ενεργή και γκρίζο αν είναι ανενεργή 5Σεπτέμβριος2015 Θέμα 13Φεβρουάριος2016 Θέμα 4Ιούλιος2016 Θέμα 12 00 10 00 12 00 ΗΜΕΡΟΛΟΓΙΟ Για να προσθέσετε μια νέα καταχώριση πα τήστε το σύμβολο Εμφανίζεται η οθόνη νης για να μετακινηθείτε μεταξύ των δυνατών επιλογών ...

Page 101: ...τις επιλογές για περιορισμό του μέγιστου χρό για καταχώρηση της ημερομηνίας και ώρας της υπενθύμισης Στην οθόνη εμφανίζονται τα κου μπιά Ακύρωση για ακύρωση της καταχώρη σης Επόμενο για να καταχωρίσετε ένα όνομα για την καταχώρηση και Τέλος για να επιβεβαι ώσετε την καταχώρηση με την επιλεγμένη ημε ρομηνία ώρα Αφού έχουν καταχωρηθεί οι λεπτομέρειες ενερ γοποιήστε την ειδοποίηση χρησιμοποιώντας το ...

Page 102: ... ECO που είναι ενεργο ποιημένος από προεπιλογή βελτιστοποιεί τη χρήση του φούρνου όταν αυτός δεν χρησιμο ποιείται Αν αυτή η επιλογή είναι απενεργοποιημένη Ενεργοποιείται αν πατήσετε για 2 ή περισσότερα δευτερόλεπτα και τότε εμφανίζεται το ακόλουθο μήνυμα σχετικά με την κατάσταση κλειδώματος πλήκτρων Σε αυτή την κατάσταση εμφανίζεται το σύμβολο με κόκκινο χρώμα Και η οθόνη και το κουμπί ON OFF είνα...

Page 103: ...Ανεξάρτητα από το αν έχει επιλεγεί μια ώρα λήξης όταν αρχίσει η διαδικασία καθαρισμού ακούγεται ένα ηχητικό σήμα επιβεβαίωσης 2 παρατεταμένα και 2 σύντομα μπιπ Ο χρόνος που υπολείπεται ως το τέλος της δι αδικασίας καθαρισμού εμφανίζεται στο κέντρο του κύκλου Λειτουργία TEKA Hydroclean Αυτή η λειτουργία επιτρέπει τον ευκολότερο καθαρισμό λίπους και λοιπών υπολειμμάτων τροφών που έχουν προσκολληθεί ...

Page 104: ...ατά στασης και συντήρησης Η λειτουργία αυτή σας δίνει τη δυνατότητα να πραγματοποιήσετε έναν κύκλο καθαρισμού με πυρόλυση κατά τη διάρκεια του οποίου λόγω των υψηλών θερμοκρασιών που αναπτύσσο νται στο εσωτερικό του φούρνου πραγματο ποιείται μια διαδικασία απανθράκωσης των συσσωρευμένων λιπών Κατά κανόνα συνιστάται να πραγματοποιεί ται ένας κύκλος πυρόλυσης κάθε 4 5 χρήσεις του φούρνου και να επιλ...

Page 105: ...η Αν συμβεί αυτό κλείστε καλά την πόρτα για να ενεργοποιηθεί το κλείδωμα και να τεθεί σε λειτουργία η διαδικασία πυρόλυσης 4 Όταν κλειδώσει η πόρτα θα ανάψει στην οθόνη του ρολογιού το σύμβολο και θα εμφανιστεί ο υπολειπόμενος χρόνος έως τη λήξη της διαδικασίας πυρόλυσης 1 29 P2 ΣΗΜΑΝΤΙΚΟ Πριν ξεκινήσετε τον κύκλο πυρολυτικού καθαρισμού μπορείτενατροποποιήσετε τη διαδικασία επιλέγοντας μια διαφορε...

Page 106: ...ς το ξεκλείδωμα θα ενεργοποιηθεί αμέσως και η οθόνη του φούρνου θα επανέλθει στην οθόνη αναμο νής 6 Η διαδικασία θέρμανσης του φούρνου έχει ολοκληρωθεί αλλά ο φούρνος είναι υπερ βολικά ζεστός για να χρησιμοποιηθεί Η διαδικασία ψύξης θα συνεχίσει να λει τουργεί και το σύμβολο θα παραμένει αναμμένο μέχρι να κρυώσει ο φούρνος ΣΗΜΑΝΤΙΚΟ Λόγω των υψηλών θερμοκρασιών που αναπτύσσονται στο εσωτερικό του ...

Page 107: ...πιλέξτε μια λειτουργία που είναι συμβατή με τη χρήση θερμομέτρου κρέατος Για συμβα τές λειτουργίες ανατρέξτε στην ενότητα Λει τουργίες του φούρνου στη σελίδα 83 Όταν μεταβείτε στην οθόνη διαμόρφωσης μαγειρέματος στην πάνω αριστερή πλευρά της οθόνης εμφανίζεται το σύμβολο θερμο μέτρου Αγγίξτε αυτό το σύμβολο για να δείτε τη θερμο κρασία που συνιστάται για την ολοκλήρωση του κύκλου μαγειρέματος Αγγί...

Page 108: ......

Page 109: ......

Page 110: ...kWh cycle kWh cycle L 0 68 0 88 70 81 1 32 kg iOven komora piekarnika kWh cycle kWh cycle L 0 68 0 88 70 IOVEN PIRO ...

Page 111: ...kWh cycle kWh cycle L 0 68 0 88 70 81 1 32 kg iOven komora piekarnika kWh cycle kWh cycle L 0 68 70 IOVEN PIRO 0 91 36 kg ...

Page 112: ...www teka com Cod 3371101 00 ...

Reviews: