© 2015
532_D - 02/15
4 of 20
A Watts Water Technologies Company
Preparation
tekmar or jeweller screwdriver
Phillips head screwdriver
Wire stripper
•
•
•
Drill (for wall anchor)
3/16" drill bit (for wall anchor)
•
•
Tools Required
------------------------------------------------------
------------------------------------------------------
Materials Required
--------------------------------------------------
--------------------------------------------------
18 AWG LVT Solid Wire
(Low Voltage Connections)
•
Installation
Choose the placement of the thermostats early in the construction process to
enable proper wiring during rough-in.
Installation Location
-------------------------------------------------
-------------------------------------------------
Consider the following:
Interior Wall.
Keep dry. Avoid potential leakage onto the control.
Relative Humidity less than 90%. Non-condensing environment.
No exposure to extreme temperatures beyond 32-122°F (0-50°C).
No draft, direct sun, or other cause for inaccurate temperature readings.
Away from equipment, appliances, or other sources of electrical
interference.
Easy access for wiring, viewing, and adjusting the display screen.
Approximately 5 feet (1.5 m) off the finished floor.
The maximum length of wire is 500 feet (150 m).
Strip wire to 3/8" (10 mm) for all terminal connections.
Use standard 8 conductor, 18 AWG wire.
•
•
•
•
•
•
•
•
•
•
•
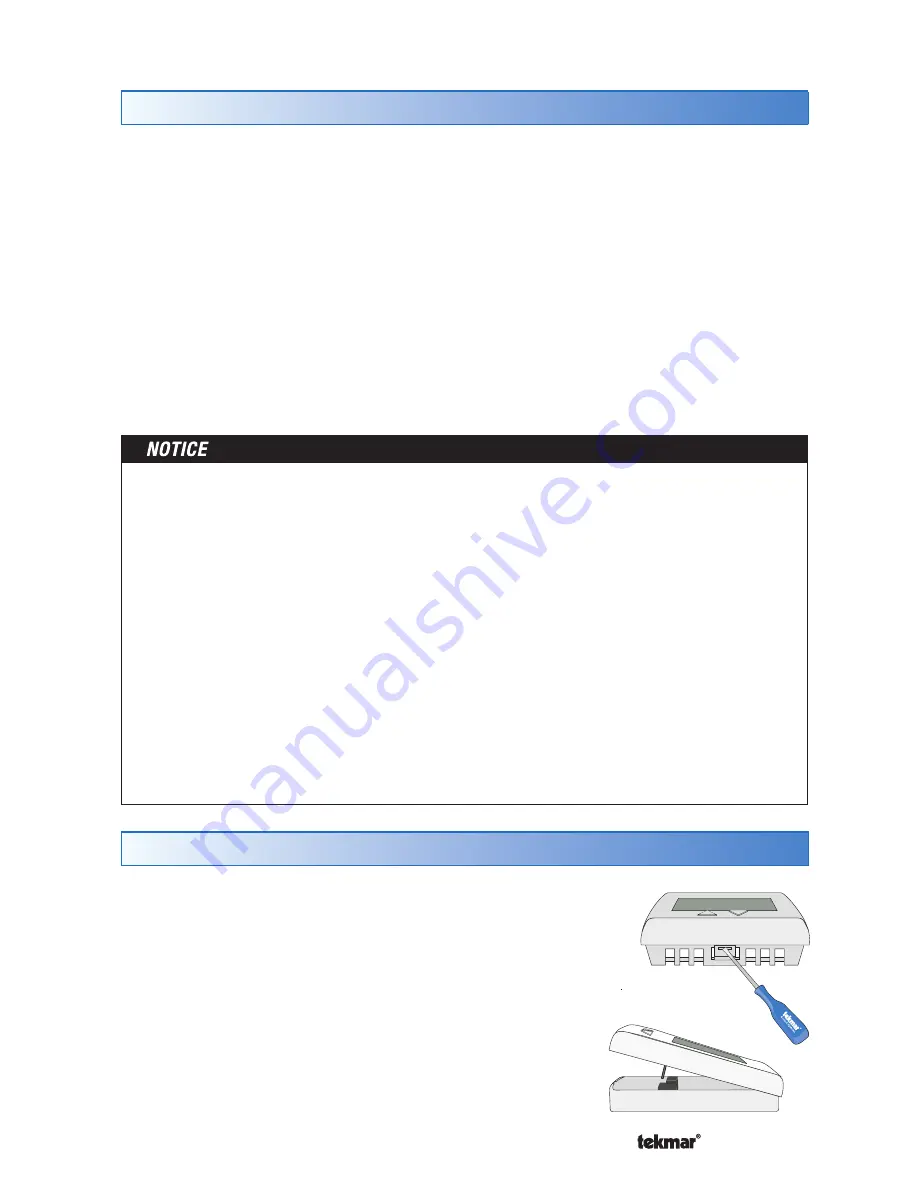
Removing The Thermostat Base
To remove the thermostat base:
Locate the tab on the bottom of the thermostat.
Push the tab with either your thumb or with a
screwdriver.
Lift the thermostat front away from the thermostat’s
base.
•
•
•


