7
QUICK-START DEM ONSTRATION
I. Supplies Needed
• a Nail • a Zinc Penny (dated after 1982) • a Nickel • a Quarter
II. Position the Detector
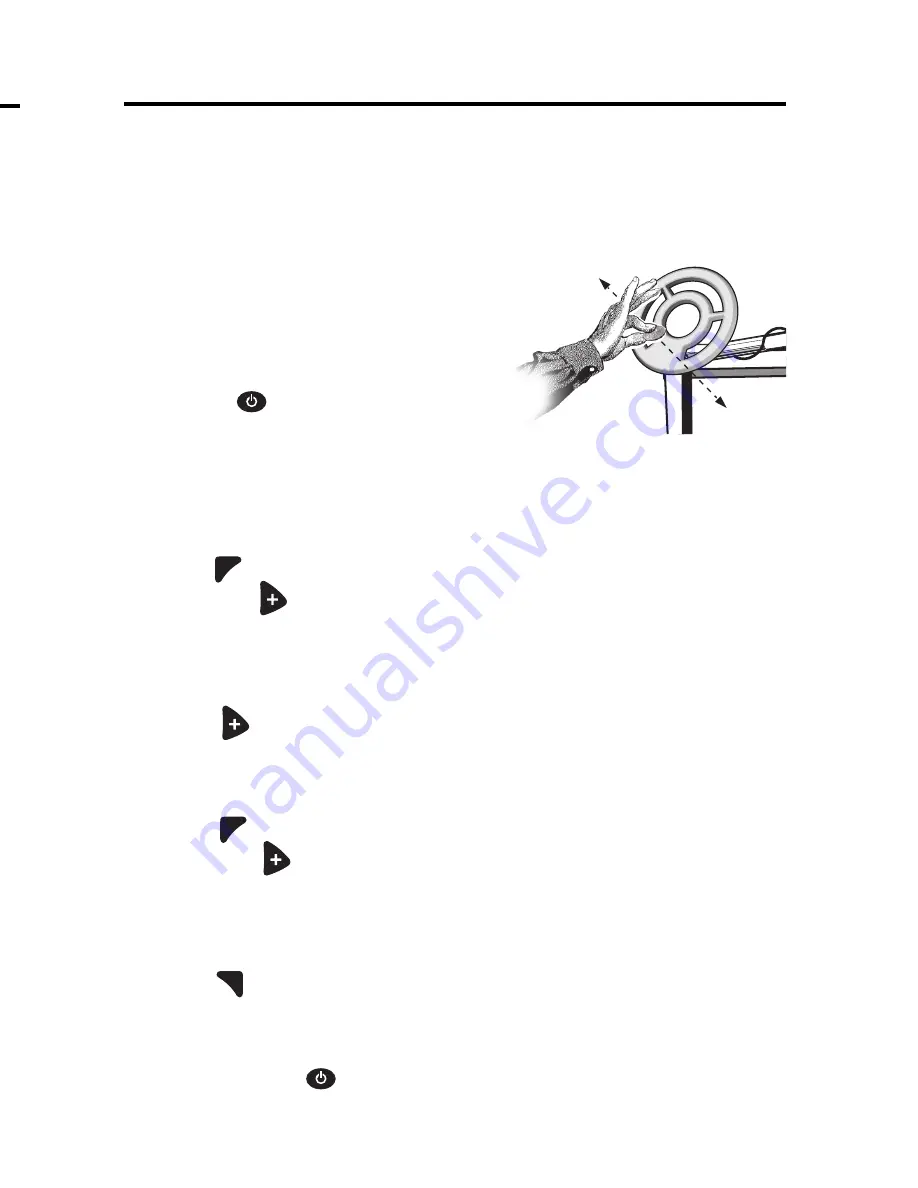
a. Place the detector on a table, with the searchcoil hanging over the edge.
Or better, have a friend hold the detector, with the searchcoil off the ground.
b. Keep the searchcoil away from walls, floors, and metal objects.
c. Remove watches, rings, and jewelry.
d. Turn off lights or appliances, whose electromagnetic
emissions may cause interference.
e. Pivot the searchcoil back.
III. Power Up
Press .
IV. Wave each object over the searchcoil.
a. Notice a different tone for each object:
Nail:
Low Tone
Coins: Sound varies in pitch and volume depending on distance from coil
b. Motion is required.
Objects must be in motion over the searchcoil to be detected in this mode.
V. Press
twice to enter the DISC. LEVEL program.
Then press
until “40” appears in the center of the screen.
a. The word “IRON” disappears from the display
VI. Wave the nail over the searchcoil.
a. The nail will not be detected
b. The nail has been “discriminated out.”
18
VII. Press
until “80” appears.
a. The words FOIL, NICKEL, PULLTAB, S-CAP+ and ZINC disappear.
VIII. Wave the nickel
a. The nickel will not be detected.
IX. Press
twice to toggle down to NOTCH.
Then press
three times
a. The word “NICKEL” reappears on the display
X. Wave the Nickel.
The nickel is now again detected.
The nickel has been “notched in.”
XI. Press
once to toggle down to ALL-METALS
XII. Pass the quarter over the searchcoil.
Move the quarter closer to and farther away from the searchcoil. Notice
the changing depth-display values at the bottom of the screen.
XIII. Press and hold
. Pass the quarter over the searchcoil
Move the quarter closer to and farther away from the searchcoil. Notice
the changing 2-digit depth-display values in the middle of the screen.
When manually ground balancing, try to “feel out” a spot on the ground
to make sure there is no metal present. In order to avoid locking onto
metal, the detector will not ground grab where the GROUND setting is
less than 40. Where the ground reads less than 40, the ground value is
displayed as “--”, and manual ground balancing is required.
To perform the Manual Ground Balancing operation, do the following:
1. Select the GROUND GRAB mode
The legend GROUND appears near the top of the screen.
The present ground balance setting is displayed (0-99).
2. Physically pump the searchcoil and detector up and down over
the ground. Lift it about 6 inches above the ground and lower it
to within 1 inch of the ground, about once or twice a second. You
are trying to balance the sound as described on the top of page 19.
a. If the detector balances, use this setting as a starting point for
manual balancing.
b. If “--” is displayed press
until you find the desired setting.
3. While pumping the coil press
or
to change the ground
balance setting.
OPERATION and CONTROLS
cont.
GROUND BALANCING
continued
The range of ground balance settings indicated on the display range
from 0 to 99; however, each displayed number spans about 10 pad
presses of the
and
buttons. The actual internal ground balance
settings change with each step; there are a total of
1000
different settings.
The
scale at the upper-right of the screen indicates the AMOUNT
of magnetic mineralization. The searchcoil must be in motion to
measure this. The most accurate measurement is obtained by
pumping the searchcoil, as in the Ground Grab procedure.
The indicators are as follows:
VL = Very Low Mineralization
L = Low Mineralization
M = Moderate Mineralization
H = High Mineralization
The two-digit GROUND setting number displayed at the center of the
LCD indicates the TYPE of ground mineralization.
Some typical ground mineralization types are:
0 -10 Wet salt and alkalis
5 - 25 Metallic iron. Very few soils in this range. You are probably
over metal.
26-39 Very few soils in this range -occasionally some saltwater beaches
40-75 Red, yellow, and brown iron-bearing clay minerals
75-95 Magnetite and other black iron minerals


