background image

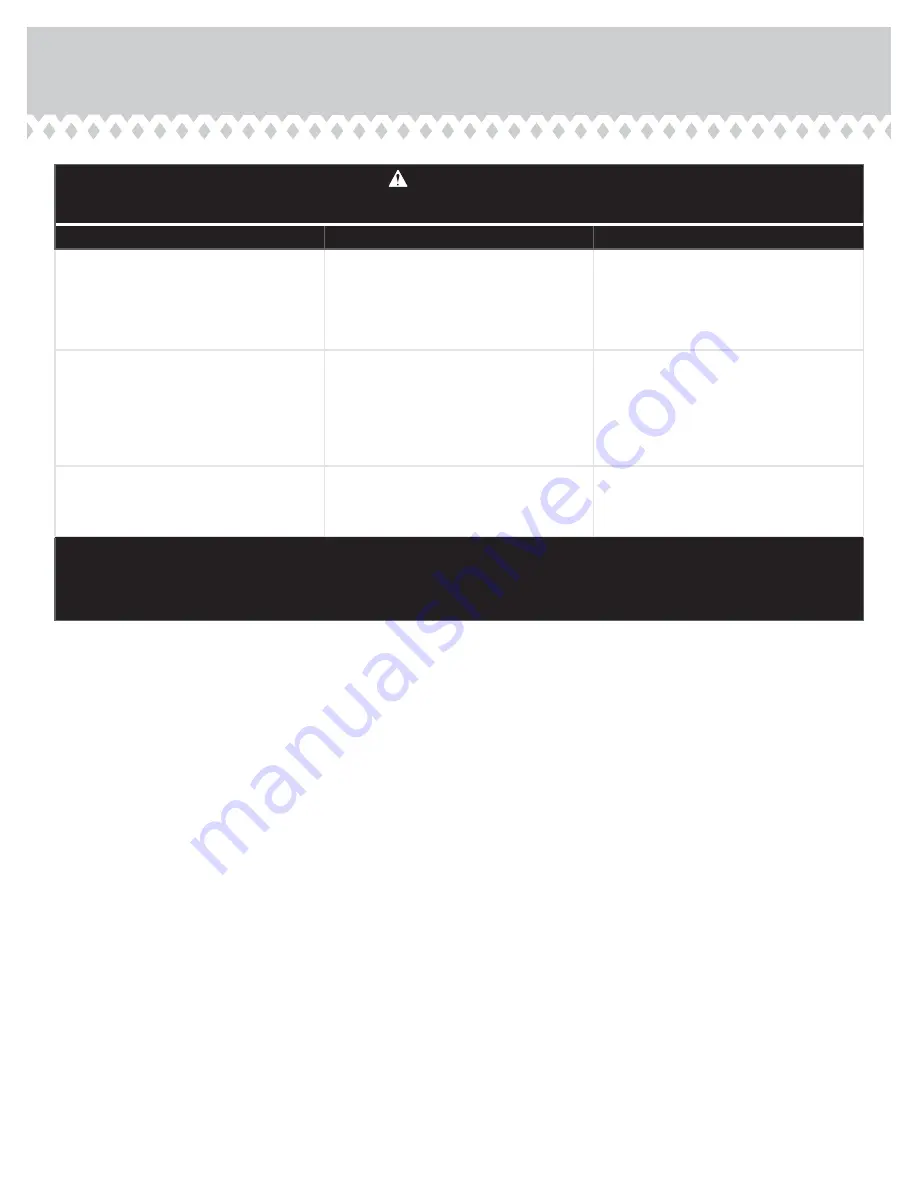
WARNING

Please use your furniture correctly and safely. Improper use can cause safety hazards,

or damage to your furniture or household items. 

Carefully read the following chart.

Look out for:

What can happen:

How to avoid the problem:

• Overloaded shelves and drawers.
• Improper loading can cause the product
to be top-heavy.

• Risk of injury.
• Top-heavy furniture can tip over.
• Overloaded shelves and drawers can
break.

• Never exceed the weight limits shown in
the instructions.
• Work from bottom to top when loading
shelves and drawers. Place the heavier 
items on the lower shelves or in lower 
drawers.

• Improperly moving furniture that is not
designed and equipped with casters.

• Furniture can tip over or break if
improperly moved.
• Physical injury. Furniture can be very
heavy.
• Breakage of tops - particularly with
double pedestal furniture (drawers at both 
ends).

• Unload shelves and drawers from top to
bottom before moving the unit.
• Do not push furniture, especially on a
carpeted fl oor. Have a friend help you lift 
the item and set it in place.
• Provide support to the center section of
the top when lifting the furniture.

• Placing TVs on furniture items that are
not designed to support a television is 
hazardous.

• Risk of injury or death. TVs can be very
heavy. Plus the weight and location of the 
picture tube tends to make TVs unbalanced 
and prone to tipping forward.

• This product is not designed to support a
television.

Summary of Contents for 5412320

Page 1: ...NOTE THIS INSTRUCTION BOOKLET CONTAINS IMPORTANT SAFETY INFORMATION PLEASE READ AND KEEP FOR FUTURE REFERENCE Home Study L Shaped Desk Model 5412320 www teknikoffice co uk Sit and surf Teknik ...

Page 2: ...tents Assembly Tools Required 3 4 5 32 41 Part Identification Hardware Identification Assembly Steps Safety Hammer Not actual size No 2 Phillips Screwdriver Tip Shown Actual Size Skip the power trip This time Page 2 ...

Page 3: ...TTOM 1 G RIGHT MODESTY PANEL 1 H LEFT MODESTY PANEL 1 I PURSE SHELF 1 J SHELF 1 K BACK 1 L LEFT LEG 1 M RIGHT FRONT LEFT REAR LEG 3 N LEFT CORNER LEG 1 O RIGHT CORNER LEG 1 P RIGHT REAR LEG 1 Q BACK LEG 1 R DRAWER FRONT 1 W PURSE SHELF MOLDING 1 X LEFT FRONT MOLDING 1 Y RIGHT FRONT MOLDINIG 1 Z FRONT MOLDING 1 AA TOP LEFT SIDE MOLDING 1 BB TOP RIGHT SIDE MOLDING 1 CC BOTTOM MOLDING 1 DD LEFT END M...

Page 4: ... ANGLE BRACKET 12 PP SUPPORT PIN 2 TT SLIDE CAM 2 YY PULL 1 WW CORD CLIP 2 VV WASHER 1 XX TIE PLATE 2 QQ AAA SCREW COVER 10 CAM COVER 10 ZZ BBB BLACK 2 1 4 FLAT HEAD SCREW 2 CCC BLACK 1 7 8 FLAT HEAD SCREW 9 DDD BLACK 9 16 LARGE HEAD SCREW 32 EEE BLACK 9 16 FLAT HEAD SCREW 12 FFF GOLD 5 16 FLAT HEAD SCREW 8 HHH NAIL 22 GGG SILVER 1 4 MACHINE SCREW 1 FILE GLIDE 2 LL 30S BLACK 1 9 16 FLAT HEAD SCREW...

Page 5: ...t or the floor å To begin assembly push a TWIST LOCK FASTENER MM into the large holes in the BOTTOM F and RIGHT MODESTY PANEL G Repeat this step for the LEFT MODESTY PANEL H PURSE SHELF I SHELF J and CORNER LEGS N and O Page 5 F G MM MM MM 18 used Do not tighten the TWIST LOCK FASTENERS in this step ...

Page 6: ...he ENDS A and B LEFT UPRIGHT C and LEGS L M P and Q Page 6 A B C L M P Q M M 18 used Arrow NN Arrow Arrow Do not tighten the HIDDEN CAMS in this step NN NN Arrow The arrow in the HIDDEN CAM must point toward the hole in the edge of the board Hole ...

Page 7: ...å Turn eighteen CAM SCREWS OO into the TOPS D and E and LEGS L M P and Q Step 3 Page 7 D E M M M P Q L OO 18 used ...

Page 8: ... HIDDEN CAMS Page 8 A B C M M Q L Curved edge Finished edge Curved edge Finished edge Finished edge S u r f a c e w i t h H I D D E N C A M S S u r f a c e w i t h H I D D E N C A M S S u r f a c e w i t h H I D D E N C A M S These surfaces should be even These surfaces should be even 1 2 ...

Page 9: ...SCREWS in the ENDS å Second slide the END MOLDINGS DD and II onto the ENDS A and B until they are against the LOWER MOLDINGS Line up the grooves in the MOLDINGS over the heads of the SCREWS in the ENDS Step 5 Page 9 B A GG EE DD II 2nd 1st 1st 2nd BLACK 9 16 FLAT HEAD SCREW 12 used in this step EEE These edges should be even These edges should be even Shoulder Apply pressure with your hands as you...

Page 10: ...S A and B Line up the grooves in the MOLDINGS over the heads of the SCREWS in the ENDS Page 10 B A FF HH These edges should be even These edges should be even Shoulder Apply pressure with your hands as you guide the MOLDINGS over the SCREWS and onto the ENDS ...

Page 11: ... B over å Fasten the REAR LEGS M and P to the ENDS A and B Tighten four HIDDEN CAMS Step 7 Page 11 B A M P These surfaces should be even Curved edge S u r f a c e w i t h H I D D E N C A M S S u r f a c e w i t h H I D D E N C A M S ...

Page 12: ...T HEAD SCREWS FFF å NOTE For each EXTENSION RAIL turn a SCREW into the hole shown in the enlarged diagram Then slide the inner cartridge of the EXTENSION RAIL out to find the other hole that lines up with the hole in the END Turn a SCREW into this hole Page 12 B C M L Push the black lever in and pull the SLIDE from the RAIL JJ KK JJ JJ Open end Finished edge Open end Finished edge GOLD 5 16 FLAT HE...

Page 13: ...owel end How to use the SAUDER TWIST LOCK FASTENER 1 Insert the dowel end of the FASTENER into the hole of the adjoining part NOTE The dowel end of the FASTENER must remain fully inserted in the hole of the adjoining part while locking the FASTENER 2 Tighten the FASTENER with a Phillips screwdriver as tight as possible Do not stand the unit upright without the BACK fastened The unit may collapse C...

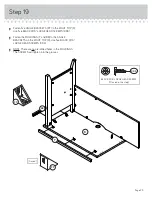
Page 14: ...Step 10 å Slide the BOTTOM MOLDING CC onto the notched edge of the BOTTOM F å U S Patent No 5 499 886 Page 14 F CC Slide the BOTTOM MOLDING CC onto the notched edge Notched edge Groove ...

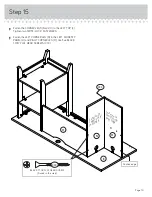
Page 15: ...å Fasten the BOTTOM F and SHELF J to the LEFT UPRIGHT C Tighten four TWIST LOCK FASTENERS Step 11 Page 15 F J C M ...

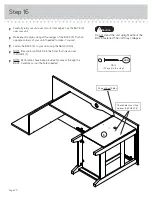
Page 16: ...Step 12 å Carefully turn your unit onto its top å Fasten the LEGS L M and Q to the LEFT TOP E Tighten four HIDDEN CAMS Page 16 C B E M L M Q S u r f a c e w i t h h o l e s CC Rounded edge Large hole ...

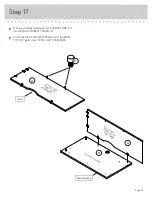
Page 17: ... AA to the ANGLE BRACKETS on the LEFT TOP E Use seven BLACK 9 16 LARGE HEAD SCREWS DDD å NOTE There are no pre drilled holes in the MOLDINGS The SCREWS will tighten into the grooves Step 13 Page 17 E Z AA X PP PP 7 used BLACK 9 16 LARGE HEAD SCREW 14 used in this step DDD Don t worry It isn t Rome This can be built in a day ...

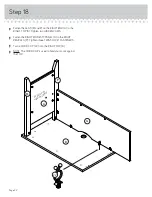
Page 18: ...sten the LEFT MODESTY PANEL H to the BACK LEG Q Use two BLACK 2 1 4 FLAT HEAD SCREWS BBB å Turn a CORD CLIP VV into the LEFT TOP E å NOTE The CORD CLIP is used to hold your cords against the TOP Page 18 Surface with TWIST LOCK FASTENER E Q H VV BLACK 2 1 4 FLAT HEAD SCREW 2 used in this step BBB ...

Page 19: ...S å Fasten the LEFT CORNER LEG N to the LEFT MODESTY PANEL H and RIGHT CORNER LEG O Use five BLACK 1 7 8 FLAT HEAD SCREWS CCC Step 15 Page 19 E H Surface with TWIST LOCK FASTENER N O Surface with TWIST LOCK FASTENER Finished edge BLACK 1 7 8 FLAT HEAD SCREW 5 used in this step CCC CCC ...

Page 20: ...å Fasten the BACK K to your unit using the NAILS HHH å NOTE Be sure to tap NAILS into the holes that line up over the SHELF J å NOTE Perforations have been provided for access through the BACK Carefully cut out the holes needed Page 20 K These holes must line up over the SHELF J Edge without holes NAIL 22 used in this step HHH Do not stand the unit upright without the BACK fastened The unit may co...

Page 21: ...DESTY PANEL G å Fasten the RIGHT MODESTY PANEL G to the RIGHT TOP D Tighten two TWIST LOCK FASTENERS Step 17 Page 21 G TT S u r f a c e w i t h T W I S T L O C K F A S T E N E R S Surface with TWIST LOCK FASTENERS G D S u r f a c e w i t h h o l e s Rounded edge Notch ...

Page 22: ...D Tighten two HIDDEN CAMS å Fasten the RIGHT MODESTY PANEL G to the RIGHT REAR LEG P Tighten three TWIST LOCK FASTENERS å Turn a CORD CLIP VV into the RIGHT TOP D å NOTE The CORD CLIP is used to hold your cords against the TOP Page 22 G D A P Surface with HIDDEN CAMS M VV ...

Page 23: ...Fasten the MOLDINGS Y and BB to the ANGLE BRACKETS on the RIGHT TOP D Use five BLACK 9 16 LARGE HEAD SCREWS DDD å NOTE There are no pre drilled holes in the MOLDINGS The SCREWS will tighten into the grooves Step 19 Page 23 PP PP D Y BB 5 used BLACK 9 16 LARGE HEAD SCREW 10 used in this step DDD ...

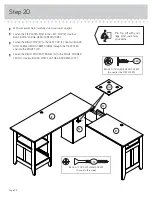
Page 24: ...he LEFT TOP E Use four BLACK 9 16 LARGE HEAD SCREWS DDD through the TIE PLATES and into the RIGHT TOP å Fasten the RIGHT MODESTY PANEL G to the RIGHT CORNER LEG O Use two BLACK 1 7 8 FLAT HEAD SCREWS CCC Page 24 D E O QQ G BLACK 9 16 LARGE HEAD SCREW 8 used for the TIE PLATES DDD BLACK 1 7 8 FLAT HEAD SCREW 2 used in this step CCC Pro Tip Lift with your legs And you know your arms ...

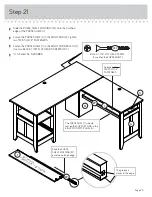
Page 25: ...ER LEG O Use two BLACK 1 7 8 FLAT HEAD SCREWS CCC å U S Patent No 5 499 886 Step 21 Page 25 I Surface with TWIST LOCK FASTENERS Slide the PURSE SHELF MOLDING W onto the notched edge W O I Surface without TWIST LOCK FASTENERS W BLACK 1 7 8 FLAT HEAD SCREW 2 used for the PURSE SHELF CCC A The PURSE SHELF I should rest on the SUPPORT PINS in the RIGHT MODESTY PANEL G G The groove is closer to this ed...

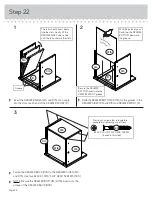
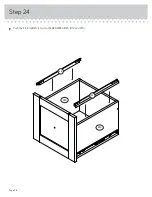
Page 26: ...ER BOTTOM D716 into the grooves in the DRAWER SIDES D14 and D15 and DRAWER FRONT R The tabs should insert freely into the slots Gently tilt the DRAWER SIDES side to side until the tabs slip into the slots Groove Be sure the DRAWER BOTTOM inserts into the DRAWER FRONT groove D14 D15 D716 D716 D14 D15 D78 D15 R R Unfinished surface With the palm of your hand tap the DRAWER BOTTOM down into the groove...

Page 27: ... and D15 Use four GOLD 5 16 FLAT HEAD SCREWS FFF through holes 1 and 3 å NOTE The screw head in the CAM must be visible through the slotted hole in the SLIDE Screw head turn CAM to line up holes in SLIDES with holes in DRAWER SIDES KK KK YY YY 1 2 3 1 2 3 Open end Open end D15 D14 GOLD 5 16 FLAT HEAD SCREW 4 used in this step FFF ...

Page 28: ...Step 24 å Push the FILE GLIDES LL onto the DRAWER SIDES D14 and D15 Page 28 LL LL D15 D14 ...

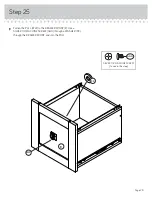
Page 29: ...en the PULL WW to the DRAWER FRONT R Use a SILVER 1 4 MACHINE SCREW GGG through a WASHER XX through the DRAWER FRONT and into the PULL Step 25 Page 29 R WW XX SILVER 1 4 MACHINE SCREW 1 used in this step GGG ...

Page 30: ...Step 26 å Push a GROMMET RR and GROMMET CAP SS into the large holes in the TOPS D and E Page 30 D E SS RR Almost time to celebrate With a nap ...

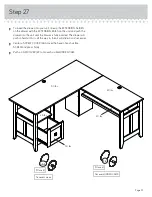
Page 31: ...he drawer is fully inserted The drawer will push in hard until it is all the way in then it will slide in and out easier å Center a SCREW COVER AAA over the head of each visible SCREW and press firmly å Push a CAM COVER ZZ onto each visible HIDDEN CAM Step 27 Page 31 AAA ZZ 50 lbs 40 lbs 25 lbs 30 lbs 20 lbs To cover HIDDEN CAMS To cover screws 10 used 10 used ...

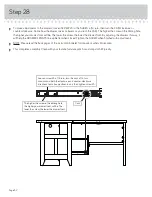
Page 32: ...DRAWER FRONTS line up better when closed Tighten the SCREW when finished with adjustments å NOTE Please read the back pages of the instruction booklet for important safety information å This completes assembly Clean with your favorite furniture polish or a damp cloth Wipe dry Page 32 The higher the screw in the oblong hole the higher your drawer front will be The lower the screw the lower the drawe...

Page 33: ...y moving furniture that is not designed and equipped with casters Furniture can tip over or break if improperly moved Physical injury Furniture can be very heavy Breakage of tops particularly with double pedestal furniture drawers at both ends Unload shelves and drawers from top to bottom before moving the unit Do not push furniture especially on a carpeted floor Have a friend help you lift the ite...

Reviews: