background image


å

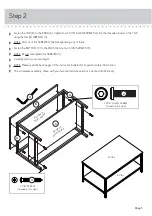
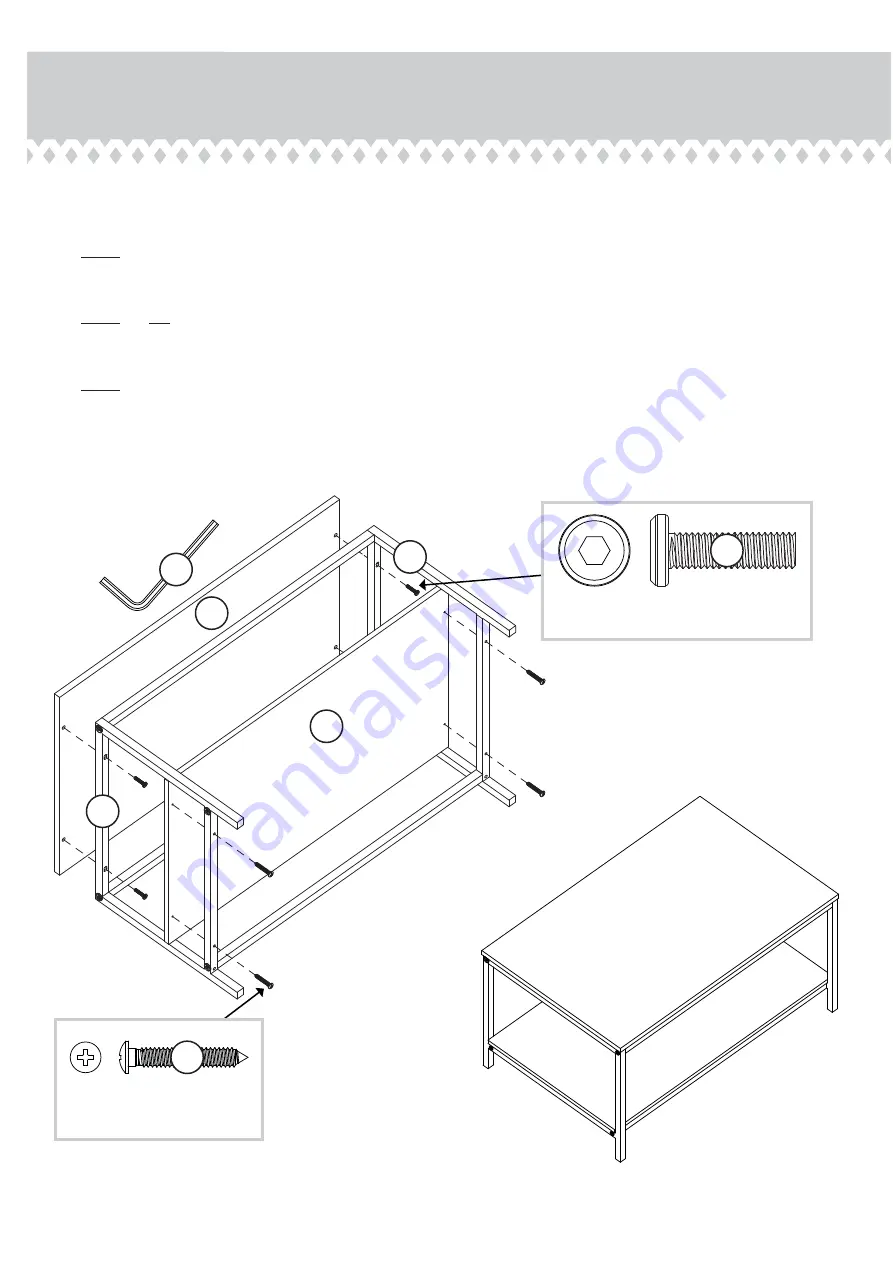
Fasten the TOP (B) to the ENDS (A). Tighten four 1-3/16" ALLEN SCREWS (2) into the threaded inserts in the TOP
using the ALLEN WRENCH (4).


å

NOTE: Start all of the SCREWS (2) before tightening any of them.


å

Fasten the BOTTOM (C) to the ENDS (A). Use four 1-1/8" SCREWS (3).


å

NOTE: Do not overtighten the SCREWS (3).


å

Carefully stand your unit upright.


å

NOTE: Please read the back pages of the instruction booklet for important safety information.


å

This completes assembly. Clean with your favorite furniture polish or a damp cloth. Wipe dry.

Step 2

Page 5

1-3/16" ALLEN SCREW

(4 used in this step)

2

B

A

A

Sur

face 

with holes

C

Sur

face 

with holes

1-1/8" SCREW

(4 used in this step)

3

50 lbs.

40 lbs.

4

Summary of Contents for 5420275

Page 1: ... Style Coffee Table Model 5420275 www teknikoffice co uk NOTE THIS INSTRUCTION BOOKLET CONTAINS IMPORTANT SAFETY INFORMATION PLEASE READ AND KEEP FOR FUTURE REFERENCE Guaranteed to hold other beverages too Teknik ...

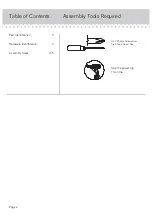
Page 2: ...Table of Contents 3 3 4 5 Part Identification Hardware Identification Assembly Steps Page 2 Assembly Tools Required No 2 Phillips Screwdriver Tip Shown Actual Size Skip the power trip This time ...

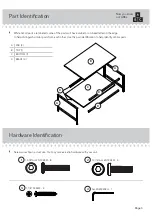
Page 3: ...milar parts from each other Use this part identification to help identify similar parts A END 2 B TOP 1 C BOTTOM 1 D BRACE 4 Now you know our ABCs Page 3 Hardware Identification å Screws are shown actual size You may receive extra hardware with your unit A B C A D D ALLEN WRENCH 1 4 1 3 8 ALLEN SCREW 8 1 1 3 16 ALLEN SCREW 4 2 1 1 8 SCREW 4 3 D ...

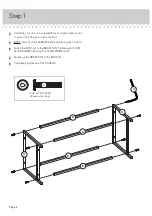
Page 4: ...the floor å NOTE Start all of the SCREWS before tightening any of them å Fasten the ENDS A to the BRACES D Tighten eight 1 3 8 ALLEN SCREWS 1 using the ALLEN WRENCH 4 å Square up the BRACES D to the ENDS A å Completely tighten all of the SCREWS Page 4 1 3 8 ALLEN SCREW 8 used in this step 1 A D A D D D 4 ...

Page 5: ... four 1 1 8 SCREWS 3 å NOTE Do not overtighten the SCREWS 3 å Carefully stand your unit upright å NOTE Please read the back pages of the instruction booklet for important safety information å This completes assembly Clean with your favorite furniture polish or a damp cloth Wipe dry Step 2 Page 5 1 3 16 ALLEN SCREW 4 used in this step 2 B A A Surface with holes C Surface with holes 1 1 8 SCREW 4 us...

Page 6: ...can tip over Overloaded shelves can break Never exceed the weight limits shown in the instructions Work from bottom to top when loading shelves Place the heavier items on the lower shelves Placing TVs on furniture items that are not designed to support a television is hazardous Risk of injury or death TVs can be very heavy Plus the weight and location of the picture tube tends to make TVs unbalanc...

Reviews: