background image

Step 

Page 7

 å

NOTE: You should start each SCREW a few turns before completely tightening any of them.

 å

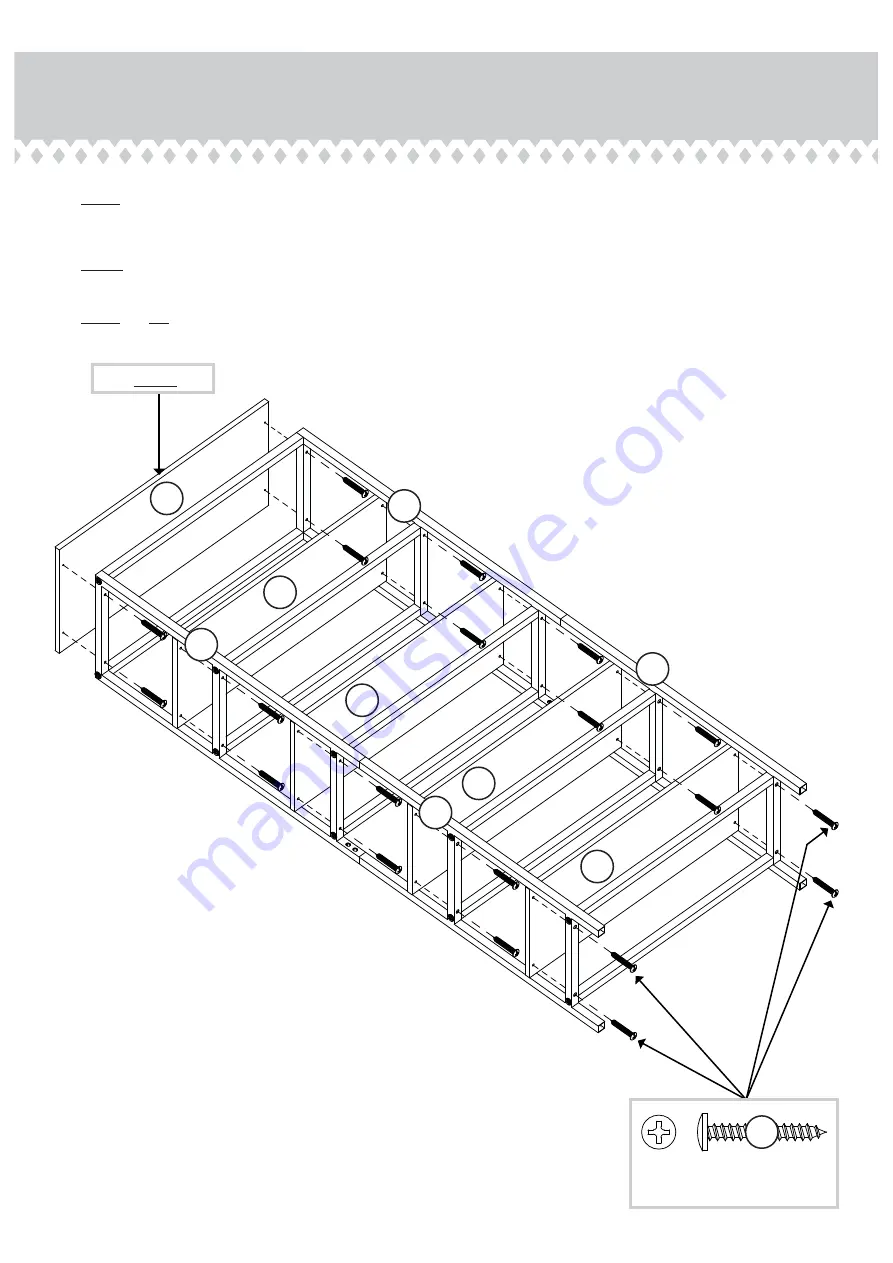
Fasten the TOP (A) and SHELVES (B and G) to the ENDS (H and I). Use twenty 1-1/8" SCREWS (2).

 å

NOTE: The TOP (A) is larger than the SHELVES (B and G). The UPPER SHELF (B) is fi nished on both sides. Be sure to
position these parts exactly as shown in the diagram below.

 å

NOTE: Do not overtighten the SCREWS.

Step 3

1-1/8" SCREW

(20 used in this step)

H

I

H

I

A

B

G

G

G

Sur

face with holes

Sur

face with holes

Unfi

 nished

sur

face

Unfi

 nished

sur

face

Unfi

 nished

sur

face

Edge without hole

2

Summary of Contents for 5423023

Page 1: ...ffice co uk Industrial 4 Shelf Bookcase Smoked Oak Model 5423023 NOTE THIS INSTRUCTION BOOKLET CONTAINS IMPORTANT SAFETY INFORMATION PLEASE READ AND KEEP FOR FUTURE REFERENCE Show everyone how smart you are Teknik ...

Page 2: ...f Contents Assembly Tools Required Part Identification Hardware Identification Assembly Steps Safety Warranty No 2 Phillips Screwdriver Tip Shown Actual Size 3 4 5 8 13 14 15 Page 2 Skip the power trip This time ...

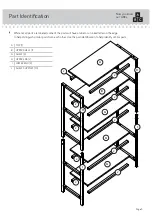
Page 3: ...l or an inked letter on the edge to help distinguish similar parts from each other Use this part identification to help identify similar parts Now you know our ABCs A TOP 1 B UPPER SHELF 1 G SHELF 3 H UPPER END 2 I LOWER END 2 J SHELF SUPPORT 10 Page 3 A B G H I J J H I G G J J J J J J J J ...

Page 4: ...dentification å Screws are shown actual size You may receive extra hardware with your unit ALLEN WRENCH 1 8 1 2 ALLEN SCREW 8 3 FURNITURE TIPPING RESTRAINT KIT 1 99 Page 4 1 1 8 SCREW 20 2 1 3 16 ALLEN SCREW 20 9 ...

Page 5: ... should start each SCREW a few turns before completely tightening any of them å Insert the LOWER END I into the UPPER END H å Then fasten the UPPER END H to the LOWER END I Use four 1 2 ALLEN SCREWS 3 and the ALLEN WRENCH 8 å Repeat this step for the other ENDS H and I H I 1 2 ALLEN SCREW 8 used in this step 3 H I 8 Page 5 ...

Page 6: ...asten the ENDS H and I to the SHELF SUPPORTS J Use twenty 1 3 16 ALLEN SCREWS 9 and the ALLEN WRENCH 8 å NOTE Be sure to square up the SHELF SUPPORTS J to the ENDS H and I before you completely tighten the SCREWS Step 2 Page 6 8 H I H I J J J J J J J J J J 1 3 16 ALLEN SCREW 20 used in this step 9 ...

Page 7: ...CREWS 2 å NOTE The TOP A is larger than the SHELVES B and G The UPPER SHELF B is finished on both sides Be sure to position these parts exactly as shown in the diagram below å NOTE Do not overtighten the SCREWS Step 3 1 1 8 SCREW 20 used in this step H I H I A B G G G Surface with holes Surface with holes Unfinished surface Unfinished surface Unfinished surface Edge without hole 2 ...

Page 8: ... RESTRAINT KIT 99 for added stability Fasten a bracket to the back edge of the TOP A using the 5 8 screw as shown å Place your unit in its final location against a wall å Follow the instructions included in the KIT to fasten your unit to the wall å NOTE Please read the back pages of the instruction booklet for important safety information å This completes assembly Clean with your favorite furniture...

Page 9: ... break if improperly moved Physical injury Furniture can be very heavy Unload shelves from top to bottom before moving the furniture Do not push furniture especially on a carpeted floor Have a friend help you lift the item and set it in place This unit must be positioned against a wall Children climbing on the shelves can cause the product to tip Risk of injury or death Do not allow children to cli...

Reviews: