background image

Step 1

 å

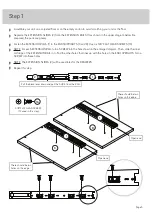
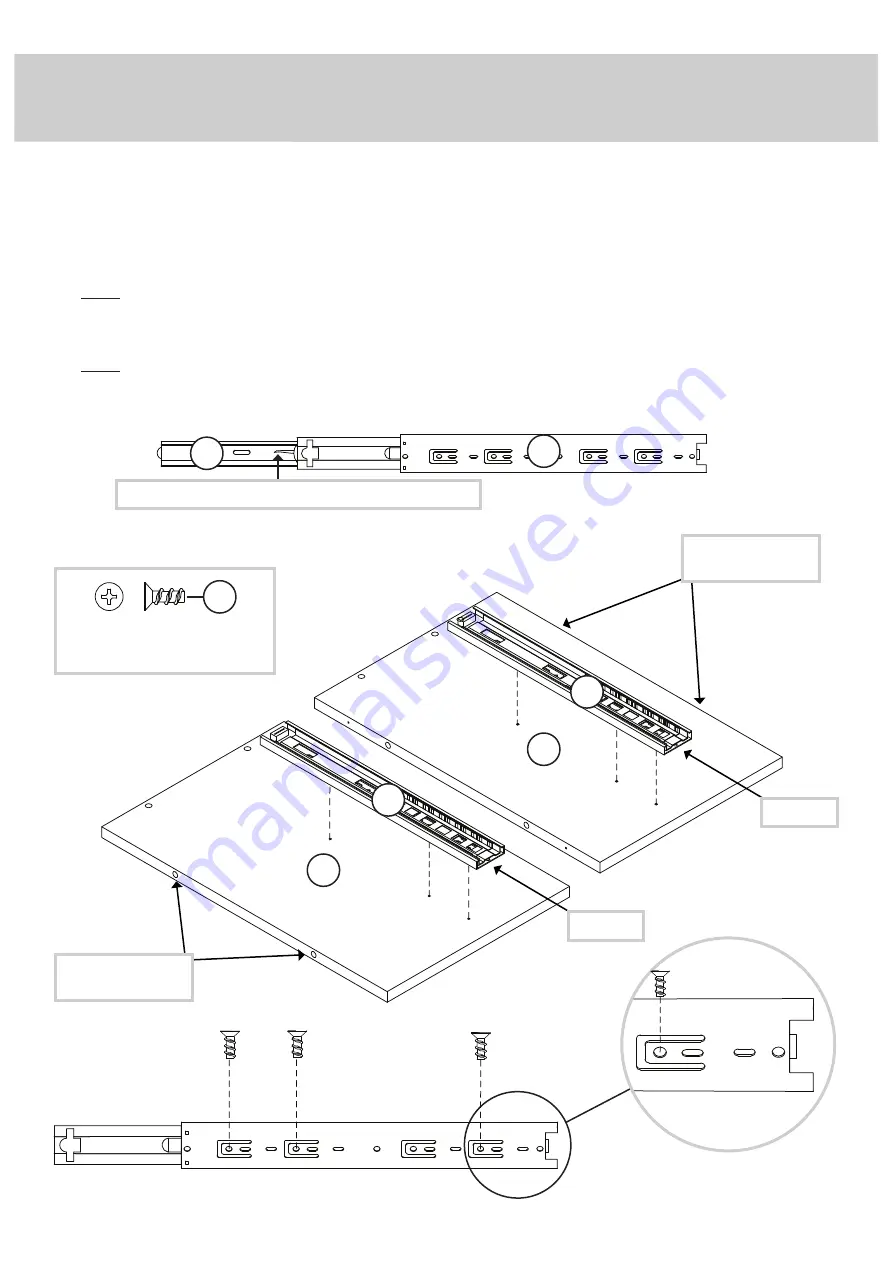
Assemble your unit on a carpeted fl oor or on the empty carton to avoid scratching your unit or the fl oor.

 å

Separate the EXTENSION SLIDES (2) from the EXTENSION RAILS (1) as shown in the upper diagram below. Be
prepared, the parts are greasy.

 å

Fasten the EXTENSION RAILS (1) to the ENDS/UPRIGHTS (C and D). Use six 3/8" FLAT HEAD SCREWS (16).

 å

NOTE: For each EXTENSION RAIL, turn a SCREW into the hole shown in the enlarged diagram. Then, slide the inner
cartridge of the EXTENSION RAIL in to fi nd the other holes that lines up with the holes in the END./UPRIGHTS. Turn a 
SCREW into these holes.

 å

NOTE: The EXTENSION SLIDES (2) will be used later for the DRAWERS.

 å

Repeat this step.

Open end

There should be two 
holes on this edge.

There should be two 
holes on this edge.

Open end

C

D

1

1

Pull the black lever down and pull the SLIDE from the RAIL.

1

2

Page 5

3/8" FLAT HEAD SCREW

(12 used in this step)

16

Summary of Contents for 5427134

Page 1: ...Iron Foundry Double Pedestal Desk Model 5427134 For all your newfangled gadgetry Teknik www teknikoffice co uk ...

Page 2: ...Part Identification Hardware Identification Assembly Steps No 2 Phillips Screwdriver Tip Shown Actual Size Table of Contents Assembly Tools Required 3 4 5 16 Page 2 ...

Page 3: ...p identify similar parts Now you know our ABCs A TOP 1 B MODESTY PANEL 1 C LEFT END UPRIGHT 2 D RIGHT END UPRIGHT 2 E BACK 2 F CABINET BOTTOM 2 G DRAWER FRONT 2 H LEFT DRAWER SIDE 2 J RIGHT DRAWER SIDE 2 K DRAWER BACK 2 L DRAWER BOX FRONT 2 N DRAWER BOTTOM 2 O BOTTOM 2 P SHORT BRACE 4 Q END FRAME 2 R UPRIGHT FRAME 2 S LONG BRACE 1 A B C C D D E E F F G G H H J J K K L L N N O O P P P P Q Q R R S P...

Page 4: ...D SCREW 4 11 7 8 PAN HEAD SCREW 8 17 1 3 8 HEX HEAD SCREW 34 13 14 1 1 4 MACHINE SCREW 4 1 3 16 FLAT HEAD SCREW 16 15 CAM SCREW 1 4 WOOD DOWEL 40 5 6 ADJUSTABLE GLIDE 8 EXTENSION SET SHOWN SEPARATED HIDDEN CAM 1 3 1 EXTENSION RAIL 4 2 EXTENSION SLIDE 4 L WRENCH 1 9 PULL 2 7 FILE GLIDE 4 8 APPLIQUE CARD 1 10 Page 4 3 8 FLAT HEAD SCREW 24 16 ...

Page 5: ... For each EXTENSION RAIL turn a SCREW into the hole shown in the enlarged diagram Then slide the inner cartridge of the EXTENSION RAIL in to find the other holes that lines up with the holes in the END UPRIGHTS Turn a SCREW into these holes å NOTE The EXTENSION SLIDES 2 will be used later for the DRAWERS å Repeat this step Open end There should be two holes on this edge There should be two holes on...

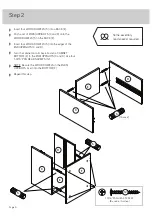
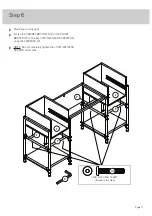
Page 6: ... the END UPRIGHTS C and D å Turn the cabinet onto its back Fasten a CABINET BOTTOM F to the END UPRIGHTS C and D Use four 1 9 16 PAN HEAD SCREWS 12 å NOTE Be sure the WOOD DOWELS in the ENDS UPRIGHTS insert into the BOTTOM F å Repeat this step Step 2 C C E E D D F 5 5 5 1 9 16 PAN HEAD SCREW 8 used in this step 12 Page 6 Some assembly and snacks required 16 used ...

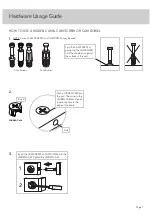
Page 7: ... Turn the CAM SCREW or gently tap the CAM DOWEL until the shoulder is against the surface of the part 1 Hidden Cam Hidden Cam Arrow Push a HIDDEN CAM into the part The arrow in the HIDDEN CAM must point toward the hole in the edge of the board Hole 2 3 1 2 Insert the CAM SCREW or CAM DOWEL into the HIDDEN CAM Tighten the HIDDEN CAM Page 7 ...

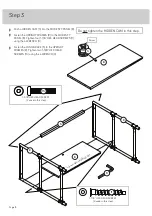
Page 8: ...SCREWS 11 using the L WRENCH 9 å Fasten the LONG BRACE S to the UPRIGHT FRAMES R Tighten two 1 3 8 HEX HEAD SCREWS 13 using the L WRENCH 9 3 Arrow 1 7 8 HEX HEAD SCREW 4 used in this step 11 9 B B S R R S u r f a c e w i t h H I D D E N C A M 1 3 8 HEX HEAD SCREW 2 used in this step 13 Page 8 Do not tighten the HIDDEN CAM in this step ...

Page 9: ...HEAD SCREWS 13 using the L WRENCH 9 å Fasten the END FRAMES Q to the SHORT BRACES P Tighten four 1 3 8 HEX HEAD SCREWS 13 using the L WRENCH 9 å NOTE Do not completely tighten the 1 3 8 HEX HEAD SCREWS at this time 1 3 8 HEX HEAD SCREW 8 used in this step 13 Q Q R R 9 Page 9 P P P P ...

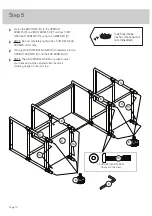
Page 10: ...SCREWS at this time å Turn eight ADJUSTABLE GLIDES 6 completely into the UPRIGHT FRAMES R and the END FRAMES Q å NOTE The ADJUSTABLE GLIDES are used to level your desk and will be adjusted after the unit is standing upright in the last step Step 5 1 3 8 HEX HEAD SCREW 8 used in this step 13 6 6 Q Q R R 13 13 13 O O 9 Page 10 Side Step Make nachos Optional but recommended ...

Page 11: ...CABINET BOTTOMS F to the SHORT BRACES P Tunn eight 1 3 8 HEX HEAD SCREWS 13 using the L WRENCH 9 å NOTE Do not completely tighten the 1 3 8 HEX HEAD SCREWS at this time Step 6 9 1 3 8 HEX HEAD SCREW 8 used in this step 13 F F P P P P Page 11 ...

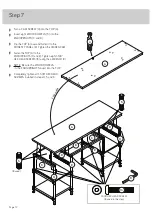
Page 12: ...EN CAM å Fasten the TOP A to the END UPRIGHTS Q and R Tighten eight 1 3 8 HEX HEAD SCREWS 13 using the L WRENCH 9 å NOTE Be sure the WOOD DOWELS in the END UPRIGHTS insert into the TOP å Completely tighten all 1 3 8 HEX HEAD SCREWS installed in steps 4 5 and 6 Step 7 4 A B A 5 5 C C D D F L I P O V E R 8 used Page 12 1 3 8 HEX HEAD SCREW 8 used in this step 13 9 Q Q R R ...

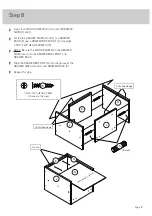
Page 13: ...HEAD SCREWS 15 å NOTE Be sure the WOOD DOWELS in the DRAWER SIDES insert into the DRAWER BOX FRONT and DRAWER BACK å Slide the DRAWER BOTTOM N into the groove of the DRAWER SIDES H and J and DRAWER BACK K å Repeat this step H H J J K K L N 1 3 16 FLAT HEAD SCREW 16 used in this step 15 5 8 used Page 13 Groove Unfinished edge Unfinished edge U n fi n i s h e d s u r f a c e ...

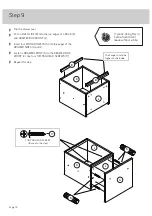
Page 14: ...WELS 5 into the edges of the DRAWER SIDES H and J å Fasten a DRAWER FRONT G to the DRAWER BOX FRONT L Use four 7 8 PAN HEAD SCREWS 17 å Repeat this step K L L G 8 8 5 5 7 8 PAN HEAD SCREW 8 used in this step 17 Page 14 If you re doing this to help a friend don t leave without a bite H J The flange should be higher on the inside ...

Page 15: ... SIDES H and J Use six 3 8 FLAT HEAD SCREWS 16 å Fasten a PULL 7 to a DRAWER FRONT G Use two 1 1 4 MACHINE SCREWS 14 å Repeat this step 1 1 4 MACHINE SCREW 4 used in this step 14 Open end Open end H J 2 2 G 7 Page 15 3 8 FLAT HEAD SCREW 12 used in this step 16 ...

Page 16: ... Peel the APPLIQUE from the APPLIQUE CARD 10 and stick it onto the HIDDEN CAM in the MODESTY PANEL å Place your desk in its final location Turn all ADJUSTABLE GLIDES downward until they touch the floor å NOTE Please read the back pages of the instruction booklet for important safety information å This completes assembly Clean with a damp cloth Wipe dry Step 11 3 0 l b s 3 0 l b s 3 5 l b s 35 lbs 5 ...

Page 17: ...y moving furniture that is not designed and equipped with casters Furniture can tip over or break if improperly moved Physical injury Furniture can be very heavy Breakage of tops particularly with double pedestal furniture drawers at both ends Unload shelves and drawers from top to bottom before moving the unit Do not push furniture especially on a carpeted floor Have a friend help you lift the ite...

Reviews: