Step 3
å
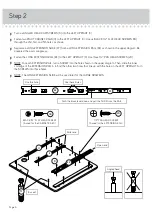
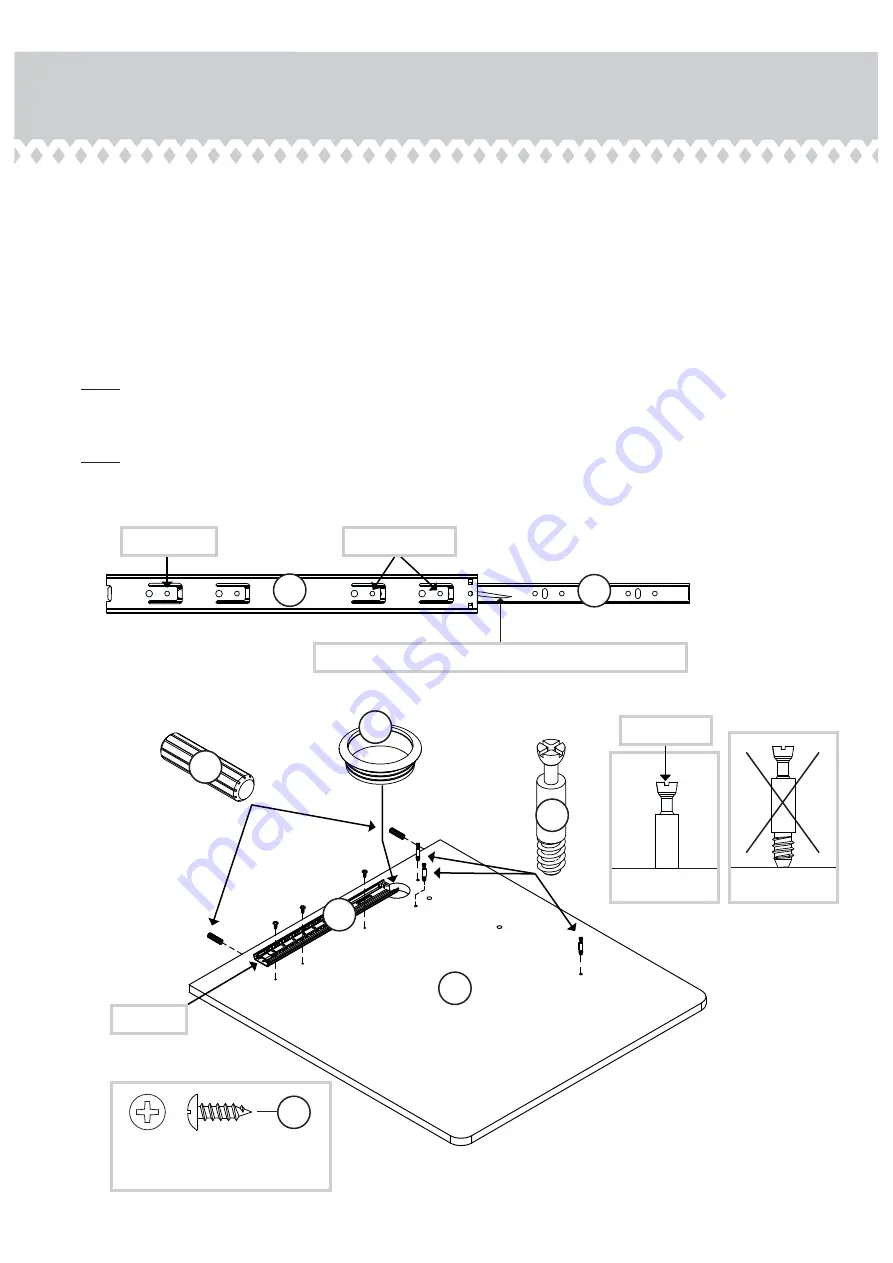
Flip the LEFT UPRIGHT (C) over.
å
Turn three ANGLED HEAD CAM SCREWS (3) into the LEFT UPRIGHT (C).
å
Push two LONG WOOD DOWELS (6) into the short edge of the LEFT UPRIGHT (C).
å
Separate a SHORT EXTENSION SLIDE (HH) from a SHORT EXTENSION RAIL (GG) as shown in the upper diagram.
Be prepared, the parts are greasy.
å
Fasten the SHORT EXTENSION RAIL (GG) to the LEFT UPRIGHT (C). Use three 1/2" PAN HEAD SCREWS (20).
å
NOTE: For each EXTENSION RAIL, turn a SCREW into the hole shown in the upper diagram. Then, slide the inner
cartridge of the EXTENSION RAIL in to fi nd the other two holes that line up with the holes in the LEFT UPRIGHT. Turn
the SCREWS into those holes.
å
NOTE: The SHORT EXTENSION SLIDE will be used later for the KEYBOARD SHELF.
å
Insert a GROMMET (9) into the large hole in the LEFT UPRIGHT (C).
6
Angled head
Open end
1/2" PAN HEAD SCREW
(3 used for the EXTENSION RAIL)
20
3
Push the black lever down and pull the SLIDE from the RAIL.
C
9
GG
HH
GG
Page 7
Use this hole.
Use these holes.

