Step
Step 14
å
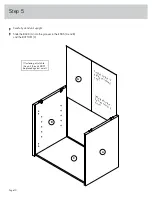
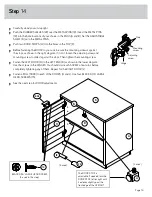
Carefully stand your unit upright.
å
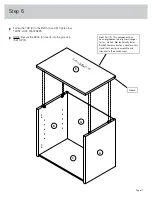
Push the RUBBER SLEEVES (2R) over the METAL PINS (1R). Insert the METAL PINS
(1R) into the hole locations of your choice in the ENDS (A and B). Set the ADJUSTABLE
SHELF (D) onto the METAL PINS.
å
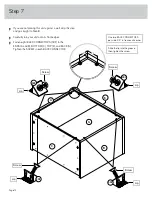
Push two DOOR STOPS (4I) into the holes in the TOP (K).
å
Before fastening the DOOR to your unit, be sure the mounting screw is against
the stops as shown in the right diagram. If it isn't, loosen the adjusting screw and
mounting screw to slide it against the stops. Then tighten the mounting screw.
å
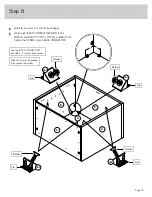
Fasten the LEFT DOOR (H) to the LEFT END (B) as shown in the lower diagram.
Use the screws in the HINGES. You should start each SCREW a few turns before
completely tightening any of them. Repeat for the RIGHT DOOR (J).
å
Fasten a PULL (189K) to each of the DOORS (H and J). Use four BLACK 9/16" LARGE
HEAD SCREWS (1S).
å
See the next step for DOOR adjustments.
K
189K
4I
Mounting
screw
Stop
Hinge
Adjusting
screw
A
B
H
BLACK 9/16" LARGE HEAD SCREW
(4 used in this step)
1S
The DOOR STOP is
adjustable. If needed, turn the
DOOR STOP left or right until
it extends slightly past the
front edge of the UPRIGHT.
Page 19
D
(4 used)
(2 used)
2R
1R

