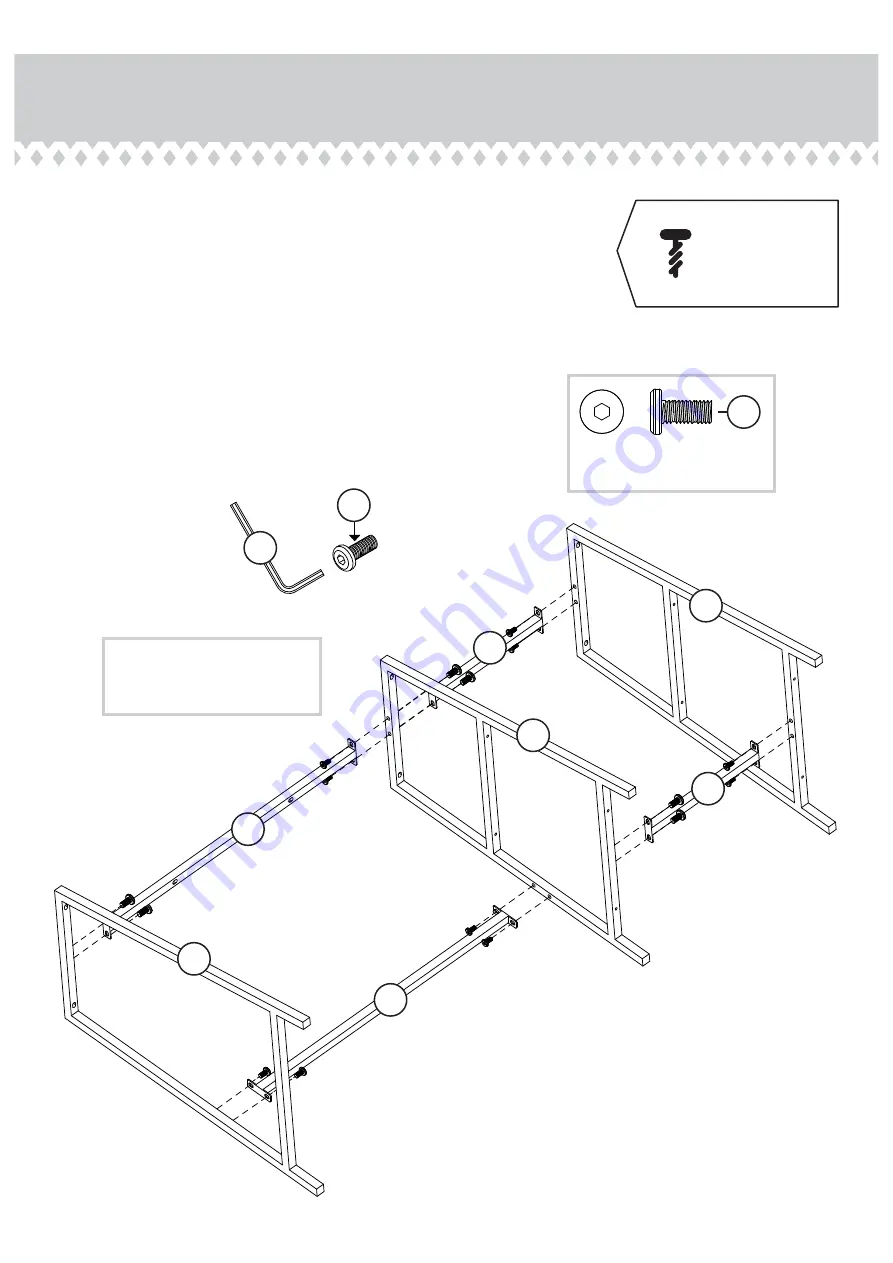
Step 1
å
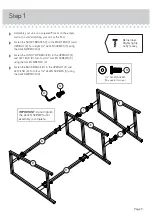
Assemble your unit on a carpeted fl oor or on the empty
carton to avoid scratching your unit or the fl oor.
å
Fasten the SHORT BRACES (I) to the RIGHT END (F) and
UPRIGHT (E). Turn eight 1/2" ALLEN SCREWS (3) using
the ALLEN WRENCH (4).
å
Fasten the LONG TOP BRACE (G) to the UPRIGHT (E)
and LEFT END (D). Turn four 1/2" ALLEN SCREWS (3)
using the ALLEN WRENCH (4).
å
Fasten the BACK BRACE (H) to the UPRIGHT (E) and
LEFT END (D). Turn four 1/2" ALLEN SCREWS (3) using
the ALLEN WRENCH (4).
D
E
F
I
I
G
H
4
3
IMPORTANT
: Do not tighten
the ALLEN SCREWS until
assembly is complete.
Remember:
Righty tighty.
Lefty loosey.
Page 5
1/2" ALLEN SCREW
(16 used in this step)
3


