Installing IDE & Floppy Devices 6-7
Mechanical Floppy Disk Installation:
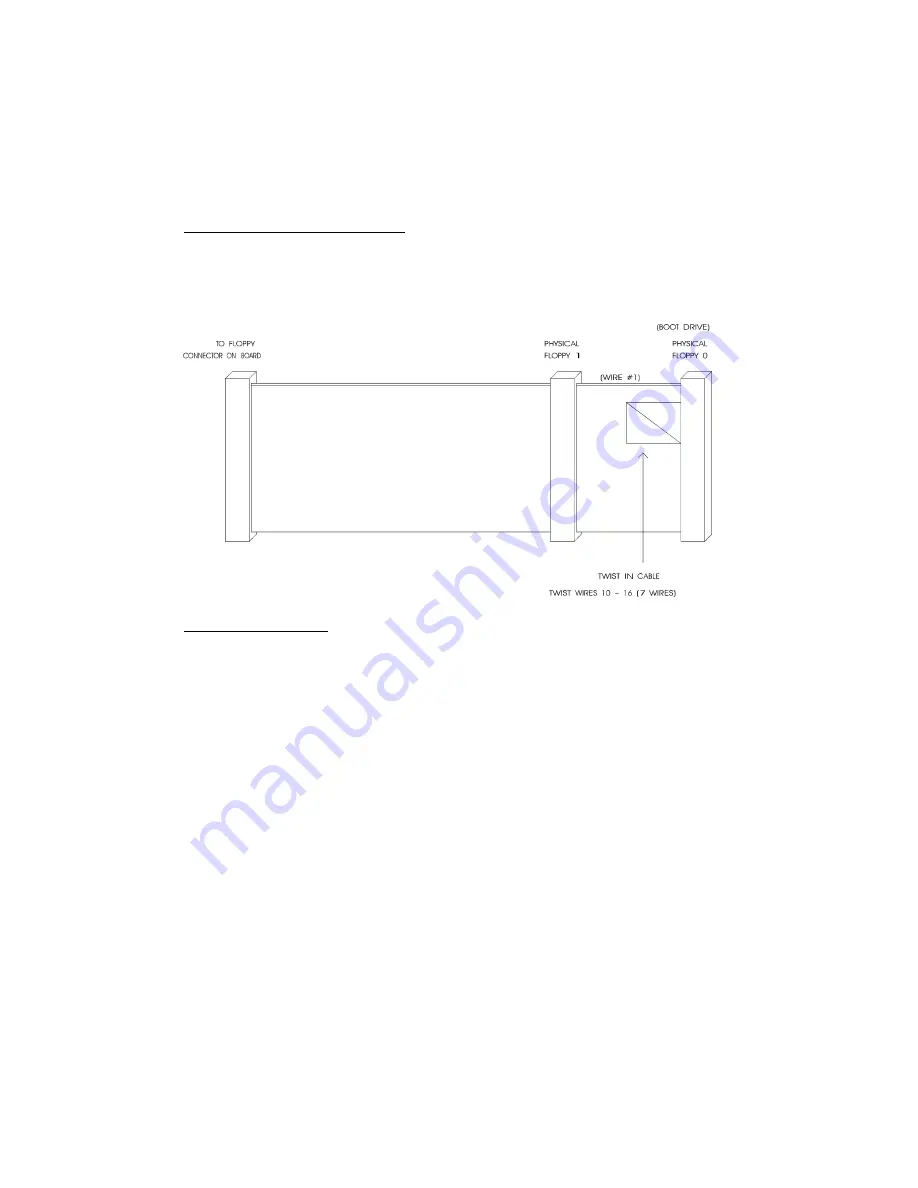
The installation of the floppy drives is done via a standard IBM 34-pin flat ribbon cable
that connects to J2.
DIAGRAM 6-1:
Floppy Disk Cable
Enhanced Floppy Mode:
In order to connect your 2.88MB floppy drive, simply indicate the proper floppy disk drive
in the AMIBIOS Setup program (Section 9).
Summary of Contents for VIPer808
Page 21: ...Installing Memory 2 3 DIAGRAM 2 1 Assembly Top...
Page 22: ...Installing Memory 2 5 DIAGRAM 2 2 Assembly Bottom...
Page 26: ...Setting Jumpers 3 3 DIAGRAM 3 1 VIPer808 Jumper Locations with Default Settings...
Page 28: ...Setting Jumpers 3 6 TABLE 3 1a Jumper Settings W1 W4 W13 W14...
Page 29: ...Setting Jumpers 3 7 TABLE 3 1b AMD DX2 DX4 CPU Jumper Settings W1 W15 W15C...
Page 30: ...Setting Jumpers 3 8 TABLE 3 1c AMD 5x86 CPU Jumper Settings W1 W15 W15C...
Page 31: ...Setting Jumpers 3 9 TABLE 3 1d Intel CPU Jumper Settings W1 W15 W15C...
Page 32: ...Setting Jumpers 3 10 TABLE 3 1e SGS CPU Jumper Settings W1 W15 W15C...
Page 33: ...Setting Jumpers 3 11 TABLE 3 1f Jumper Settings W18 W20 W23...
Page 92: ...Memory I O Maps B 1 APPENDIX B MEMORY I O MAPS B 01 MEMORY MAPS DIAGRAM B 1 Memory Map Diagram...
Page 96: ...Mechanical Layout Block Diagram C 3 DIAGRAM C 1 Mechanical Specifications...


