Kona Macro User Guide
T0004279_UG
Version 1.1
TEKTELIC Communications Inc.
Confidential
Page 12 of 34
•
For the direct DC power feed option, the DC positive pin must be at positive potential
relative to the DC negative pin. If the polarity is reversed, the unit will not sustain damage
but will not operate until the connection polarity is corrected.
•
Although the Kona Macro Gateway can be powered through either a direct DC input or
through power over Ethernet (PoE), simultaneous application of power to both inputs may
result in unexpected operation and shall be avoided.
•
The Kona Macro Gateway power source must meet SELV requirements.
2.2
Unpacking and Inspection
The following should be considered during the unpacking of a new Kona Macro Gateway.
1.
Inspect the shipping carton and report any significant damage to TEKTELIC.
2.
Unpacking should be conducted in a clean and dry location when possible.
3.
Do not discard the shipping box or foam inserts as they will be required if a unit is
returned for repair or re-configuration.
2.3
Required Equipment for Installation
The following tools are required to install the Kona Macro Gateway module:
1.
A 6 point metric socket set and torque wrench drive.
2.
Anti-oxidant compound (NO-OX-ID, Penetrox, Noalox, Ox-Gard or equivalent).
3.
A small wire brush.
4.
A clean cloth.
5.
Weatherproofing tape kit for the RF connectors (Scotch Wireless Weatherproofing Kit,
WK-101 recommended).
6.
Appropriately sized pipe clamps for pole mounting or appropriate screws or bolts (four
sized M8) with any required anchors according to the wall construction for wall
mounting.
2.4
Kona Macro Gateway Mounting
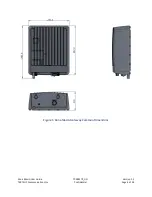
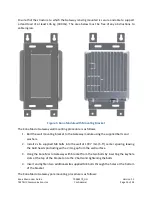
Kona Macro Gateway is designed to be mounted to a vertical pole or wall using a mounting
bracket. The mounting bracket is a single part that bolts to the back surface of the Gateway
using supplied hardware (four M6x1.0 - 14 mm bolts with flat and star lock washers) as
illustrated in Figure 5. The Gateway module must be oriented with the connector bulkhead
facing down, towards earth.


