background image

Summary of Contents for PS 5010

Page 1: ...gon 97077 070 3391 00 Product Group 76 COMMITTEDTO EXCELLENCE PLEASE CHECK FOR CHANGE INFORMATION AT THE REAR OF THIS MANUAL PROGRAMMABLE POWER SUPPLY Francais Deutsch INSTRUCTION MANUAL Serial Number First Printing JUN 1981 Revised APR 1988 ...

Page 2: ...vCs Le contenu de ce rnanuel ne peut atre reprodu t sous quelque tor 01981 pfi 8f 3 b a 3 7t i Ft7G me que ce so t sans I accord de Tektron xInc Tous les produ ts TEKTRONIX sont brevet US et Etranger et T E K T R O N I X TEK SCOPE MOBILE les logotypes TEKTRONIX TEK SCOPE MOBILE dCposCs d 7 3 t n 3 x t t n Z f t i W 2 T d Imprime aux USA TEKTRONI X s e rCserve le drort de modifier NZIE 7 E P R J w ...

Page 3: ...TION lnstructions d utilisation 2 1 Instructions de reemballage 2 1 Auto test a la mise en service 2 2 Tableau 2 1 Reglages obtenus a la mise en service 2 2 Tableau 2 2 Codes d erreurs en face avant 2 2 Page Chapitre 2 INSTRUCTIONS D UTILISATION cont Commandes connecteurs et indicateurs 2 2 Conditionsd utilisation 2 7 Commutation automatique 2 7 Limitation de courant par retournement alimentation ...

Page 4: ...es d8entr6e sortie 3 2 Commandes d btat de I instrument 3 2 Commandes du systime 3 2 cont Page PROGRAMMATlON cont Liste des commandes detaillees Messages et protocole de communication elimiteur de commande Fin de message Formattaged un message Formats numbriques Table de conversion ASCII et IEEE 488 GPIB Arguments numeriques arrondis Protocole d un message Messages multiples Weponse de I instrumen...

Page 5: ... 4 4 4 4 4 4 Section 4 Section 5 Section 6 Page THEORY OF OPERATION cont Circuits 4 4 Logic Supply 4 5 4 6 Converter Circuits 10 4 6 Floating Supply 4 7 Floating Supply 4 8 CALIBRATION Performance Check Procedure 5 1 Introduction 5 1 Test Equipment Required 5 1 PerformanceCheck Summary Sheet 5 3 Internal Adjustment Procedure 5 15 Introduction 5 15 Services Available 5 15 Test Equipment Required 5 ...

Page 6: ... ELECTRICAL PARTS Section 9 DIAGRAMS AND CIRCUIT BOARD ILLUSTRATIONS Signature Analysis Test Adjustment Locations Component Reference Charts Schematic Diagrams Section 10 REPLACEABLE MECHANICAL PARTS Fig I Exploded View Accessories CHANGE INFORMATION REV MAR 1986 ...

Page 7: ...ction of load and monitor tests leads to minimize voltage reading error 2 9 Multiple load connections 2 10 Typicalapplication utilizing remote sensing 2 11 Installation et retrait du tiroir 2 1 Commandes et connecteurs en face avant 2 3 Skquence d nements utilisbe pour entrer un paramhtre dans une alimentation 2 5 Droites de charge correspondant diff6rentes impedancede charge 2 7 aracteristiques d...

Page 8: ...eform is TTL compatible Assignments for rightmost connector as viewed from rear of instrument Assignments for leftmost connector as viewed from rear of instrument Assignments for GPlB connector as viewed from rear of instrument Fig No NOTE The following illustrations are located in the diagrams section at the rear of this manual GPlB address switch and buffer test Kernel test CPU address lines and...

Page 9: ...pdes d erreurs utilises sur le Bus et reponse H appel sd ectif en s h e 3 21 Codes d erreurs relatifs au contrcle en face avfnt 3 22 dglages a la mise en service 3 22 Fehler Abfrage und Status Information 3 21 Fehler Codesauf der Frontplatte 3 22 Eischalt Einstellungen 3 22 U1120 Chip Selects 4 3 U1310 Chip Selects 4 3 U1311 chip selects 4 3 Operating System Firmware Location and Addresses 4 3 Sug...

Page 10: ... of the power module power cord To avoid electrical shock plug the power cord into a properly wired receptacle before connecting to the product input or output terminals A pro tective ground connection by way of the grounding conduc tor in the power module power cord is essential for safe operation Danger Arising From Loss of Ground Upon loss of the protective ground connection all accessi ble con...

Page 11: ...everal points in this prod uct To avoid personalinjury do not touch exposed connec tions and components while power is on Disconnect power before removing protective panels sol dering or replacing components Power Source This product is intended to operate in a power module con nected to a power source that will not apply more than 250 volts rms between the supply conductors or between either supp...

Page 12: ... d alimen tation Pour eviter tout choc electrique inserer la prise du cordon d alimentation dans une prise de distribution corres pondante avant de connecter I entree ou les sorties de I appa reil Pour utiliser I appareil en toute sc curitc une connexion B la masse r6alis6e au moyen d un conducteur pr6vu dans le cordon d alimentation est indispensable Danger provoqu6 par la coupure de connexion de...

Page 13: ...tiels dangereux existent en differents points de I appareil Pour eviter toute blessure ne pas intervenir sur les connexions et les composants alors que I appareil est sous tension Debrancher I alimentation avant le demontage des panneaux soudure ou remplacementde composants Source d alimentation Cet appareil est conqu pour fonctionner a partir d une sour ce d alimentation qui n applique pas plus d...

Page 14: ...sgAnge ist der Netzstecker ineine korrekt ver drahtete Steckdose einzustecken Vetwenden Sie den Schutzleiter nicht als einzige Verbindung zwischen zwei oder mehreren Geraten Zur Vermeidung von elektri scken Schlagen sind die Gerate untereinander mit sepa raten Leitungen m u verbinden Gefahr durch fehlende Schutzerde Durch eine fehlende Schutzerde konnen alle beruhr baren leitenden Teile einschlief...

Page 15: ...ten oder Er urn im Bedarfsfall Erste Hilfe oder Wiederbelebungsver setzen on Bauteilen 1st irr mer die Betriebsspannung zu suche zu leisten entfernen bletzspannungsversorgung Lassen Sie besondere Vorsicht walten wenn Die Betriebsspannung fur dieses Gerat darf 250 V nicht an einem unter Spannung Gerat Oberschreiten und ist an die Versorgungsleitungen bzw arbeiten an eine Versorgungsleity ng und Mas...

Page 16: ...1 PSSO10 ProgrammablePOWWSuppiy ADD NOV 1985 ...

Page 17: ...ated at the bottom of the numeric displays They indicate whether voltage or current is being displayed In the operating mode the display show the true output voltage in constant voltage mode or current in the constant current mode Since the display parameter changes with the automatic crossover the displays always indicate the true output values Complete information for programming the PS 5010 via...

Page 18: ...1 2 ELECTRICAL CHARACTERISTICS Supplemental Information Characteristics Performance Requirements POSITIVE and NEGATIVE FLOATING SUPPLIES Configuration Dual floating supplies with shared common termi nal Independent constant voltage or constant cur rent modes with automatic crossover Constant voltage mode Range Positive supply Negative supply Step size resolution Typically 10 mV 2 mV at 20 C to 30 ...

Page 19: ...nal with respect to ground Front panel operation Rear interface operation Typical shunting capacitance be tween floating supplies and ground Output on off response time Programming Time GET time Without output on off change With output on off change Performarice Requirements Supplemental Information No load Max load 1 ms 1 ms and below 50 mA to 400 mA 0 750A at 15V and below I 10 mA Output impedan...

Page 20: ...out put with remote sensing Typically 500pVI0C Transient recovery current I Maximum allowable combined voltage drop in out put leads is 500 mV Maximum allowable combined sense line resistance is 400 mQ Typically t5 mV hour PARD r Current limit Range Step size Accuracy Scaled current out rear interface 500ps to within 20 mV of nominal value only Scale factor GET time Without output on off 3 ms typi...

Page 21: ...module 1 A fast blow 3 AG 250 V 2 ea 2 5 A medium blow 3 AG 125 V 2 ea 1 6 A slow blow 3 AG 250 V 8 Vdc from power module Logic supply output Power consumption 6 A fast blow 3 AG 250 V 6 A fast blow 3 Ag 250 V 250 VA maximum in high power compartment 200 VA in standard compartment Calibration interval Warm up time 1000 hours or 6 months whichever occurs first 20 minutes ...

Page 22: ...brium whichever occurs fied power modu es first 3 Q g s 1 2 sine 11 ms duration Meets MIL T 288008 class 5 when installed in quali 3 shocks in each directiondalong fied power modu es 3 major axes 18 total shocks Qualified under National Safe Transit Association Preshipment Test Procedures 1A B 1 and 1A B 2 Within limits of F C C Regulations Part 15 Subpart 5 Class A VDE 0871 and MIL 461A tests REO...

Page 23: ... Height Description 126 0 mm 4 96 in Length Net weight Finish Width 134 47 mm 5 29 in 285 37 mm 11 24 in 2 7 kg 6 Ibs Laminated polycarbonate front panel with anodized aluminum chassis Enclosure type and style per MIL T 288006 TYpe Style III E style F in rackmount power modules ...

Page 24: ......

Page 25: ...cted power module compartments Push the PS 5010 into the mainframe and press firmly to seat the rear connec tors in their respective jacks at the rear of the power mod ule Connect the power cord to the power source and turn on the power module POWER switch Repackaging Information If this instrument is to be shipped to a Tektronix Service center for service or repair attach a tag showing owner with...

Page 26: ... Math pack error System RAM error System RAM error low nibble C O O O ROM placement error DO00 ROM placement error E O O O ROM placement error F O O O ROM placement error C O O O ROM checksum error DO00 ROM checksum error E O O O ROM checksum error F O O O ROM checksum error Signature analysis mode Calibration Mode Code 302 303 340 341 372 373 374 375 392 393 394 395 521 CAL If one of these codes ...

Page 27: ...Operating Instructions PS 501Q F1g 2 2 Frontpanel controlsand connectors ...

Page 28: ...rent limit each supply is operating under Pressingthis button displays the current limit of all three supplies When this button is re leased the display returns to the voltage or current limit each supply is operating under Nonfunctional 0 through 9 and Button 0 1 4 and 7 are functional to select period supplies or tracking mode only after SUP PLY SELECT is pushed Entry Mode Turns output on or off...

Page 29: ...the L o t h e r parameter in same supply CURRENT VOLTAGE Default VOLTS or AMPS lights flashing or steady If steady supply is at limit if flashing no 4 7 8 9 4 5 6 1 2 3 O a C quits flashing Supply goes to new param eter value 4 Digits selected are bright NOT ENTERED light flashes NOT ENTERED light Entry mode All displays bright t Operating mode Fig 2 3 Sequence of events used to enter a parameter ...

Page 30: ...nonfunctional if the NOT ENTERED or ERROR lights are flashing In the track mode both supplies increment by the least significant digit of the highest display Incre mentingoccurs until either supply reaches its maxi mum or minimum allowable value A bright display indicates the parameter ing entered The remaining dim displays the same as in the operating mode A bright display indicates the parameter...

Page 31: ...urrent until the voltage reaches the programmed voltage limit Further increase in load im pedance puts the supply in the constant voltage mode See Fig 2 4 Logic Supply Foldback Current Limit The logic supply regulator employs foldback current limit ing This term refers to current limit which is a function of the output voltage The specified output voltage range of the logic supply is 4 5 V to 5 5V...

Page 32: ...x ternally connected in parallel to obtain an output current equal to the sum of the currents from each supply Both supplies should be programmed to the same volt age When operating the display of one supply may blank out indicatingthat it is out of regulation This happens when the supply is driven into overvoltage by the other supply If the load current increases enough one supply will go into th...

Page 33: ... is not provided The logic supply output is overvoltage protected by a SCR crowbar connected to the supply input The trip volt age is approximately 6 2 V If an internal supply failure or externally applied voltage exceeds this limit the SCR fires pulling down the mainframe supplies This in turn opens the output relays to protect the load and supply from damage Load and Monitor Connections A common...

Page 34: ...the point of load rather than from the output terminals This improves load regulation by allowing the supply to compen sate for voltage drop in the power leads Remote sensing involves only the voltage loop it has no effect on constant current operation Since utilization of remote sensing in volves bringing the feedback path outside the power supply precautions must be observed to avoid introducing...

Page 35: ...his supply with an ac potential there is an 120 Vdc or peak ac with respect to chasis earth ground inherent capacitance to chassis ground This capacitance is The maximum allowable voltage on any rear interface out distributed to all output terminals and has a value of ap put or sense terminal is 60 Vdc or 42 Vac peak with respect proximately 0 015 pF to ground When any of the floating supply outpu...

Page 36: ......

Page 37: ...ant 1 111s fallati011ou le retraif de tout firoir lrlsfaller ef ufer le tiroir avec precaution Aligner les rainures superieure et inferieure du tiroir avec les guides des compartiments selectionnes v figure 2 1 Inserer I Alimentation PS 5010 dans le compartiment et la pousser a fond pour que le circuit imprime se place correctement Mettre le module en service commutateur POWER Instructions de riie...

Page 38: ...service ou en cours de fonctionnement couper I alimentation puis la reta blir Si I erreur se repete s adresser a un personnel de mainte nance qualifie lire la procedure de depannage du chapitre Maintenance Erreur dans le systeme Logiciel mathematique errone RAM du systeme erronee RAM du systeme erronee Position de la ROM COO0 erronee Position de la ROM DO00 erronee Position de la ROM EOOO erronee ...

Page 39: ...Instructions d utilisatlon PS 5010 Fig 2 2 Commandes et connectaun en h c ervnt ADD NOV 1985 French 2 3 ...

Page 40: ...ons effectuees avec la com Si le voyant ERROR ou NOT ENTERED est eclaire mande SUPPLY SELECT fait apparaitre I alimentation precedemment af fichee Ceci est la seule faqon de liberer le clavier pour d autres fonctions lorsque le voyant ERROR clignote Lorsqu aucun voyant n est allume cette touche valide le mode Utilisation SUPPLY SELECT Une pression sur ce bouton perrnet de program En mode Entree pe...

Page 41: ...OLTAGE 4 Pardefaut Voyants VOLTS ou AMPS dignotants ou allurnis de facon constante l i u m i s I alimentation est dans les l i m i t e s requises Clignotants I alimentation est hors gamme I 14 Les chiffres sdectionnks sont lumineux Le voyant T NOT ENTERED clignote Le voyant NOT ENTERED ne clignote plus L alimen tation prend la valeur du nouveauparametre Mode Entree Eclairage de tout les afficheurs...

Page 42: ...ntation Logique Pas d affichage lorsque I alimentation n est ni en mode Courant Constant ni en mode Tension Constante Ceci se produit dans le cas d une limitation de courant par retournement ou d une surtension issue d une source externe Seule la derniere valeur entree est eclairee Les autres valeurs assombries sont les m6mes qu en mode Utilisation AMPS Allume indique que le parametre affiche est ...

Page 43: ...que la tension atteigne la limite de tension programmee Au deli I Alimentation passe en mode Tension Constante Se referer a la Figure 2 4 Limitation de courant par retournement alimentation logique Le reguiateur de I Alimentation Logique utilise une limitation de courant par retournement La limite de courant est fonction de la tension de sortie La plage de tension de sortie de I Ali mentation Logi...

Page 44: ...ortie egal a la somme des courants de chaque alimentation Alimentation f Alimentation Fig 2 6 Alimentations connectees en serie Les deux alimentations doivent 6tre prograrnmees a la meme tension En cours de fonctionnement I affichage de I une des tensions peut disparaitre indiquant qu elle se trouve hors de la plage de regulation Ceci se produit dans le cas d une surten sion issue de I autre alime...

Page 45: ...tion La tension est environ de 6 2 V Dans le cas d une defaillance interne de I alimentation ou de I application d une tension externe depassant cette limite le thyristor s amorce ecroulant les tensions du ch5ssis Ce qui ouvre les relais de sortie protegeant la charge et evitant une destruction de I alimentation Connexion de la charge et de I instrurnent de test Des tensions erronees sont frequemm...

Page 46: ...rge 3 TF3391 10 Regulation a distance Par regulation a distance on entend un retour de tension a partir du point de connexion de la charge et non a partir des connecteurs de sortie Ceci ameliore la regulation de charge en permettant a I Alimentation de compenser la chute de ten sion dans les conducteurs d alimentation La regulation a dis tance ne porte que sur la boucle de tension elle est sans ef...

Page 47: ...cune des bornes d e sortie elevee il existe une capacite inherente par rapport a la masse est de 150V crktes par rapport a la masse Par exemple si les du ch5ssis Celle ci est repartie sur toutes les bornes de sortie alimentations sont utilisees a f 3 0 V la borne COMMON peut et a une valeur d environ 0 015 p F flotter a n importe quelle tension entre plus et moins 120V continus ou cr8te alternativ...

Page 48: ......

Page 49: ...u des Einschubes abgeschaltet werden Bei Ein oder Ausbau darf keine Gewalt angewendet werden Die nachstehenden Anweisungen werden in Bild 2 1 dargestellt Setzen Sie das Chassis der PS 5010 an die oberen und unteren Fuhrungsschienen der ausgewahl ten Abteile der Versorgungseinheit Drucken Sie die PS 5010 mit leichtem Druck ein bis die ruckseitige Steckverbindung einrastet Verbinden Sie das Netzka b...

Page 50: ... O ROM Plazierungsfehler F O O O ROM Plazierungsfehler C O O O ROM Prufsummenfehler D O O O ROM Prufsummenfehler E O O O ROM Prufsummenfehler F O O O ROM Prufsumrnenfehler Betriebsart Signaturanalyse Betriebsart Kalibrierung Code 3Q2 303 340 341 372 373 374 375 392 393 394 395 521 CAL Erscheint wahrend des Betriebs oder beirn Einschal ten einer dieser Codes schalten Sie das GerBt aus und wieder ei...

Page 51: ...Bedienungsanleitung PS 5010 Bild 2 2 Bedienungselementeund Anschlusse auf der Frontplatte ADO NOV 1985 ...

Page 52: ...gen dargestellt Wird der Knopf losgelassen geht die Anzeige auf die Strom oder Spannungswerte zuruck mit denen jede Versorgung jeweils arbeitet Bei Drucken dieses Knopfes werden die Stromgrenzwerte aller drei Spannungs versorgungen dargestellt Wird der Knopf losgelassen geht die Anzeige auf die Strom oder Spannungswerte zuruck mit denen jede Versorgung jeweils arbeitet Keine Funktion Eingabe Schal...

Page 53: ...nter the o t h e r parameter in same supply CURRENT VOLTAGE 4 Default VOLTS or AMPS lights flashing or steady If steady supply is at limit if flashing no I 4 Digits selected are bright NOT ENTERED light flashes NOT ENTERED light quits flashing Supply goes to new param eter value Entry mode ICLEAR IC All displays bright Operating mode 339 I 03 Bild 2 3 Eingabevorgang eines Parameters in eine Spannu...

Page 54: ... Stromen Erhoht oder vermindert Strom oder Spannung je nach Programmierung in den kleinstmoglichen Stufen Bei Fest halten dieser Tasten wird die Spannung automatisch bis zu den Grenzwerten der Spannungsversorgung erhoht Das ist eine automatische Eingabefunktion Dieser Knopf arbeitet nicht wenn die Lampchen NOT ENTERED oder ERROR flackern In der BetriebsartTrack werden beide Spannungs versorgungen ...

Page 55: ...sspannung sinkt ab Umgekehrt ist es bei steigendem Lastwiderstand Die Spannungsversorgung liefert konstanten Strom bis die Spannung ihren programmiertenGrenzwert erreicht hat Bei weiterem Ansteigen des Lastwiderstandes schaltet das Gerat auf Konstantspannungs Betrieb um Siehe Bild 2 4 KurzschluBstrom Ruckregelungder Logik Spannungsversorgung Der Regler der Logik Spannungsversorgung sorgt fur e ine...

Page 56: ...rn parallel geschaltet werden wenn man einen Strom errei chen will der der Summeder Ausgangsstrome aller Spannungsversorgungen entspricht Power Supply Power Supply Bild 2 6 In Reihe geschaltete Spannungsversorgungen Beide Spannungsversorgungen sollten fur die gleiche Spannung programmiert werden Bei Betrieb kann die Anzeige einer Spannungsversorgung dunkel werden Dadurch wird angezeigt daB sie auB...

Page 57: ...t die bei etwa 6 2 Vauslost Wenn durch einen internen Fehler oder durch eine angelegte Spannung diese Grenze uberschritten wird lost die Schutzschal tung aus und schaltet die Versorgung vom Grundgerat ab Dadurch ijffnen sich die Ausgangsrelais und schut Zen so die Last und die Spannungsversorgung vor Beschadigung Anschlufi der Last und von Mefigeraten Eine haufige Quelle von Spannungsfehlern ist d...

Page 58: ...rste geoffnet und als letzte geschlos sen werden Bei Benutzung des Druckknopfes OUTPUT ON OFF wird dies intern durchgefuhrt Fern Abtastung Fern Abtastung bedeutet Erfassung der Spannungs ruckkopplung am Lastpunkt statt an den Ausgangsan schlussen Dadurchwird die Spannungsstabilitat an der Last verbessert weil sie es der Spannungsversorgung ermoglicht den Spannungsabfall in den Leitungen zu kompens...

Page 59: ...rde anjedem Frontplatten ausgang 150 V Wenn z B die Spannungsversorgun gen mit 3O V betriebenwerden kannder Null AnschluB auf jedes Potential zwischen Plus und Minus 120 V Gleichspannung oder Spitze Wechselspannung gegen Erde gelegt werden Die maximal zulassige Spannung gegen Erde an jedem ruckseitigen Schnittstellen oder Fuhler AnschluB betrtigt 60 V Gleichspannung oder 42 V Wechselspannung Wird ...

Page 60: ......

Page 61: ...o func tional groups with brief descriptions Detailed Command List An alphabetical listing of commands with complete descriptions Published by the Institute of Electrical and Electronics Engi neers Inc 345 East 47th Street New York NY 10017 TM 5000 programmable instruments connect to the GPlB through a TM 5000 power module Refer to the Oper ating Instructionssection of this manual for information ...

Page 62: ...e limits InputlOutput Commands OUT ON Connects supplies to output terminals OUT OFF Disconnects supplies from output terminals OUTPUT Returns FSOUT and LSOUT ON or OFF FSOUTPUT ON Connects the floating supplies to the output terminals FSOUTPUT OFF Disconnects the floating supplies from the output terminals FSOUTPUT Returns FSOUT ON or OFF LSOUTPUT ON Connects the logic supply to the output termina...

Page 63: ...ace message before updating the hardware to new settings The OFF argument permits hardware updating without the GET message ERROR Type Query Query syntax ERR Query ERROR response ERR 103 ERR 204 Discussion This command returns an error code for the most recent error reported via serial poll When the error status reporting is disabled RQS OFF this command returns the highest priority condition pend...

Page 64: ... command connects or disconnects both floating supplies to or from their respective output terminals Some protective components remain connected to the output ter minals Refer to schematics 11 and 12 for components that remain connected FSOUTPUT Type Query Query syntax ID Query response ID TEKIPS50101V79 1 FXX Discussion XX indicates the firmware version number ID ...

Page 65: ...n is 100 mA INEGATIVE Type Setting or query Setting syntax INEG number Examples INEG 1 45 INEG 1 INEGATIVE 3 Query syntax INEG Query response examples INEG 1 1 INEG 750 Discussion This command sets the negative supply current limit to the absolute value specified The units for the setting and query versions are amperes The range is 0 050 A to 0 750 A 1 6 A at 15 V and below in the high power com p...

Page 66: ...amples IPOS 45 IPOS 1 IPOSlTlVE 0 3 Query syntax IPOS Query response examples IPOS 1 1 IPOS 750 Discussion This command sets the positive supply current limit to the value specified Units for the setting and query versions are in amperes The range is 0 05 A to 0 750 A 1 6 A at 15 V and below in the high power compartment and 0 05 A to 0 40 A 0 75 A at 15 V and below in the standard com partment Th...

Page 67: ...es all instrument settings to the states as specified in the binary block argument Use this commandfor rapidtransfer of settings The binary block is generated by the instrument and is not intended to be generated or modified by the user The query returns all instrument settings in low level binary format The binary block format consists of the percent O O sign decimal 37 followed by a two byte bin...

Page 68: ... See Ta ble 3 1 The status message returned with RQS asserted as a result of enabling the LRI interrupt does not necessarily show the instruments present status It shows the status which was latched at the time the interrupt occurred Use the command REG to determine present status LSOUTPUT Type Setting or query Setting syntax LSOUT ON LSOUT OFF Examples LSOUT ON LSOUT OFF Query syntax LSOUT Query ...

Page 69: ...message returned with RQS asserted as a result of enab ing the NRI interrupt does not necessarily show the instruments present status Instead it shows the status which was latched at the time the interrupt occurred Use the command REG to determine present status NRI OUTPUT Type Setting or query Setting syntax OUT ON OUT OFF Examples OUT ON OUTPUT OFF Query syntax OUT Query response examples FSOUT ...

Page 70: ...essage returned with RQS asserted as a result of enabling the PRI interrupt does not necessarily show the instruments present status Instead it shows the status which was latched at the time the interrupt occurred Use the command REG to determine present status PRI REGULATION Type Query Query syntax REG REGULATION Query response REG number number number Discussion This command provides a means of ...

Page 71: ...instrument to generate ser vice requests The OFF version of the command disables all service requests RQS SET Type I Query I Query syntax SET Query response example VNEG 0 O INEG 0 4 VPOS 0 O IPOS 0 4 VLOG 5 0 ILOG 1 O FSOUT 0FF LS OUT 0FF NRI 0FF PRI OFF LRI OFF DT 0FF USER 0FF RQS ON 1 Discussion Returns values for all instrument states as shown in example SET ...

Page 72: ... corresponding to the ROM in which the checksum error was found See Table 3 2 TEST USEREQ fype Setting or query Setting syntax USER ON USER OFF USEREQ ON USEREQ OFF Query syntax USER USEREQ Query response USER ON USER OFF Discussion Enables SRQ when INST ID front panel button is pressed ...

Page 73: ... query versions The range is 4 5 V to 5 5 V and the resolu tion is 0 010 V REV OCT 1986 VLOGIC VNEGATIVE Type Setting or query Setting syntax VNEG 26 7 VNEGATIVE 3 5 Query syntax VNEG VNEGATIVE Query response example VNEG 23 2 VNEG 1 O Discussion This command sets the negative floating supply voltage limit to the value specified The units are volts for both the setting and query versions The range...

Page 74: ...for both the setting and query versions The range is 0 V to 32 V and the resolutionis 0 01 V to 10 V and 0 10 V above 10 0 V VPOSITIVE VTRACK Type Setting Setting syntax VTRA number VTRACK number Examples VTRA 25 3 VTRA 5 02 VTRACK 2 Discussion This command sets the voltage magnitudeof both float ing supplies to the absolute value specified Units are volts The range is 0V to 32 V and the resolutio...

Page 75: ...ded in ASCII however they accept both upper and lower case ASCll characters All data output is in upper case See Fig 3 2 As previously discussed a command consists of a head er followed if necessary by arguments A command with arguments must have a header delimiter which is the space character SP between the header and the argument The space character carriage return and line feed are shown as sub...

Page 76: ... 5 1 19 25 32 SUB 1A 261 33 ESC 18 27 34 F s 2 8 2 c 35 GS 1 0 29 36 RS 1E 30 37 us I F 31 28 40 29 141 52 2A 421 53 28 431 54 9 4 4 3 C 55 2 0 45 56 2E 46 57 2F lr7 38 56 71 9 3 9 57 72 3A 58 73 9 38 59 7 4 60 4C 75 3 0 61 76 3E 62 77 7 UNL F 63 48 172 111 I 49 731 112 J 4A 741 113 K 4 8 75 114 L 761 115 M 4 0 177 116 N 4E 178 117 0 4F 791 58 88 131 Y 59 89 132 z 5A 90 13 5 8 91 134 92 6C I 5 0 9...

Page 77: ...e instrumentprocesses an operationalcommand in a message it executes any preceding setting commands before executing the operational command Multiple Messages The lnput Buffer has finite capacity and a single message may be long enough to fill it In this case a portion of the message is processed before the instrument accepts addi tional input During command processing the instrument holds off add...

Page 78: ... front panel ADDRESSED light is off DCLDevice Clear The Device Clear message reinitializes communication betweenthe instrument and controller In response to BCb the instrument clears any input and output messages and any unexecuted settings in the Pending Settings Buffer Also cleared are any errors or events waiting to be reported except the power on event If the SRQ line is asserted for any reaso...

Page 79: ...l message remains asserted while multiple keystroke settings are entered and it is unassertedafter the execution of the settings Since rtl prevents transitions to REMS the instrument unasserts rtl if a multiple button sequence is not completed in a reasonable length of time approximately 5 to 10 seconds The instrument maintains a record of its settings in the Current Settings Buffer and new settin...

Page 80: ...sses of events are defined as lndicates the instrument has received a command which it cannot understand lndicates that the instrument has re ceived a command that it cannot ex ecute This is caused by arguments out of range or settings that conflict lndicates that the instrument has de tected a hardware condition or firmware problem that prevents operation Events that are common to instru ments in...

Page 81: ...er ignored Bus response to ERR Response to serial polla Normal Conditions Internal Errors System error Math pack error System Events Power on User request Device Dependent Events Negative supply goes to constant voltage mode Negative supply goes to constant current mode Negative supply goes to unregulated mode Positive supply goes to constant voltage mode Positive supply goes to constant current m...

Page 82: ... a Serial Poll With RQS OFF the controller may send the ERR query at any time and the instrument returns an event waiting to be reported The controller can clear all events by sending the error query until a zero 0 code is returned or clear all events except Power on through the DCL interface message With RQS OFF the controller may perform a Serial Poll but the Status Byte only contains Device Dep...

Page 83: ...Statement 180 is a remark statement Statement 190checks C for a question mark If a question mark is included in C the messagecontained a query The program moves on to statement 200 210 and 220 which will input the response to the query from the PS 5010 and print it on the computer screen Talker Listener Program For the 4041 Controller This sample program allows sending the listed com mands and rec...

Page 84: ...40 INPUT T 250 PRINT 260 PRINT Set UP front panel fm initial settin svthen press 270 PRINT PS5010 INST I D button 280 WAIT 290 FRINP P VNEG iVPOS 300 INPUT PtAvH 310 LET F ltT lOO 320 F RINT 330 PRINT F lt s Ti percent tolerance 340 PRINT Pt8VNEG iA Fi8iVFOS iB F 350 WAIT 360 LET F l T l O O 370 F RINT 380 PRINT Minus VT percent tolerance 390 PRINT Yt VNEG iA Fi iVPOS iB F 400 WAIT 410 PRINT 420 P...

Page 85: ...gns the PS 5010 factory set address to the undefined variable P The next dimensions A to 26 characters The low level settings query command is then sent to the PS 5010 The fourth statement makes the PS 5010 a talker and the fol lowing line reads the binary block into the computer mem ory The last statement recovers the low level settings from the computer memory and sends them back to the PS 5010 ...

Page 86: ......

Page 87: ... les commandes ayant trait aux differents modes d utilisation v fig 3 11 Une liste de commandes fonctionnelles reparties par groupes Chaque fonction est decrite brievement Une liste de commandes detaillee liste alphabetique des commandes Chacune d elle est suivie de sa descrip tion complete VNEG VNEG INEG INEG FSOUT ON VPOS VPOS IPOS IPOS VTRA ITRA VLOG VLOG ILOG ILOG FSOUT OFF FSOUT LSOUT ON LSOU...

Page 88: ...ree sortie OUT ON connecte les alirnentations aux bornes de sortie OUT OFF deconnecte les alimentations des bornes de sortie OUTPUT renvoie les reponses FSOUT et LSOUT ON ou OFF FSOUTPUT ON connecte les Alimentations Flottantes aux bornes de sortie FSOUTPUT OFF deconnecte les Alimentations Flottantes des bornes de sortie FSOUTPUT renvoie FSOUT ON ou OFF LSOUTPUT ON connecte I Alimentation Logique ...

Page 89: ... les instru ments avant de remettre a jour ses reglages L argument OFF permet d effectuer d autres reglages sans utiliser le message GET ADD NOV 9985 ERROR Erreur Type Interrogation Syntaxe ERR Reponse ERR 103 ERR 104 Explication Cinterrogation ERROR renvoie un code d erreur correspon dant a la plus recente erreur obtenue par un Appel Selectif en Serie Lorsque le compte rendu d erreur est inhibe R...

Page 90: ...ication Cette commande connecte ou deconnecte les deux Ali mentations Flottantes a leurs bornes de sortie respectives Ouelques composants de protection sont connectes en permanence aux bornes de sortie voir schemas 11 et 12 French 3 4 FSOUTPUT ID Identification Type Interrogation Syntaxe d interrogation ID Reponse a I interrogation ID TEKlPS5010 W g l FXX Explication XX indique le numero de la ver...

Page 91: ...solution est 1 0 0 mA ADD NOV 1985 INEGATIVE Lirnite de courant de I Alimentation Negative Type Reglage ou interrogation Syntaxe de reglage INEG nombre Exemples INEG 1 45 INEG 1 INEGATIVE 3 Syntaxe d interrogation INEG Exemples de reponses a I interrogation INEG 1 1 INEG 750 Explication Cette commande regle la limite de courant de I Alimentation Negative a la valeur specifiee Les unites sont des a...

Page 92: ...errogation Syntaxe de reglage IPOS nornbre Exemples IPOS 45 IPOS 1 IPOSlTlVE 0 3 Syntaxe d interrogation IPOS Exemples de rkponses a I interrogation IPOS 1 1 IPOS 750 Explication Cette commande regle a la valeur specifiee la limite de cou rant de I Alimentation Positive Les unites sont des amperes Reglage et Interrogation La plage va de 0 05 A a 0 750 A 1 6 A jusqu a 1 5V dans le compartirnent hau...

Page 93: ...LSET Reponse a I interrogation LLSET bloc binaire Explication La commande de reglage modifie tous les reglages de I instrument selon les etats indiques dans I argument bloc binaire Utiliser cette commande pour transferer rapidement des reglages Le bloc binaire est genere par I instrument et n est pas concu pour i3re genere ou modifie par l utilisateur L interrogation renvoie tous les reglages de I...

Page 94: ... tion a genere la demande de service et le nouveau mode choisi Se referer au tableau 3 I Le message d etat renvoye la ligne RQS etant validee en reponse a la validation de I interruption LRI n indique pas forcement I etat actuel des instruments mais plut6t I etat in terrompu Pour determiner I etat actuel utiliser la commande REG French 3 8 LRI LSOUTPUP Sortie des Alimentations Type Reglage ou inte...

Page 95: ...tion a genere la demande de service et le nouveau mode choisi Se refkrer a11tableau 3 1 Le message d etat renvoye la ligne RQS etant validee en reponse a la validation de I interruption NRI n indique pas forcement I etat actuel des instruments mais plutrjt I etat in terrompu Pour determiner I etat actuel utiliser la commande REG ADD NOV 1985 NRI OUTPUT Sortie Type Reglage ou interrogation Syntaxe ...

Page 96: ... demande de service et le mode choisi Se referer au tableau 3 1 Le message d etat renvoye la ligne RQS etant validee en reponse a la validatiorl dc I i llerri ptiorl PRI l indiqircpas forcement I etat actuel des instruments mais plut6t I etat in terrompu Pour determiner I etat actuel utiliser la commande REG French 3 10 PRI REGULATION Type Interrogation Syntaxe d interrogation REG REGULATION Repon...

Page 97: ...ion Cette commande valide 1 3 qkneration de demandes de ser vice par I instrument RQS OFF inhibe toutes ies demandes de service ADD NOV 1985 RQS SET Reglages Type Interrogation Syntaxe SET Reponse VNEG O O INEG C 4 VPOS 0 O IPOS 0 4 VLOG 5 0 ILOG 1 O FSOUT 0FF LS OUT 0FF NRI 0FF PRI OFF LRI 0FF DT 0FF USER 0FF RQS ON Explication L interrogation SET renvoie tous les reglages actuels de I instrument...

Page 98: ...cksum errone Se referer au tableau 3 2 French 3 12 TEST USEREQ USER REQUEST Demande de service de I utilisateur Type Reglage ou interrogation Syntaxe de reglage USER ON USER OFF USEREQ ON USEREQ OFF Syntaxe d interrogation USER USEREQ Reponse aux interrogations USER ON USER OFF Explication Valide la ligne SRQ lorsque le bouton INST ID face avant est enfonce USEREQ ADD NOV 1985 ...

Page 99: ...nterrogation La plage de reglage va de 4 5 V a 5 5 V e l la resolutior esl de 10 I V ADD NOV 1985 VLOGIC VNEGATiVE Lirnite de tension de I Alirnentation Negative Reglage ou interrogation Syntaxe de reglage VNEG 26 7 VNEGATIVE 3 5 Syntaxe d interrogation VNEG VNEGATIVE Exernple de reponse a I interrogation VNEG 23 2 VNEG 1 O Explication Cette commande regle a la valeur specifiee la limite de ten si...

Page 100: ...les Volts Reglage et Interrogation La plage de reglage va de 0 V a 3 2 V et la resolution est 1 0 mV jusqu a 1 0 V 0 10 V au dessus de 10 1 V French 3 14 VPOSITIVE VTRACK Rbglage de tension des Alimentations Positive et Negative Type Reglage Syntaxe de reglage VTRA nombre VTRACK nombre Exemples VTRA 25 3 VTRA 5 02 VTRACK 2 Explication Cette commande regle a la valeur absolue specifiee la plage de ...

Page 101: ... message Les instruments de la serie TM 5000 sont livres avec la fin de message EOI ONLY selectionnee Formattage d un message Pour iitre comprises les commandes transmises aux instru ments de la serie TM 5000 doivent avoir le format ou syn taxe approprie Toutefois ce format est tres souple et peut subir de nombreuses variations Une description de ce format et des variations admises est donnee ci a...

Page 102: ...l ET IEEE 488 GPIB Commandes adressees I Adresses Adresse transmettre Secondaires Commandes universelles ou commandes Adresse recevoir KEY TO CHART GPIB code ASCll character Fig 3 2 Table de conversion ASCll et IEEE 488 GPIB French 3 16 ADD NOV 1985 ...

Page 103: ......

Page 104: ...sage reinitialise les communications entre I instru ment et le contrbleur En rdponse a ce message I instrument annule tout message en entree et en sortie et toute commande de reglage dans la memoire tampon Reglages en Attente II en est de meme pour toute erreur ou tout evenement non encore transmis a I exception de la mise en service Si la ligne SRQ est a I etat bas validee pour une autre raison q...

Page 105: ...e commande n affectent pas I execution du message en cours de traitement quand GTL est requ Remote ContrBle a Distance Local operation Con trBle Local Les lignes qui precedent decrivent les transitions d un etat a I autre provoquees par les messages GTL et REN La plupart des commandes en face avant provoquent une transition de REMS a LOCS en validant le message Retour en mode Local lrtl Cette tran...

Page 106: ... d arguments errones ou de reglages contradictoires ERREUR INTERNE lndique que I instrument a detecte une condition ma terielle ou logicielle emp6 chant urle operation EVENEMENTSDU SYSTEME Evenements communs a tous les eleiments d un systeme Mise en Service Requete Utili sateur etc AVERTISSEMENT EN COURSL instrurnent fonctionne mais D EXECUTION I utilisateur doit prendre conscience de problemes po...

Page 107: ...onflits de reglage Argument hors gamme Declenchement de groupe ignore GET Erreurs internes Erreur du systeme Erreur du bloc mathematique Conditions normales Evenements du systeme Mise en service Requste de I utilisateur Evenements specifiques a I instrument CAlimentation Negative passe en mode Tension Constante CAlimentation Negative passe en mode Courant Constant L Alimentation Negative passe en ...

Page 108: ...e mode I ir lerroyaliorlERR pcnr cl au contr6leur de s informer des evenements sans executer un appel selectif en serie I1 peut emettre cette interrogation a tout instant I instrument lui transmet alors tout evenement en attente d gtre communique Le contr6leur peut annuler tous les evenements soit en transrnettant I interrogation ERR jusqu a ce que le code zero 0 soit renvoye soit par I interme di...

Page 109: ...face avant reflete la valeur transmise La ligne 180 est une re marque REM L instruction 190 recherche un point d interro gation dans C Si C comprend un point d interrogation c est que le message contient une interrogation Le pro gramme va aux lignes 200 210 et 220 qui entreront la reponse a I interrogation du PS I ecran du calculateur Programme de transmission contrdleur 4041 5010 et I imprimeront...

Page 110: ...lNT Restaurer les reglages initiaux en face avant puis appuyer PRINT sur le bouton INST ID W I T PRlNT P VNEG VPOS INPUT P A B LET F l TI100 PRlNT PRINT Plus Ti tolerance en pourcentage positif PRlNT J P VNEG A8F VPOS B8F W I T LET F 1 TI100 PRINT PRlNT Moins Ti tolerance en pourcentage negatif PRlNT P VNEG A8F VPOS B8F W I T PRlNT PRlNT Retour aux reglages initiaux PRlNT P VNEG A VPOS B GO TO 220...

Page 111: ...ommande d interrogation LLSET etat des reglages est alors transmise au PS 5010 La qua trieme instruction designe le 5010 comme Emetteur et la ligne suivante lit le bloc binaire dans la memoire du calculateur La derniere instruction rappelle I etat des reglages en langage non evolue dans la memoire du calculateur pour les renvoyer au PS 5010 Une definition de I argument bloc binaire est fournie dan...

Page 112: ......

Page 113: ...nktionsgruppen mit kurzen Beschreibungen aufgeteilt ist e Detaillierte Befehlsliste eine alphabetische Auflistung der Befehle mitvollstBndiger Beschrei bung verijffentlicht durch das Institute of Electrical and ElectronicsEngineers Inc 345 East 47th Street New York NY 10017 Programmierbare Gerate der Serie TM 5000 werden Ober eine Versorgungseinheit TM 500X mit dem GPlB verbunden Der Abschnitt Bed...

Page 114: ...lt die positiven und negativen Spannungs Grenzwerte ein OUTPUT Abfrage nach FSOUT und LSOUT ON oder OFF FSOUTPUT ON Verbindet die erdfreien Spannungs versorgungen mit den Ausgangs Anschlussen FSOUTPUT OFF Trennt die erdfreien Spannungs versorgungen von den Ausgangs Anschlussen FSOUTPUT Abfrage nach FSOUTPUTON oder OFF LSOUTPUT ON Verbindet die Logik Spannungs versorgung mit den Ausgangs Anschlusse...

Page 115: ...arten bevor die Hardware neu eingestellt wird Das Argument OFF erlaubt die Neueinstellung der Hardware ohne die Mitteilung GET ADD NOV 1985 ERROR Art Abfrage Abfrage Syntax ERR Antwort auf Abfrage ERROR ERR 103 ERR 204 Beschreibung Dieser Befehl fragt einen Fehiercode fur den letzten uber die Serienabfrage berichteten Fehler ab 1st der Fehler Statusreport gesperrt RQS OFF wird dieser Befehl mit de...

Page 116: ...nnt oder verbindet beide erdfreien Versorgungen von oder mit ihren entsprechenden Ausgangs Anschlussen Einige Schutzkomponenten bleiben mit den Ausgangs Anschlussen verbunden Die verbleibenden Schutzkomponenten finden Sie in den Schemazeichnungen 11 und 12 FSOUTPUT ID Art Abfrage Abfrage Syntax ID Abfrage Antwort ID TEK PS5010 V79 1 FXX Beschreibung XX gibt die Ausfiihrungsnummer der Firmware an I...

Page 117: ... mit einer Aufldsung von 100 mA ADD NOV 1985 INEGATIVE Art Einstellung oder Abfrage Einstell Syntax INEG number Beispiele INEG 1 45 INEG 1 INEGATIVE 3 Abfrage Syntax INEG Abfrage Antwort Beispiele INEG 1 1 INEG 750 Beschreibung Dieser Befehl stellt den Stromgrenzwert der negati ven Versorgung auf den angegebenen absoluten Wert Die Einheiten fur Einstellung und Abfrage sind Ampere Der Bereich ist 0...

Page 118: ...instell Syntax IPOS number Beispiele IPOS 45 IPOS 1 IPOSITIVE0 3 Abfrage Syntax IPOS Abfrage Antwort Beispiele IPOS 1 1 IPOS 750 Beschreibung Dieser Befehl stellt den Stromgrenzwert der positiven Versorgungauf den spezifizierten Wert ein DieEinheiten fur Einstellung und Abfrage sind Ampere Der Bereich ist 0 05 A bis 0 750 A 1 6 A bis15V im Hochspannungs fach und 0 05 A bis 0 40 A 0 75 A bis 15 V i...

Page 119: ...uf die im biniirenBlockargumentspezifiziertenWerte Verwen den Sie diesen Befehl fiir die schnelle ljbertragung von Einstellungen Der binare Block wird im Gerat erzeugt und braucht nicht durch den Anwender erzeugt oder modifiziert werden Auf Abfrage werden alle Gerateein stellungen im binaren Format dargestellt Das binare Blockformat besteht aus dem Prozentzei chen Dezimalzahl37 dem eine zweistelli...

Page 120: ...echselt wurde Die Statusmitteilung die bei Freigabe der LRI Unter brechung mit ausgegebenem RQS erscheint zeigt nicht unbedingt den derzeitigen Geratestatus an Sie zeigt den Status der bei Eintreten der Unterbrechung gultig war Der derzeitige Status kann mit dem Befehl REG bestimmt werden LRI LSOUTPUT Art Einstellung oder Abfrage Einstell Syntax LSOUPON LSOUT OFF Beispiele LSOUT ON LSOUT OFF Abfra...

Page 121: ...wechselt wurde Siehe Tabelle 3 1 Die Statusmitteilung die bei Freigabe der NRI Unter brechung mit ausgegebenem SRQ erscheint zeigt nicht unbedingt den derzeitigen Geratestatus an Sie zeigt den Status der bei Eintreten der Unterbrechung gultig war Der derzeitige Status kann mit dem Befehl REG bestimmt werden ADD NOV 1985 NRI OUTPUT Art Einstellung oder Abfrage Einstell Syntax OUT ON OUT OFF Beispie...

Page 122: ...Siehe Tabelle 3 1 Die Statusmitteilung die bei Freigabe der PRI Unter brechung mitausgegebener SRQ erscheint zeigt nicht unbedingt den derzeitigen Geratestatus an Sie zeigt den Status der bei Eintreten der Unterbrechung giiltig war Der derzeitige Status kann mit dem Befehl REG bestimmt werden REGULATION Art Abfrage Abfrage Syntax REG REGULATION Abfrage Antwort REG number number number Beschreibung...

Page 123: ...ibt das Gerat fur die Ausgabe einer Bedienungsabfrage frei Der Befehl RQS OFFsperrt alle Bedienungsabfragen ADD NOV 1985 RQS SET Art Abfrage Abfrage Syntax SET Abfrage Antwort Beispiele VNEG 0 0 iNEG 0 4 VPOS 0 0 IPOS 0 4 VLOG 5 0 ILOG 1 0 FSOUT OFF LSOUT OFF NRI OFF PRI OFF LRI OFF DT OFF USER OFF RQS ON Beschreibung Wie im Beispieldargestellt werden alleGerateeinstel lungen angezeigt SET ...

Page 124: ... Prijfsummenfehler entdeckt wurde dargestellt Siehe Tabelle 3 2 TEST USEREQ Art Einstellung oder Abfrage Einstell Syntax USER ON USER OFF USEREQ ON USEREQ OFF Abfrage Syntax USER USEREQ Abfrage Antwort USER ON USER OFF Beschreibung Gibt SRQ aus wenn der INST ID Knopf auf der Front platte gedrikkt wird I USEREQ ADD NOV 1985 ...

Page 125: ...rage ist die Einheit Volt Der Bereich geht von 4 5 V bis 5 5 V mit einer AuflOsung von 0 010 V ADD NOV 1985 VNEGATIVE Art Einstellung oder Abfrage Einstell Syntax VNEG 26 7 VNEGATIVE 3 5 Abfrage Syntax VNEG VNEGATIVE Abfrage Antwort Beispiele VNEG 23 2 VNEG 1 O Beschreibung Dieser Befehl stellt den negativen Spannungs Grenz wert der erdfreien Versorgung auf den spezifizierten Wert Fijr Einstellung...

Page 126: ... EinstellungundAbfrage ist Volt Der Bereich geht von 0 V bis 32 V mit einer Auflosung von 0 01 V bis 10 V und 0 10 V uber 10 V WRACK Art Einstellung Einstell Syntax VTRA number VTRACK num ber Beispiele VTRA 25 3 VTRA 5 02 VTRACK 2 Beschreibung Dieser Befehl stellt die Spannungshdhe beider erd freier Versorgungen auf den spezifizierten absoluten Wert Die Einheit ist Volt Der Bereich geht von 0 V bi...

Page 127: ...Befehle inASCII kodiert sind sie nehmen jedoch groOe und kleine ASCII Zei chen an Die Datenausgabe erfolgt in groOen Zeichen siehe Bild 3 2 Wie vorher besprochen besteht ein Befehlaus einem Kopfteil dem falls erforderlich Argumente folgen Ein Befehl mit Argumenten mu6 ein Kopfteil Endezeichen haben das aus dern Zwischenraurnzeichen SP zwi schen Kopfteil und Argument besteht RQSspON Werden zusiitzl...

Page 128: ... 105 125 145 165 a 1 0 1 ENiPC 25 N A 45 5 E u e u 5 51 15 21 25 37 35 53 45 69 55 85 65 101 75 117 66 106 126 146 166 D 1 1 0 ACK 26SYN 46 6 F V f v 6 6 16 21 26 38 S 54 46 70 56 861 66 102 76 118 7 27 67 107 127 147 167 47 a 1 1 1 BEL ETB 7 G W w 9 19 19 25 29 41 39 57 49 73 59 89 69 105 79 121 12 32 52 112 132 152 72 172 I s 1 s LF SUB J z i z A 10 1A 26 2A 1421 3A 158 4A 74 5A 90 6A 1061 7A 12...

Page 129: ... wei tergegeben Wenn das Gerat in einer Mitteilung einen Betriebsbe fehl bearbeitet werden vor dem Betriebsbefehl alle vor hergehenden Einstellbefehle ausgefuhrt Mehrfach Mitteilungen DerEingangs Puffer hat eine begrenzte Kapazitatund eine einzelne Mitteilung kann so lang sein daB er damit ausgefullt ist In diesem Fallewird einTeil der Mitteilung bearbeitet bevor das Geriit weitere Daten annimmt W...

Page 130: ... Lampchen ADDRESSEDuauf der Frontplatte ist aus DCL Device Clear Die Mitteilung Device Clear stellt die Kommunikation zwischen Controller und Gerat wieder her Als Antwort auf DCL I6scht das Gerat alle Eingangs und Ausgangs mitteilungen und jede nicht ausgefuhrte Einstellung im Einstellungs Puffer Ebenso werden alle auf Abruf war tenden Fehler und Ereignisse geloscht mit Ausnahme des Einschalt SRQ ...

Page 131: ...bedie nungszustande nicht nur Bedienungselemente die EinstellungenBndern kdnnen rtl geltend machen Diertl Mitteilung bleibt wiihrend mehrfacher Tasteneingaben gultig sie wird ungultig wenn die nderung der Bedie nungselementeauf der Frontplatte durchgefuhrt ist Da rtl die Umschaltung auf REMS verhindert macht das Gerat rtl ungultig wenn eine mehrfache Knopfdruck folge nicht in einer angemessenenZei...

Page 132: ...r wider spruchliche Befehle INTERNAL Zeigt an daB das Geriit ein Hardwa ERROR re oder Firmwareproblem entdeckt hat das den Betrieb verhindert SYSTEM Ereignisse die in allen Gertiten in EVENTS einem System gleich sind z B Power On User Request usw EXECUTION DasGerat arbeitet aber der Anwen WARNING der sollte auf potentielle Probleme achten DEVlCE Gerateabghangige Ereignisse STATUS Das Gerat kann zu...

Page 133: ...206 302 303 Normaie Zustande GerateabhangigeEreignisse Die negativeVersorgung schaltet auf Konstantspannung Die negative Versorgung schaltet auf Konstantstrom Die negative Versorgung schaltet auf ungeregelt Die positive Versorgung schaltet auf Konstantspannung Die positive Versorgung schaltet auf Konstantstrom Die positive Versorgung schaltet auf ungeregelt Die Logik Versorgung schaltet auf Konsta...

Page 134: ...e durchzufuhren Bei RQS OFF kann der Controller die ERR Abfrage jederzeit ausgeben unddas Gerat antwortet mit einem Ereignis das darauf wartet berichtet zu werden DerController kann alle Ereignisse durch Aussenden der Fehlerabfrageldschen bis ein Null 0 Code erscheint oder alle Ereignisse mit Ausnahme von PowerOn mit der Interface Mitteilung DCLIoschen Mit RQS OFF kann der Controller eine Serienab...

Page 135: ...hl gibt die Anzeige auf der Front platte den gesendeten Wert wieder Statement 180 ist ein Dokumentations Statement Statement 190pruft ob C ein Fragezeichen enthglt 1st in C ein Fragezeichen enthalten enthielt die Mitteilung eine Abfrage Das Pro gramm geht auf die Statements 200 210 und 220 uber die die Antwort auf die Frage von der PS 5010 eingeben und druckt diese auf dem Bildschirm des Rechnersa...

Page 136: ...RN i 240 INPUT T 250 PRINT 260 PRINT Set UP front panel for initial settinsfsr then press 270 PRINT PS5010 INST I D button 280 WAIT 290 PRINT QPt8VNEG iVPOS 300 INPUT P AIE 310 LET F l T 100 320 PRINT 330 PRINT Plus Ti percent tolerance 340 F RINT P VNEG iA Fi8iVPOS iBtF 350 WAIT 360 LET F l T 100 370 PRINT 380 PRINT M I J S Ti8 percent tolerance 390 PRINT F VNEG iA Fi8iVPOS iE F 400 WAIT 410 F RI...

Page 137: ...h weniger Buszeit Das erste Statement weist die werksseitig eingestellte Adresse der PS 5010 der undefinierten VariablenPzu DasN8chstedimensio niert A auf 26 Zeichen Der Einstellungs Abfragebefehl wird dann an die PS5010gesendet DasvierteStatement rnacht die PS 5010zum Sprecher unddie folgende Zeile liest den Bin block in den Speicher des Rechners ein Das letzte Statement ruft die Einstellungen au...

Page 138: ......

Page 139: ...Y QUALIFIED PERSONNEL ONLY TO AVOID PERSONAL INJURY DO NOT PERFORM ANY SERVICING OTHER THAN THAT CONTAINED IN OPERATING INSTRUCTIONS UNLESS YOU ARE QUALIFIED TO DO SO REFER TO OPERATORS SAFETY SUMMARY AND SERVICE SAFETY SUMMARY PRIOR TO PERFORMING ANY SERVICE ...

Page 140: ......

Page 141: ...and the output terminal The voltage drop across this resistor is proportional to the logic supply current The output voltage of the logic current DAC is propor tional to the programmed current limit The fold back current limit checks the output voltage and current This circuit protects the pass transistor from overdissipation when the supply is operated outside of the specified load range This is ...

Page 142: ...put relay and the input output select switch to the selected output terminal DETAILED CIRCUIT DESCRIPTION The GPlB communications are controlled by U1001 U1000 and U1010 Bidirectional buffers U1000 and U1010 provide drive capability for U1001 the GPlB interface The IEEE 488 1975178 standard protocol is handled automati cally in both talker and listener modes by U1001 This in strument is assigned a...

Page 143: ...1314 and U1315 Type U1315 The remaining chip selects are produced by U13ll and are Table 4 3 U1311 CHlP SELECTS Latch Circuit Number 3080 30BF VMA is included in Memory Keyboard 2800 2BFF Display 2400 27FF Display 2000 23FF all U l 3 l l chip selects Located the CPU board are 16k bytes of ROM con taining the operating system firmware This instrument has either 2 8kx8 or 4 4kx8 ROMs Table 4 4 shows...

Page 144: ...at U1315 This gates a logic 0 through U1301 to the display controller IC If the microprocessor writes a logic 0 to U1315 the data selector gates a 20 kHz 40 duty cycle signal to the display controller IC causing the seven seg ment LEDs to dim The remaining three seven segment LEDs are multiplexed by U1410 This integrated circuit is similar to U1400 except each LED segment is controlled indepen den...

Page 145: ...R1945 R1943 and R1950 provides 4 5 V at pin 5 of U1741B This operational amplifier is a current to voltage converter for the logic supply As this converter is referenced to 4 5 V it effectively sums the current informa tion from the DAC with the 4 5 V reference thus creating a voltage between 4 5 V and 5 5 V at pin 7 of U1741B The output of U1741B passes to the input of U1740 which serves as a vol...

Page 146: ...s The supplies are stacked to obtain the higher dc voltages Base drwe for the supply series pass transistor is pro v ded by emitter followers Q1500 in the high voltage mode and Q1501 nthe low voltage mode Transistors 22000 and Q1900 perform the same function for the supply Correct base voltages for these transistors are provided by Zener diodes VR1501 and VR1600 and in the supply VR2000 and VR1800...

Page 147: ...oltage conversions for the current DAC is provided by R1211 and R1210 The 0 adjust for this converter is pro vided by R1311 This signal is buffered by unity gain follow er U1111B Floating Supply The output of the current DAC connects to pin 3 of U1100 The current sense from sensing resistor R1104 connects to pin 2 of U1100 As the supply output current increases the voltage at pin 2 of U1100 goes m...

Page 148: ...open collector outputs As long as the inputs to these com parators from the voltage and current error amplifiers re main within the window 8 V to 8 V the outputs will remain high These voltages are the normal window for bal anced operation under worst case conditions When a loop is unbalanced the output of its comparator is approximately 15 V The output of these comparators drive the opto isolator...

Page 149: ... be substituted The performance check may be done at any ambient temperature between 0 C and 50 C Test Equipment Required The test equipment listed in Table 5 1 or equivalent is suggested to do the performance check or the adjustment procedure All steps in the Performance Check procedure may be performed with the PS 5010 in the power module All steps except source effect and transient recovery may...

Page 150: ...ith 7000 series mainframe and timebase Oscilloscope 5 mV div differential capability 20 Hz to 20 MHz with 20 MHz bandwidth limit switch Tektronix Part No 388 0842 00 Resistor Resistor 1 560 R 5 3 W Tektronix Part No 308 0298 00 Tektronix Part No 308 0769 00 Resistor special 0 1 R 0 1 3 W four terminal Resistor 1 45 R 5 25 W 2 ea Tektronix Part No 308 0744 00 2A spst switch I Tektronix Part No 012 ...

Page 151: ...d as a short form performance check procedure Perform the check and record the reading in the Measured column Compare the reading with the upper and lower limits After maintenance or adjustment again perform the procedure and compare the readings Date Serial Number Tested by Maximum Measured Minimum Step Description ...

Page 152: ... order listed SUPPLY SELECT POS 3 2 ENTER Make certain the OUTPUT is ON CHECK that the dvrn reads from 31 82 V to 32 18 V 2 Check Source Effect a Connect the dvrn to the POSITIVE or NEGATIVEfront panel connectors b Determinethe selected line voltage range of the power module c With the power module connected to the variable voltage transformer lower the voltage to the lower limit for the selected ...

Page 153: ...e order listed 2 0 ENTER f Press the INCREMENT t button for one step change r Note the dvrn reading g CHECK that the dvrn reads from 0 mV to 20 mV from the reading taken in step e s Press the INCREMENT f button for one step change h Press the following buttons in the order listed t CHECK that the display reads from 60 mV to 2 140 mV more negative than the reading obtained in 0 step r ENTER u Leave...

Page 154: ... All entered values are identical m Change the front rear switch on the rear panel of the instrument to rear Floating supply left board sense 23A 238 I output 22A 228 common 21A 218 7 sense common 24A 2481 1 Fig 5 1 Connections for rear interface load effect check Dvm must be connected to same point as sense lines n Connect the resistor and dvrn as shown in the figure Connections for the negative ...

Page 155: ... Make certain the OUTPUT is OFF Connect the test fixture shown in Fig 5 2 to the front panel common and POSITIVE output connectors 2A switch Fig 5 2 Test fixture for load transient recovery c Connect the oscilloscope to the front panel POSITIVE and common connectors g Adjust the oscilloscope triggering so that the transient waveform during switch opening and closing is visible on the oscilloscope ...

Page 156: ...s 2 0 ms Turn the OUTPUT OFF Connect a 45 Q 25 W resistor across the POSITIVEand common front panelconnectors This is two 90 R resis tors in parallel Repeat steps e f g h and i CHECK for a 1 ms risetime from 0 V to 32 V Repeat steps k and I CHECK for a falltime of 63mS Repeat this entireprocedurefor the NEGATIVEsupply Substitute NEG for POS and use the NEGATIVE and common front panel connections I...

Page 157: ...ent Step Size a Turn the OUTPUT OFF b Connect the current meter to the front panel POSITIVE and common terminals Calibration PS 5010 Performance Check Procedure Select any voltage within the range of the instrument The selected voltage must be sufficient to force the selected current through the internal resistance of the current meter and associated leads Select any current within the specified r...

Page 158: ...urrent deviates 1 0 mA from the reading taken in step f Turn the OUTPUT off Turn the OUTPUT OFF Connect a known value resistor across the front panel POSITIVE and common terminals The suggested value is 5 Q with sufficient wattage for the current limit desired Connect the oscilloscope across the resistor Ac couple the vertical input and limit the bandwidth to 20 MHz Select the current limit desire...

Page 159: ...ope to trigger on the falling waveform CHECK that the time for the voltage to decreasefrom 3 75 V to 0 25 V is 2 0 ms p Remove these connections for the next step 14 Check Logic Supply Constant Voltage Range and Overall Accuracy Make certain the OUTPUT is OFF Connect the dvm to the front panel LOGIC and ground terminals Connect the power modulethrough the variable voltage transformer to the supply...

Page 160: ...s Determine the line voltage range of the power module With the power module connected to the variable voltage transformer lower the voltage to the lower limit for the line voltage used Program the PS 5010 for any voltage within the range of the logic suppy Note the displayed voltage on the dvm Change the varible voltage transformer to the maximum for the line voltage range used CHECK that the dvr...

Page 161: ...s Select any specified voltage and current combination for the logic supply Make certain the PS 5010 OUTPUT is ON Allow up to 30 s for the dvm to stabilize CHECK that the dvm display reads 6 2 mV rms Remove the dvm from the front panel connectors Connect the oscilloscope vertical input to the front panel LOGIC terminals Use the 1x probe Ac couple the oscilloscope input Set the bandwidth to 20 MHz ...

Page 162: ...gh the resistor within 5 20 mA of the current value selected Reduce the current limit by 100 mA press the INCRE MENT 1pushbutton once I CHECK that the current flowing through the resistor is from 70 mA to 130 mA less than the original current selected m Remove the dvm for the next step 21 Check Logic Supply Scaled Current Out a Using the same setup in the previous step connect the dvm to rear inte...

Page 163: ...nix Part No 067 0645 02 to operate the plug in outside the power module An extender cable for the GPlB Tektronix Part No 067 0996 00 is also available When connecting the plug in to the power module via the plug in extenders make certain the top of the extender in the power module is connectedto the top of the plug in Remove the right side cover of the PS 5010 All adjustments are located on the ri...

Page 164: ...Adjustment interactions If the intersecting square is darkened the adjustments interact c Press the following buttons in the order listed SUPPLY SELECT LOGIC CURRENT 3 0 ENTER CLEAR f CHECK that the dvm reads from 0 2950 V to 0 3050 V g ADJUST R1850 Max I Adj for a dvm reading of 0 2950 V to 0 3050 V h Remove the foldback defeat short d Short TP1550 Foldback Defeat Test Point to ground with a scre...

Page 165: ...on is illuminated h CHECK that the dvrn reads from 0 20 mV to 0 20 mV i ADJUST R1335 Da 0 Adj for a dvrn reading of 0 20 mV to 0 20 mV j Move the dvrn positive lead to TP 1430 the V Dac test point k CHECK for a dvrn reading from 0 20 mV to 0 20 mV I ADJUST R1334 Da 0 Adj for a dvrn reading from 0 20 mV to 0 20 mV m Remove these connections for the next step Adjust O Adj Connect the dvrn lead to th...

Page 166: ...ct the dvrn lead to the PS 5010 front panel POSITIVE connector The dvrn lead is connected the common connector Make certain 10 0 V appears in the positive display Turn the OUTPUT ON CHECK the dvrn for a reading from 9 999 V to 10 001 v ADJUST R1545 10 V Gain Adj for a dvrn reading from 9 999 V to 18 001 V Leave these connections for the next step Adjust 32 V Gain Adj Make certain the dvrn is conne...

Page 167: ...2 hold switch meter input Connect the common terminal to the S1600 in Fig 5 8 3 turn the power module on 4 input release the switch after self test is completed the word CAL shows in the LOGE display c Press these buttons in the order listed C A U T I O N D SUPPLY SELECT TRACK FOR IEEE 488ADDRESS SELECTION REFER TO INSTRUCTIONMANUAL THE INST ID BUITON WILL DISPLAY THE CURRENTADDRESS OUTPUT SELECTO...

Page 168: ... in the order listed 10 V output from both supplies SUPPLY SELECT TRACK CURRENT 1 6 ENTER Turn the OUTPUT on CHECK for a drnm reading from 1595 mA to 1605 mA ADJUST R1211 Max I Adj for a drnm reading from 1595 mA to 1605 mA Turn the OUTPUT OFF Remove the lead from the POSITIVE connector on the PS 5010 Adjust Max I Adj Connect the positive lead of the drnm to the front panel NEGATIVE connector Conn...

Page 169: ...1320 has three positions See Fig 6 1 This jumper should be in the Normal mode for instrument oper ation Place the jumper in the Signature analysis mode or the Calibration mode when instructed to do so in this man ual The normal operating position for J1220 is the Run mode position The Force data position is only used in the signature analysis mode Static Sensitive Components Static discharge can d...

Page 170: ...type desoldering tools Cleaning This instrument should be cleaned as often as operating conditions require Loose dust accumulated on the outside of the instrument can be removed with a soft cloth or small brush Remove dirt that remains with a soft cloth dampened in a mild detergent and water solution Do not use abrasive cleaners Table 6 1 RELATIVE SUSCEPTIBILITY TO TO STATIC DISCHARGE DAMAGE Semic...

Page 171: ... G To avoid electric shock hazard disconnect the instru ment from the power source before soldering The reliability and accuracy of this instrument can be maintained only if proper soldering techniques are used when repairing or replacing parts General soldering tech niques which apply to maintenance of any precision elec tronic equipment should be used when working on this instrument Use only 601...

Page 172: ...Now remove the screws as shown in Fig 6 3 for the board of interest To remove the Logic Supply board it is necessary to first remove the Float ing Supply board After disconnecting the plugs to the par instrument until free of the interconnect board sz Remove this screw to remove the Remove this screw Floating Supply to remove the board Logic Supply Filter Remove this screw board to remove the CPU ...

Page 173: ...cription as an aid Some subtle problems may af fect circuits not apparently related or may not show up while performing the Performance Check Procedure As an aid in locating some of these problem areas the following descriptions and tests are provided CPU Board Intermittent failure of the instrument processor is often caused by a timing problem This is especially true if the instrument fails after...

Page 174: ...t current operation or insufficient float ing supply I zero adjust or maximum I adjust range can be caused by either a 15 V control supply out of tolerance or a circuit fault which results in drawing too much bias current which returns through a current sense resistor The 15 V supplies can be checked from the emitters of Q1100 and Q1101 to TP1620 Floating Supply board The normal range is 14 4 V to...

Page 175: ...nalysis mode The 521 on each display if correct verifies that adjacent lines on the display drivers are not shorted and the lines used are functioning 2 Addressldata buffer test Verify address buffer with this test checks unbuffered address lines but they should be good if self test works Also checks data bus and buffer which indicates if keyboard encoder U1421 and GPlB chip U1001 are putting out ...

Page 176: ...l test mode 0 Troubleshoot display driver II AddressIData Buffer Test A Address bus and buffer B Data bus and buffer A IV GPlB chip test Replace U1001 I L Replace U1421 or troubleshoot sw tches 2 A Replace buffer if bad other failures try kernel test mode B Depending on response replace data buffer do GPlB chip test do keyboard encoder test I 1 Ill Addressable latch test A Dim and relay latch U131...

Page 177: ...10 is cor rect If outputs of latches are correct then use Logic Supply Shift Register Test If the shift registers are all right then most likely the D to A converter is defective REAR INTERFACE INFORMATION Functions Available at Rear Connector Slots exist between pins 19 and 20 and 6 and 7 on the rear interface connectors The slot between pins 19 and 20 is the family key slot The slot between pins...

Page 178: ...ssis ground Family Key 25 V ac winding i 26 V dc Base lead of pnp series pass Emitter lead of pnp series pass Ground 26 V dc Emitter lead of npn series pass TM 5000 Key Base lead of npn series pass 18 V ac winding Ground Ground 8 Vdc 25 V ac winding Assignments listed for pins 1 through 13 are available from all power modules however only those pins marked with an asterisk are used in the PS 5010 ...

Page 179: ...NCTION Sensing common Remote sense Output Common Family Key 25 V ac winding 26 V dc Base lead of pnp series pass Emitter lead of pnp series pass Ground 26 V dc Emitter lead of npn series pass TM 5000 Key Base lead of npn series pass 18 V ac winding Ground Ground 8 Vdc 25 V ac winding Assignments listed for pins 1 through 13 are available from all power modules however only those pins marked with a...

Page 180: ...rd 22A and 228 These connections are the logic supply output Common Logic Supply 21A and 21B These connections provide the return path for the log ic supply output voltage They are connected to chassis ground and Remote Sense and Sensing Common Floating Supply Board 23A 238 24A and 24B These Connections function only in the rear interface mode The sense lines are diode clamped to the respective ou...

Page 181: ...Section 7 PS 5010 OPTIONS No options exist for the PS 5010 at this time ...

Page 182: ......

Page 183: ...tes part number to be used when ordering replace Whenthecompletecomponent numberof apart isknown this list ment part from Tektronix will identify the assembly in which the part is located CROSS INDEX MFR CODE NUMBER TO SERIAL MODEL NO columns three and four MANUFACTURER of the Electrical Parts List The Mfr Code Number to Manufacturer index for the Column three 3 indicates the serial number at whic...

Page 184: ...TIONAL TELEPHONE AND TELEGRAPH CORP ELEC TROL INC SIGNETICS CORP MILITARY PRODUCTS DIV MEPCOKENTRALAB A NORTH AMERICAN PHILIPS CO KYOCERA INTERNATIONAL I NC 11901 W I S O N AVE CLEVELAND OH 44101 CHATSWORTH CA 91311 5911 21001 NORDHOFF ST 600 W JOHN ST HICKSVILLE NY 11802 SANTA CLARA CA 95050 CUPERTINO CAW CA 95014 1500 SPACE PARK OR 10400 RIDGEVIEW CT BURLINGTON I A 52601 2850 MT PLEASANT AVE 710...

Page 185: ...AN AND ASSOCIATES TEKA PRODUCTS INC PHILIPS NEDERLAND BV AFD ELONCO 16931 MILLIKEN AVE 3400 HILLVIEW AVE 7741 N BUSINESS PARK DR PO BOX 37144 7158 MERCHANT AVE 114 OLD STATE RD PO BOX 14460 401 N BROAD ST 14150 S W KARL BRAUM DR PO BOX 500 MS 53 111 561 HILLGROVE AVE PO BOX 10373 2064 12TH AVE PO BOX 609 7633 S 180TH 45 SALEM ST POSTBUS 90050 IRVINE CA 92713 PAL0 ALTO CA 94304 1319 TUCSON AZ 85740...

Page 186: ...00 8031399 670 6677 03 8031400 N a m e Description CIRCUIT B D ASSY FRONT PANEL CIRCUIT B D ASSY INTCON CIRCUIT B D ASSY CPU CIRCUIT B D ASSY LOGIC SUPPLY CIRCUIT BD ASSY LOGIC SUPPLY CIRCUIT B D ASSY FLOATING SUPPLY CIRCUIT B D ASSY FLOATING SUPPLY CIRCUIT B D ASSY FLOATING SUPPLY CIRCUIT BD ASSY FLOATING SUPPLY Mfr Part No 670 6682 00 670 6680 00 670 6676 00 670 6681 00 670 6681 01 670 6677 00 6...

Page 187: ...MAX LT EMITTING DIO RED 650NM 40MA MAX LAMPPLED RDWT ORANGE 7 SEG l DIGIT LT EMITTING DIO RED 650NM 40MA MAX LT EMITTING DIO RED 650NM 40MA MAX LT EMITTING DIO RED 650NM 40MA MAX LT EMITTING DIO RED 650NM 40MA MAX CONN RCPT ELEC CIRCUIT BOARD 25 CONTACT CONN RCPT ELEC CIRCUIT BOARD 25 CONTACT TRANSISTOR NPN S I TO 92 TRANSI STOR NPN SI TO 92 TRANSISTOR NPN S I TO 92 TRANSISTOR NPN S I TO 92 TRANSI...

Page 188: ... 25W RES NTWK FXD FI 5 lOK OHMf5 0 l25W RES FXD FILM 160 OHM 5 0 25W RES FXD FILM 160 0HMf5 0 25W RES FXD FILM 560 OHM 5 0 25W RES FXD FILM 560 OHM 0 25W SWITCH PB ASSY MOMENTARY SWITCH PB ASSY MOMENTARY SWITCH PB ASSY MOMENTARY SWITCH PB ASSY MOMENTARY SWITCH PB ASSY MOMENTARY SWITCH PB ASSY MOMENTARY SWITCH PB ASSY MOMENTARY SWITCH PB ASSY MOMENTARY SWITCH PB ASSY MOMENTARY SWITCH PB ASSY MOMENT...

Page 189: ...ctrical Parts P S 5010 Mr Nam Description Code Mfr Part N o CIRCUIT B D ASSY INTCON 80009 670 6680 00 C O N N RCPT ELEC CKT BD 25 50 FEMALE 05574 000201 4543 CONN RCPT ELEC CKT BD 1 X 36 O 1 SPACING 08261 800 380 000 CONN RCPT ELEC CKT BD 1 X 36 O 1 SPACING 08261 800 380 000 C O N N RCPT ELEC CKT BD 36 72 CONT FEMALE 05574 000201 3774 C O N N RCPT ELEC CKT BD 25 50 FEMALE 05574 000201 4543 REV JAN...

Page 190: ...UF 1PF 50V CAP FXD CER D I O lUF 1PF 50V CAP FXD CER D I O lUF 1PF 50V CAP FXD CER D I O lUF 1PF SOV CAP FXD CER D I O lUF lPF 5OV CAP FXD CER D I O lUF lPF 50V CAP FXD CER D I O lUF lPF 50V CAP FXD CER D I O lUF 1PF 50V CAP FXD CER D I O lUF 1PF 50V CAP FXD ELCTLT 1UF 75 10 50V TERM SET PIN 36 O O25 SQ PIN ON 0 1 CTRS TERM SET PIN 36 0 025 SQ PIN ON 0 1 CTRS TERM SET PIN 36 0 025 SQ PIN ON 0 1 CT...

Page 191: ...ROCKT DGTL QUAD 2 1 NP NOR GATE SCRN 18324 MICROCKT DGTL 3 8 LINE DCDR SCRN 01295 MICROCKT DGTL 4 B 6 X 8 EPROM PROGRAMMED 80009 MICROCKT DGTL 4096 X 8 EPROM PROGRAMMED 80009 160 1333 00 MC6800 S OR Pf N7402 NB OR FB SN74LS138NP3 160 1332 00 160 1331 00 MICROCKT DGTL OCTAL BUS XCVR W 3 STATE OUT 01295 MICROCKT DGTL LSTTL 3 STATE OCTAL BFR SCRN 27014 MICROCKT DGTL LSTTL 3 STATE OCTAL BFR SCRN 27014...

Page 192: ...AP FXD ELCTLT 100UF 75 lo 5OV CAP FXD CER D I O lUF 1PF 50V CAP FXD CER D I O lUF 1PF 50V CAP FXD CER D I O OlUF lo 100V CAP FXD CER D I O OlUF 1077 100V CAP FXD CER D I O 01UF 100 0 500V CAP FXD ELCTLT 330UF 50 lo 25VDC CAP FXD ELCTLT 33OUF 50 20 35V CAP FXD ELCTLT 2000UF 75 10 40V CAP FXD ELCTLT 2000UF 75 10 40V CAP FXD ELCTLT 2000UF 75 10 40V CAP FXD CER D I O lUF lPF SOV CAP FXD CER D I O OlUF...

Page 193: ...C DI SW S1 175V O lA DO 35 SEMICOND DVCfDI RECT SI 200V 1A SEMICOND DVC DI RECT SI 2O0Vf3A A249 SEMICOND DVC DI RECTfSI 200V 3A A249 SEMICOND DVC DI RECT SI 200V 3A A249 SEMICOND DVC DI RECT SI 2O0V 3AfA249 SEMICOND DVC DI SW SI 30V 150M 30VfDO 35 SEMICOND DVC DI RECT SI 400V 1A 00 41 SEMICOND DVC DI SW SI 30V 150M 30V DO 35 FUSE CARTRIDGE 3AG 6A 250V MEDIUM BLOW FUSE CARTRIDGE 3AG 6A 250V MEDIUM ...

Page 194: ...ES FXD FILM 8 66K OtM 1 0 125W TC TO RES FXD WW O l OHM 1 3W RES FXD FILM 2 7K OHM15A 0 25W RES FXD FILM 910 OHM 5 0 25W RES FXD FILM 910 OHM 5 O025W RES FXD CMPSN lK OHM 5 0 50W RES FXD FILM 1K OHMI5 0 25W RES FXD FILM 470 OHM 5 0 25W RES FXD FILM 100 OHM 5 0 5W RES FXD FILM 1 05K OM l O l25W TC TO RES FXD FILM l69K OHM l O 125W TC TO RES FXD FILM 25 5K OtM l O l25W TC TO RES1FXD FILM 9 1K OHM 5 ...

Page 195: ... STORE BUS RGTR MICROCKT LINEAR D A CONVERTER 8 BIT SCRN MICROCKT DGTL 8 STG SHF STORE BUS RGTR SEMICOND DVC DI ZEN SI 16V 5 0 4W DO 7 SEMICOND DVC DI ZEN SI 16V 5 0 4W DO 7 SEMICOND DVC DI ZEN S1 5 1V 5 0 4W DO 7 SEMICOND DVC DI ZEN SI 16V 5 0 4W DO 7 SEMICOND DVC DI ZEN SI 24V 5 0 4W SEMICOND DVC DI ZEN S1 8 2V 5 0 4W DO 7 SEMICOND DVC DI ZEN S1 8 2V 5 0 4W DO 7 SEMICOND DVC DI ZEN SI 4 3V 5 0 4...

Page 196: ...50V CAP FXD CER DI O O047UF 20 500V CAP FXD CER D I 1500PF 5 200V CAP D D CER DI 100PF 5 100V CAP FXD CER D I l5OOPF 5 200V CAP FXD CER DI O O047UF 20 500V CAP FXD CER D I O lUF 1PF 50V CAP FXD CER D I O lUF lPF 5OV CAP FXD CER D I 100PF Y o 100V CAP FXD ELCTLT 10UF 50 20 1OOWVDC CAP FXD ELCTLT 10 UF 50 lo 5 0 V K CAP FXD ELCTLT 10UF 50 20 lOOWVDC CAP FXD ELCTLT 10 UF 50 1m 5OVDC CAP FXD CER D I 0...

Page 197: ...ND DVC DI SW SI 30V 150MA 30V DO 35 SEMICOND DVC DI SW SI 3OV l5OMA 3OV DO 35 SEMICOND DVC DI SW SI 30V 150EV 30V DO 35 SEMICOND DVC DI RECT SI 100V 6A A264 TERM SET PIN l X 14 0 15 SPACING TERM SET PIN l X 14 0 15SPACING RELAY REED 2 FORM A 200MA 100VDC COIL RELAY ARMATURE 2 FORM C 2A 30VDC COIL 24VDC 870 O M COIL RF FIXED 395NH TRANSISTOR NPN SI TO 220 TRANSISTOR PNP SI TO 220 TRANSISTOR NPN SI ...

Page 198: ...M l O l2W TC TO RES FXD FILM 6 2K OHM 5 0 25W RES VAR NONW TRMR 5K OHM 0 5W RESVFXD FILM 2 80K OtM l O l25W TC TO RES FXD FILM 9 6K OHM 1 0 125W TC TO RES VAR NOW TRMRf5K OHM O W RES FXD FILM 10K OHM 5 0 25W RES FXD FILM ZOK OHM 5 0 25W RES FXD FILM ZOK 0HMf5 0 2W RES FXD FILM 1 8K OHM 5 0 25W RES FXD FILM 16K OHM 5 0 25W RES FXD FILM 12 4K 0 1 0 125W TC T9 RES FXD FILM l2 4K OM 1 0 125W TC T9 RES...

Page 199: ...M 40K OHM 0 25 0 125W TC T2 RES FXDfFILM 6 81K 0 0 5 0 125W TC T2 RES FXDfFILM 6 81K 0W 0 5 0 125WfTC T2 RES VAR NONW TRMR lK OHM 0 75W RES VAR NONW TRMR 1K OHM 0 7 RES FXD CMPSN 5 1 OHM 5 0 25W RES FXD W 0 2 OHM 57 1W FlJSIBLE RES FXD WW 0 75 OHM 5 2W RES FXD W 0 2 OHM 5 1W FUSIBLE RES FXD W 0 75 OHM 5 2W RES FXD W 0 75 OHM 5 2W RES FXD WW O 75 OHM 5 2W RES FXD FILM 100 OHM 5 0 25W RES FXD FILM 1...

Page 200: ... SfG SHF STORE BUS RGTR MICROCKT L1NEAR OPNL AMPL CHECKED MICROCKT L1NEAR OPNL AMPL SELECTED MICROCKT LINEAR D A CONVERTER 8 BIT SCRN MICROCKT LINEAR D A CONVERTER 8 BIT SCRN MICROCKT LINEAR CMOS lO BIT MULTIPLYING DAC MICROCKT L1NEAR lO BIT MULTIPLYING D A CONV MICROCKT DGTL 8 STG SHF STORE BUS RGTR MICROCKT DGTL 8 STG SHF STORE BUS RGTR MICROCKT DGTL 8 STG SHF STORE BUS RGTR MICROCKT L1NEAR QUAD...

Page 201: ...6 00 CAP FXD C E R DI 0 47UF 80 20 100V 20932 5034ESlOORD474Z 5500 131 2487 00 JACK TIP GREEN 80009 131 2487 00 5510 136 0732 00 JACK TIP RED 80009 136 0732 00 5520 131 2488 00 JACK TIP WHITE 80009 131 2488 00 JACK TIP RED 80009 136 0732 00 JACK TIP BLACK 80009 136 0731 00 COIL ASSY AF FIXED 2 INDUCTORS SWINGING 80009 108 1015 00 COIL ASSY AF FIXED 2 INDUCTORS SWINGING 80009 108 1015 00 RES FXD CM...

Page 202: ......

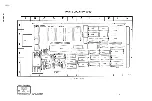
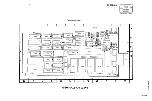
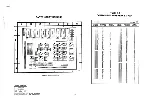
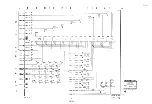
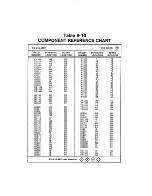
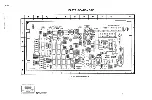
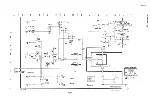
Page 203: ...bly number e g A20 The assembly number grid coordinates is provided for ease of locating the appearson the circuit board outline on the diagram inthe component Onlythecomponents illustratedonthefacing title for the circuit board component location illustration diagram are listed in the lookup table When more than and in the lookup table for the schematic diagram and one schematic diagramisusedto i...

Page 204: ......

Page 205: ... Set J1220 as shown IV Setup PS 5010 A Remove CPU U1111 to free up data bus B Remove R1211 to open data bus V Measurements Using oscilloscope connected to U1212 as shown and checking for highs and lows exercise GPlB address switch and mode jumper J1320 Check for stuck shorted or open signal paths If problems are found trace to buffer switch pull up resistorsor circuit board Depressthis side low De...

Page 206: ...ng startlstop for signature analyzer Check J1111 pin 34 for approxi mately a 7 Hz waveform 140 ms IV Setup PS5010 on extenders 1 GPlB address switch S1221 as shown Press IOt U001 2 Mode jumper J1320 as shown h F Signature mode 3 Runlforce data jumper J1220 as shown 1Force data k These signatures are valid but do not exercise the nodes completely Check these nodes with the Addressable Latch Firmwar...

Page 207: ... E F ROM Enable working U1120 pins 9 and 7 Verify with CPU address lines and address decoding kernel test C C ROM Enable D ROM Enable E ROM Enable F ROM Enable working U1310 pins 4 5 6 and 7 Verify with CPU address lines and address decoding kernel test IV Setup A PS 5010 set conditions with power off 1 Place PS 5010 on flexible extenders 2 Set GPlB address switch S1221 as shown Press 3 Set runlfo...

Page 208: ... of signatures The startlstop and qualify connections are given first Use 5 V signature to verify correct setup The signatures given in parentheses are provided to locate misplaced ROMs There are timing differences be tween the CIE and DIF ROM positions which account for the different signatures on 5 V ROM positions C and E give the same signatures for a particular ROM ROM positions D and F will a...

Page 209: ...D3 u 202 D4 Data D5 a I bufferBI D6 i I J Fig 9 3 CPU board ...

Page 210: ...rtlstop test point functional Check for pulses approximately 5 5 ms apart low true IV Setup A PS 5010 on extenders 1 GPIB address switch to instrument ID 22 address F P I bus I HP5P O buffer I PSP I e 1OA8 O I i 10A8 1 OOOO 1 A Data bus with U1421 installed I Press 2 Mode jumper J1320 as shown I Inputs 0 Outputs I Signature mode a t a bus with U1421 removed 3 Runlforce data jumper J1220 to run pos...

Page 211: ...ow true C U1220 pin 6 clock signalfunctional Check for approximately a 1 MHz toggle IV Setup A PS 5010 on extenders 1 Set GPlB address switch S1221 to ID 22 Press 2 Set mode jumper J132O as shown Inputs Outputs 161514 1 3 l 2 l l 10 9 Signature mode 5 3 7 s Input output 3 tz F pinouts f0r U1310 r i u y dd U l 3 l 4 U l 3 l 5 A B C D E F G 0 and U l 4 1 1 3 Set runlforcedata jumper J1220 as shown m...

Page 212: ...pin 11 Check U1120 pin 11 for pulses approxi mately 5 5 ms apart low true IV Setup PS 5010 on extenders A Set mode jumper J1320 as shown Signature mode 8 Set runlforce data jumper J1220 as shown C Signature analyzer Connect to CPU board and set as follows Threshold TTL Start LConnect to U1120 pin 11 via DIP clip Stop IConnect to U1120 pin 11 via DIP clip Clock IConnect to 42 J1111 pin 2 clock Gnd ...

Page 213: ...or pulses approximately 5 5 ms apart low true C U1220 pin 6 clock signal functional Check for approximately a 1 MHz toggle IV Setup A PS 5010 on extenders 1 Set GPlB address switch S1221 to ID 22 Press 2 Set modejumper J1320 as shown Signature mode 3 Set runtforcedata jumper J1220 as shown Run B Signatureanalyzer Connect to CPU board and set as follows Threshold TTL Start Connect to SIS test point...

Page 214: ...ctional U1120 pin 11 Check U1120 pin 11 for pulses approxi mately 5 5 ms apart low true IV Setup PS 5010 onextenders A Set mode jumper J1320 as shown F Signature mode B Set runlforce data jumper J1220 as shown m Run C Signature analyzer Connect to CPU board and set as follows Threshold TTL Start IConnect to U1120 pin 11 via DIP clip Stop Connect to U1120 pin 11 via DIP clip Clock 1Connect to 62 51...

Page 215: ...ode 2 Set runlforce data jumper J1220 as shown 8 Signature analyzer Connect to CPU board and set as follows Threshold TTL Start IConnect to U1311 pin 13 via DIP clip Stop IConnect to U1311 pin 13 via DIP clip Clock IConnect to 2via J l 111 pin 2 clock Gnd Connect to ground test point TP1011 V Measurements Using the following chart verify stimulus and response for each front panel key Start by veri...

Page 216: ...lse Low 03 D4 D5 D6 07 INST ID ENTER CLEAR 3 6 9 8 5 2 0 1 4 7 INCREMENT 4 SUPPLY SELECT CURRENT VOLTAGE INCREMENT OUTPUT Make data measurements on R1211 1 I 3 4 5 6 7 8 D D D D D D D D 0 1 2 3 4 5 6 7 Pinouts for U1421 2 q c Buffered data bits 2 2 A o h 4 o Q Q o o o I c CPU board Fig 9 7 REV DEC 1982 ...

Page 217: ...5 5 ms apart IV Setup A PS 5010 extend boards with power off 1 Place logic supply board on extender 2 Place CPU board on extender 3 Set mode jumper J1320 as shown c Signature mode 4 Set runlforce data jumper J1220 as shown B Signature analyzer Connect to CPU board and set as follows Threshold TTL Start IConnect to CPU board sls test point TP1401 Stop Connect to CPU board sls test point TP1401 Cloc...

Page 218: ...ep 3 Step 3 TP1330 R1344 R1345 TP1431 TP1430 Ref Com Zero Adj Zero Adj V Dac V Dac Step 3 Step 5 Step 4 Step 3 Step 3 Fig 9 9 Floating supply board A14 adjustments R1950 R1851 R1850 TP1550 R1545 4 5 V Adj Gain Adj Max IAdj Fd Test Point 10 V Gain Adj Step 1 Step 1 Step 2 Step 2 Step 7 Fig 9 10 Adjustments accessed through bottom of instrument ...

Page 219: ...R LOGIC SCALED CURRENT R CURRENT SENSE SCALED I MEASUREMENT I REFERENCE LOGIC SUPPLY 11 KY REAR I PANEL C P 1 INPUT DATA BOARD SHIFT REGISTERS LOOP BALANCE STATUS COMPARATORS t FOLDBACK I L I M I T CIRCUIT I VOLTAGE ERROR AMPL I F1E R I LOGIC VOLTAGE DAC 0 1 0v 0 I bFRONT PANEL ...

Page 220: ...DATA INPUT OPTO ISOLATORS OUTPUT PASS TRANSISTOR 1I N POWER MODULE1 REAR PANEL YjW SENSE I I SHI FT REG1STERS 1 BASE DRIVE EVV r VOLTAGE ERROR VOLTAGE DAC 1 I I LOOP BALANCE STATUS COMPARATOR CURRENT DAC CURRENT ERROR 13 0 VOLTAGE ERROR VOLTAGE DAC I I SWITCHING ...

Page 221: ...CONTROL LOGIC v I I b 5v CPU BOARD KEYBOARD ENCODER KEY DOWN 3C00 BIT 7 1 KEY DATA J 2800 2BFF DIM AND RELAY LATCH 3080 33BF SERIAL OUTPUT AND PARTIAL DISPLAY 3000 333F STATUS BUFFER 3C00 3FFF ADDRESS DECODING OECODED NETWORK Ics LOGIC SUPPLY LOOP BALANCE INOICATORS FLOATINC SUPPLY LOOP BALANCE OPTOISOLATORS FLOATING SUPPLY SHIFT OPTOISOLATORS REGISTER 1 5 VOLT REGULATOR b 5v LOGIC FILTERSUPPLY BO...

Page 222: ...2 COMPONENT NUMBER EXAMPLE Component Number A23 A2 R1234 I I Is b y 1 L Number Subassembly Number Number rf used I I I Chass s mounted components have no Assembly Number Static Sensitive Devices pref x see end of ReplaceableElectrical Parts L st See Marntenance Section ...

Page 223: ...EFERENCE CHART PI0 A12 ASSY CPU Power Supply 0 CIRCUIT SCHEMATIC BOARD NUMBER LOCATION LOCATION CIRCUIT SCHEMATIC BOARD NUMBER LOCATION LOCATION TPlOll D5 84 TP1020 H6 D5 TP1410 C5 L3 VRlOll E9 84 PI0 A12 ASSY also shown on ...

Page 224: ...A 3 R W 2 CPlB CLK CLK CDNT P BCONT 11 1 W l B INTERFACE Ul000 75161 GPIB BUFFER 0 NC 4TRIG TP1410 TPl011 B T I CND J1111 1 I I TP1020 NOTE J1111 I S A TEST FIXTURE ONLY I COMPONENT NUMBER EXAMPLE I COMPONENT NUMBER I NUMBER CIRCUIT SUBASSEMBLY NUMBER NUMBER I F USED CHASSIS MOUNTED COMPONENTS HAVE NO ASSEMBLY NUMBER PREFIX SEE END OF REPLACEABLE ELECTRICAL PARTS LIST STATIC SENSITIVE DEVICES SEE ...

Page 225: ...2 COMPONENT NUMBER EXAMPLE Component Number A23 A2 R1234 I Isembly 1 L Number Subassembly Number 1 used Number I I I Chasswnounted camponenls have no Assembly Number Static Sensitive Devices prefix see end of ReplaceableElectrical Parts L st See Marntenance Secbon ...

Page 226: ... 1 J 1 1 1 1 J 1 1 1 1 J l l l l J 1 1 1 1 J 1 1 1 1 J l l l l J 1 1 1 1 J 1 1 1 1 J l l l l Microprocessor 0 CIRCUIT SCHEMATIC BOARD NUMBER LOCATION LOCATION R l l 2 8 R1210G R1211 R 1220 R1222 R 1223 R1310A R1310B R1310C R1410 U l l l l U1112A U1112C U1112D U1120 U1202 U1210 U1213A U1213C U1220A U1220B U1320A U1320E Ul323A VR1121 Pi0 A12 ASSY also shown on O O O ...

Page 227: ...l 0 f 1 9 31111 9 EXT R E S T RES 40 NC SS NC v B A TSC A8 WE A 11 A 12 A 13 A14 RU A15 01 VUA Jllll 6 COMPONENT NUMBER EXAMPLE Number I used I I Chassis mounted components have no Assembly Number pref x see end of Replaceable Electr calParts L st Static Sensitive Devices See Maintenance Section MICROPROCESSOR DJD ...

Page 228: ...ACK Fig 9 13 CPU board A12 COMPONENT NUMBER EXAMPLE Component Number A23 A2 R1234 I I Chasslsmunted components have no Assembly Number 8 Static Sensitive Devices prellx see end of Replaceable Electr calParts List See Maintenance Section ...

Page 229: ...CIRCUIT SCHEMATIC BOARD NUMBER LOCATION LOCATION CIRCUIT SCHEMATIC BOARD NUMBER LOCATION LOCATION U1100 1 4 D2 U l l O l G4 E2 U1200 F4 F2 U1201 D4 G2 U1310 1 8 H3 U1311 D8 J3 U1313C G7 J3 U1320C H7 H5 U1320F 1 6 H5 U13230 D7 K5 PI0 A12 ASSY also shown on 00 0 ...

Page 230: ...ssembly J 1 Ls zp I Number Subassemblv kt A I Number if used u uc I U AWRESS MCOOER Imo1 OUTPUT PART ALO SPLAY Chassis mountedcomponents have no Assembly Number prefix see end of Replaceable Electrical Parts List STATUS SEL KEYBOARD b U1421 14 411 Static Sensitive Devices See Maintenance Section MEMORY 0JD ...

Page 231: ...CPU BOARD A 12 ...

Page 232: ...NENT REFERENCE CHART PI0 A12 ASSY Input Output CIRCUIT SCHEMATIC BOARD NUMBER LOCATION LOCATION C1300 E7 J2 C1411 H7 K3 C1420 C2 K5 C1421 C5 K5 C1422 C5 K5 C1423 C5 L5 CIRCUIT SCHEMATIC BOARD NUMBER LOCATION LOCATION ...

Page 233: ...48 27A HICHPOYERCOTIPARtr EKT PI 28A FS 1 BALANCED P14WU 26B FS I BALANCED STATUS BUFFER I 211 CAL h l 1 l8 I 7 3 lQ 18 Vcc CND DIN COMPONENT NUMBER EXAMPLE I Component Number CLR I I SERIAL OUTPUT AN0 PARTIAL DISPLAY LATCH IAssembly J 1 L Number Subassembly Number if used Number I1 Chassismountedcomponents have noAssembly Number prefix see end of ReplaceableElectrical Parts List Static Sensitive ...

Page 234: ...EP 16EE n n n ...

Page 235: ...C 1400 13 L1 C1401 H7 K2 C1412 J7 K4 C1413 J7 M4 CIRCUIT SCHEMATIC BOARD NUMBER LOCATION LOCATION U1213D H5 F4 U1221 E8 G5 U1301 H2 J 1 U1313A H7 J3 U13136 13 J3 U1314 G9 H4 U1315 F2 J4 U13206 F7 H5 U1320D 17 H5 U1321A 19 K5 U13218 19 K5 U1321C 18 K5 U1321D 1 8 K5 U1322 D7 H5 U13238 18 K5 U1323C 18 K5 U1400 13 L2 U1410 J5 L2 U1412 K6 L4 PI0 A12 ASSY also shown on G ...

Page 236: ... Component Number 1 LSchemat c Assembly Number Subassembly Circuit Number fused Number 1 22 Hz BLINK CLOCK IU l 4 l 2 74LS241 0 1SCRETE LED D RlVER pref x see end of Replaceable Electrical part L st Static Sensitive Devices See Maintenance Section I 74LS390 ICLOCK DI V IDER at 1 LED ENABLE l g 2 U13200 5v b v Q 7 l N C 1A4 C1311 1 lA3 Q6 N C U1323B 4 6 74LS08 1Al BA3 I A at U1323C 2 8 74LS0B 014 2...

Page 237: ...A10 ASSY Front Panel CIRCUIT SCHEMATIC BOARD NUMBER LOCATION LOCATION CIRCUIT SCHEMATIC BOARD NUMBER LOCATION LOCATION IAssembly _ 1 Schematic Number Subassembly AUb r Number 11 used 1 1 Chassis mounted componentshave no Assembly Number Static Sensitive Devices prefix see end of ReplaceableElectr calParts List See Maintenance Section ...

Page 238: ...A D R1026 d w J1021 12 P1021 12 LS d Pl02l 15 LS 9 4 b __ P1021 21 LS AMPS R1032 G W R1311 G IP1021 17 LS p COMPONENT NUMBER EXAMPLE Component Number e m 1 Lschematic Number Subassembly orcult Number I used Chass smounled components have no Assembly Num prehx see end of Replaceable Eleclr cal Parts Llst OUTPUT O N Gu Rl039 51240 8 240 8 5 1K Static Sensitive Devices See Maintenance Section A00 LED...

Page 239: ... A23 A2 R1234 I I Ilssemb y J 1 Lschem c Number Subassembly Number I used Number I Chasswmounted components have no Assembly Number Static Sensitive Devices ellx see end ol Replaceable Oectrcal Parts L1s1 See Maintenance Sectlon Fig 9 17 Floatingsupply board A 14 ...

Page 240: ...SCHEMATIC BOARD NUMBER LOCATION LOCATION p C1120 C1230 C1231 C1340 C1341 CR1112 CR 1330 CR2030 F1250 F1340 F1341 KlllO K1510 K2010 L1240 P1000 P1000 P1000 P1000 CIRCUIT SCHEMATIC BOARD NUMBER LOCATION LOCATION PI0 A13 ASSY also shown on PI0 A14 ASSY Ground Reference Circuit 0 PI0 A14 ASSY also shown on ...

Page 241: ...POYER COtRARTMM I PVR P1000 68 PVR 1 no I Q1729 PVR PI500 228 J1 500 22B I R1043 5 lK Pl020 22A FS OUTPUT ON I P W R m J P1020 19A OUTPUT RELAY RETURN COMPONENT NUMBER EXAMPLE I Com onentNumber 1 A23 A2 R1234 Assembly Number T T c h e r n a t c Subassembly Circurt Number if used I PVR MDL I PI0 A14 FLOATING SUPPLY BOARD Chassis mountedcomponentshave no Assembly Number I P O A13 LOGIC SWF LY FILTER...

Page 242: ...OMPONENT NUMBER EXAMPLE Component Number A23 A2 Rl234 T T Ii Assembly _ Number Subassembly Number rf used I I Chass s mountedcomponents have no Assembly Number Static Sensitive Devices pref x see end ol Replaceable Electr calParts L st See Maintenance Section ...

Page 243: ... J 1200 J500 J5 10 K1110 P I 120 P I 120 01200 Q1400 Ql64O Q1650 Ql73O Q1731 Q2050 RllOO R l l O l R l l l O R l l l l R1112 C l D l D l F5 G4 H4 H5 J4 54 J5 J5 K5 L5 Chassis 82 C2 82 C1 C2 E6 E6 E6 F5 F4 F6 G5 G5 H5 H5 82 C3 C3 C2 C2 Chassis Chassis C3 C3 C3 C2 E1 G5 G6 H4 H4 L6 C1 C1 82 C2 C2 CIRCUIT SCHEMATIC BOARD NUMBER LOCATION LOCATION D2 E5 E6 F5 F5 F5 F5 F5 F6 G6 G4 G4 G5 G5 G6 G5 G5 H5 H...

Page 244: ...URRENT C DAC 2s 0813 V REF DBl2 B1 IMSB DBll 2s OBI0 C a2 DB9 a1 068 l0 B6 w vss 2 6 V 2W SELECTED b 15V 15V U1840 N C 8V M5009 C1831 T 0 w U1741 I COMPONENT NUMBER EXAMPLE ComponentNumber A23 A2 R1234 I Chass smounted components have no Assembly Nu1 pref x see end of Replaceable Eleclr cal Parts 11s Static See Mafnfenance Sensitive Sect on Devices P O A13 LOGIC SUPPLY FILTER BOARD PS 5010 LOGIC S...

Page 245: ...ard A 13 COMPONENT NUMBER EXAMPLE Component Number A23 A2 R1234 I IAssembly 1 1 s y Number Subassembly Number d used Number I I Chass smountedcomponents have no Assembly Number Static Sensitive Devices prehx see end ol Replaceable Electr calParts L st See Mamtenance Section REV MAR 1984 ...

Page 246: ... J1930 J1930 K1510S K2010s K2010s L500A L5OOB L510A L51O B P1000 P1000 P1000 P1000 P I 140 P I 140 P I 140 PI140 PI140 PI140 D2 D3 D3 D3 A3 A3 A3 A3 85 B5 85 85 85 85 85 F4 F4 F4 F4 K4 K4 K4 K4 F2 L2 L2 Chassis Chassis Chassis Chassis A3 A3 A3 A3 B5 85 B5 85 85 85 PI0 A13 ASSY also shown on 6 CIRCUIT SCHEMATIC BOARD NUMBER LOCATION LOCATION I PI0 A14 ASSY Rectifier Filter Q1100 Q1101 R1001 R1002 R...

Page 247: ......

Page 248: ...ponent Number A23 A2 R1234 I I IAssembly 1 schematic Number Subassembly i i r Number i used I Chasswmountedcomponentshave no Assembly Number prel x see end of ReplaceableElectr calParts L st Static Sensitive Devices See Maintenance Section Fig 9 20 Floating supply board A14 ...

Page 249: ... l 4 O R l l 4 l R l l 4 2 R1143 R l l 4 4 R1202 R1210 R1211 R1212 R1213 R1220 R1221 R1222 R1223 R1300 R1301 R 1302 CIRCUIT SCHEMATIC BOARD NUMBER LOCATION LOCATION R l 3 l l R1321 R1327 R1330 R1331 R1332 R1333 R 1334 R 1335 R 1340 R1341 R1342 R1343 R 1344 R1345 R 1346 R1347 R1349 R1445 R1530 TP1330 TP1340 TP1430 TP1431 TP1630 U1030 U1041 U1042 U l l l l A U1111B U1121 U1130 U1140 U1221 U1230 U123...

Page 250: ... V O A C 4 0 5v w con TPl838 0 1 4 connON c CON REF TPl33B REFERENCE COHHON 2 15V 3 3 b 1 9 R1220 V REF UllllB 6 4 m 15V V O A C O U T R1445 0 COMPONENT NUMBER EXAMPLE I Comoonent Number 1 IAssembly J 1 LSchematic Number Subassembly orcurt Number rf used Number I 1 REFERENCE 0ISABLE I I Chass smunted componentshave no Assembly Numbel prefix see end of ReplaceableElectr calParts L st Static Sensiti...

Page 251: ...ply board A14 COMPONENT NUMBER EXAMPLE I Comoonent Number 1 Ie b L Number Subassembly Number rf used hawsmounted componmts harp no AssemblyNumber Static sensitive Devices prel x see end ol Replaceable Electr calParts Llst see Maintenance section ...

Page 252: ...L4 L4 L4 L4 Chassis H3 K3 L1 A3 A3 J2 M2 M2 M2 L4 CIRCUIT SCHEMATIC BOARD NUMBER LOCATION LOCATION P1630 P1630 Q1400 Q1401 Q1402 Q1640 21641 R1102 RllO3 R1120 R1121 R1122 R1324 R1400 R l 4 l l R1412 R1413 R1420 R1422 R1500 R1531 R1533 R1541 R1542 R1543 R1544 R1545 R1611 R1612 R1622 R1632 R1640 R1641 R1643 Sl5OOC Sl5OOD Sl6OOA UllOO U111OA U1110B U l l lOC U l l lOD U1420 VR 1420 PI0 A14 ASSY also ...

Page 253: ......

Page 254: ...D COMPONENT NUMBER EXAMPLE Component Number A23 A2 R1234 I I Chass s mountedcomponents have no Assembly Number Static Sensitive Devices prel x see end ol Replaceable Electr calParts 1st See Marntenance Section Fig 9 22 Floating supply board A14 ...

Page 255: ...ly 0 CIRCUIT SCHEMATIC BOARD NUMBER LOCATION LOCATION 2 G2 H2 G3 G3 J4 L5 K5 Chassis F2 F3 G3 F3 F3 H2 H2 G4 H5 H5 J3 J3 54 J2 J2 L4 L4 L4 Chassis Chassis H3 K3 A3 A3 J2 J2 L4 L4 L4 G I G2 CIRCUIT SCHEMATIC BOARD NUMBER LOCATION LOCATION P I 0 A14 ASSY also shown on ...

Page 256: ...ERROR AHPLlFiER U1430 ZERO CURRENT ERROR AHPLIFIER I 7 1 SUPPLY FILER BOARD I COMPONENT NUMBER EXAMPLE Component Number I T T T s c w m a t l c A23 A2 1 2 3 4 Assembly _ Number Subassembly C rcU t Number rf used I 1020 2A 1020 2B V COLLECTOR SUPPLY I 1 Chass smounted componentshaveno Assembly Number prehx see end ol Replaceable Electr calParts Ltst Static Sensitive Devices See Maintenance Section ...

Page 257: ...CATION J1020 N1 F3 J1021 B1 A3 J1240 812 D5 COMPONENT NUMBER EXAMPLE A23 A2 R1234 CIRCUIT SCHEMATIC BOARD NUMBER LOCATION LOCATION J1400 F1 83 J1500 J1 C3 I Schernat c Assembly i 1 L Number Subassembly Number 11used 8Static Sensitive Devices See Maintenance Sect on C Chassrs rnountedcomponents haveno AssernMy Number pret r see end ol Replaceable Electr calParts L sl ...

Page 258: ...CEO FS DATA FS DATA 0 7 701 l o p SERIAL RETURN TEST PA0 FS V BALANCE0 FS V BALANCEO O FS CLOCK FS CLOCK ley a i men POWR COMPARTKFR l o I p o r n C W A I 1 25 0 07 I n I t I I5v 10 i 8 0 FS I BALANCED FS I BALANCED g 1 cpu A I OUTPUT RELAY RETURN e y P O I wu j lop 9 0 1 CPU 109 901 5v T H S E INTERCONNECT LlNES ARE NOT CROW40 REFERENCED AN0 MAY FLOAT TO 150V PEAK ABOVE MUSSIS GROUND COMPONENT NU...

Page 259: ...s section are numbers to the illustrations ACTR ADPTR ALIGN AL ASSEM ASSY ATTEN AWG BD BRKT BRS BRZ BSHG CAB CAP CER CHAS CKT COMP CONN c o v CPLG CRT DEG DWR INCH NUMBER SIZE ACTUATOR ADAPTER ALIGNMENT ALUMINUM ASSEMBLED ASSEMBLY ATTENUATOR AMERICAN WlRE GAGE BOARD BRACKET BRASS BRONZE BUSHING CABINET CAPACITOR CERAMIC CHASSIS CIRCUIT COMPOSITION CONNECTOR COVER COUPLING CATHODE RAY TUBE DEGREE D...

Page 260: ...INC LEWIS SCREW CO 17301 RIDGELAND RICHARDS M E 2021 W VALLEY VIEW LN PO BOX 810839 77 DRAGON COURT 515 FISHING CREEK RD 111 INDUSTRIAL RD 4001 BENEFIT AVE P 0 BOX 9 800 E NORTHWEST MJY ST CHARLES ROAD 14150 S W KARL BRAUM DR PO BOX 500 MS 53 111 3221 W BIG BEAVER RD 1101 SPMUELSON R D 13885 R A M O NAVE 7031 SONORA AVE 600 18TH AVE 19115 HAMILTON AVE PO BOX 389 4300 S RACINE AVE TINLEY PARK I L 0...

Page 261: ...0 266 I D X 0 5 OD X 0 05 END ATTACHING PARTS NUT PLAIN KNURL 0 25 28 X 0 375 OD BRS NP STUD SHLDRUTEP BINDING POST PANEL FRONT ATTACHI NG PARTS SCR ASSEM WSHR 6 32 X 0 5 TAPTITE PNH STL WASHER FLAT 0 141 I D X 0 266 OD X 0 5 AL END ATTACHING PARTS M4RKER IDENT MKD GPIB INSTRUCTION PLASTIC CH4NNEL O 156 X 0 156 POLYETHYLENE PANEL REAR ATTACHING PARTS SCREW TPG TF 6 32 X 0 375 L FILH STL SUPPORT PL...

Page 262: ...40 X 0 5 PNHfSTL INSULATOR XSTR TO 220 POLYENELENE INSULATOR PLATE TRANSISTOR END ATTACHING PARTS TRANSISTOR SEE A13Q1400 REPL ATTACHING PARTS SCREW MACHINE 4 4 X 0 375 PNH STL WASHER SHLDR INSULATOR PLATE TRANSI STOR ALUMINA END ATTACHING PARTS HEAT SINK ELEC CIRCUIT BOARDPAL ATTACHING PARTS SCR ASSEM WSHR 4 40 X 0 29 PNH BRS N I PL END ATTACHING PARTS TERM TEST POINT SEE A13TP1550 TPl75l REPL ST...

Page 263: ...E AllJ1020 Jl5OO REPL CONN RCPT ELEC SEE AllJ1400 REPL SUBPANEL FRONT ATTACHI NG PARTS SCR ASSEM WSHR 4 40 X 0 29 PNH BRS N I PL WASHER FLAT 0 14 I D X 0 25 OD X 0 031 END ATTACHING PARTS CKT BOARD ASSY FRONT PANEL SEE A10 REPL SWITCH PB ASSY SEE A10S1030 REPL SWITCH PB ASSY SEE A10S1120 S1130 Sll31 S1131 S1133 S1220 S1221 S1222 S1223 S1230 Sl 3l l23Z Sl233 Sl32O Sl322 Sl33O 1 3 3 1 REPL SWITCH PB...

Page 264: ......

Page 265: ...to printing and shipping requirements we can t get these changes immediately into printed manuals Hence your manual may contain new change information on following pages A single change may affect several sections Since the change information sheets are carried in the manual until all changes are permanently entered some duplication may occur If no such change pages appear following this page your...

Page 266: ... 156 0885 00 156 0885 00 156 0885 00 156 0885 00 156 0885 00 156 0885 00 156 0885 00 Page 1 of Description OPTOELECTRONIC ISOLATOR OPTOELECTRONIC ISOLATOR OPTOELECTRONIC ISOLATOR OPTOELECTRONIC ISOLATOR OPTOELECTRONIC ISOLATOR OPTOELECTRONIC ISOLATOR OPTOELECTRONIC ISOLATOR OPTOELECTRONIC ISOLATOR OPTOELECTRONIC ISOLATOR OPTOELECTRONIC ISOLATOR OPTOELECTRONIC ISOLATOR OPTOELECTRONIC ISOLATOR OPTOE...

Reviews: