C O N F I G U R I N G T H E V O I P G A T E W A Y V I A T H E W E B
Rev H
87 of 244
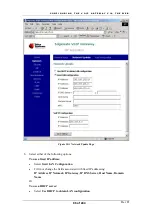
7. Scroll down to the bottom of the Web page, and click the
Save Settings
button.
8.
Select
Reset
in the vertical menu bar to reset the unit (see
You can now use the new IP address.
11.1.1 Setting the VoIP Gateway to be a DHCP Client
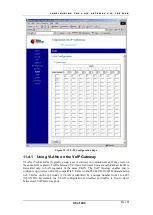
To use a DHCP server to supply an IP address to the VoIP Gateway, you must first configure
the unit appropriately by selecting the
Use DHCP to obtain LAN configuration
option, as
described in step 6 above.
We recommend that you configure your DHCP server to assign the same address to the VoIP
Gateway unit each time it is powered up. This will help to track the available VoIP Gateway
units during the VoIP Gateway and Gatekeeper configuration.
When the VoIP Gateway unit is powered up, it queries the DHCP server for an IP address.
You must know this “new” IP address, assigned by the server, in order to access the VoIP
Gateway Web Setup Facility. To determine which IP address refers to your VoIP Gateway,
see the IP address in the CLI opening screen that appears when the unit boots with a terminal
(see
Upgrading the Gateway Firmware and Downloading Configuration Files
11.1.2 Using VoIP Gateway with a Fixed Address
If you do not have access to a DHCP server, and your Gateway is configured to use a DHCP
server, or if you do not know the IP address used by the Gateway, configure your Gateway
via a terminal connected to the AUX/Console port (not avaible for 232 products, use Keypad
Configuration). You can also view the IP address or disable DHCP.
11.2
VoIP Protocol Configuration
Once the VoIP Gateway unit has obtained its IP address, you can use the Web Configuration
to configure the VoIP Gateway. To be able to place calls, you must configure the VoIP
protocol parameters, appropriate to the VoIP protocol installed in the VoIP Gateway (H.323,
MGCP or SIP). Refer to sections which detail H.323 configuration, MGCP configuration, or
SIP configuration.
11.3
Autoconfiguration
To enable and set automatic configuration (see
Upgrading the Gateway Firmware and
Downloading Configuration Files
1.
In the horizontal menu bar of the
Network
page, select
AutoConfguration
.
The
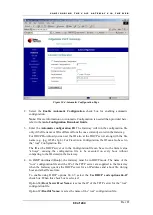
Automatic Configuration page appears (
).
Summary of Contents for AC - 232 - TX
Page 4: ......
Page 24: ......
Page 44: ......
Page 50: ......
Page 68: ......
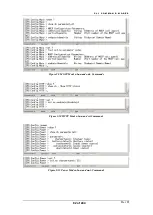
Page 79: ...C L I C O M M A N D M O D E S Rev H 79 of 244 Figure 9 4 Network Mode show and set Commands ...
Page 81: ...C L I C O M M A N D M O D E S Rev H 81 of 244 Figure 9 8 SIP Mode show and set Commands ...
Page 98: ......
Page 108: ......
Page 156: ......
Page 158: ......
Page 170: ......
Page 184: ......
Page 202: ......
Page 228: ......
Page 234: ......
Page 242: ......

