Assembly instructions
Vers. 001
Flat Sat Light
13
Connections
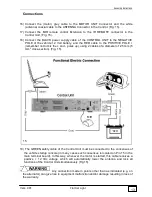
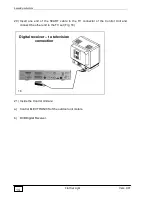
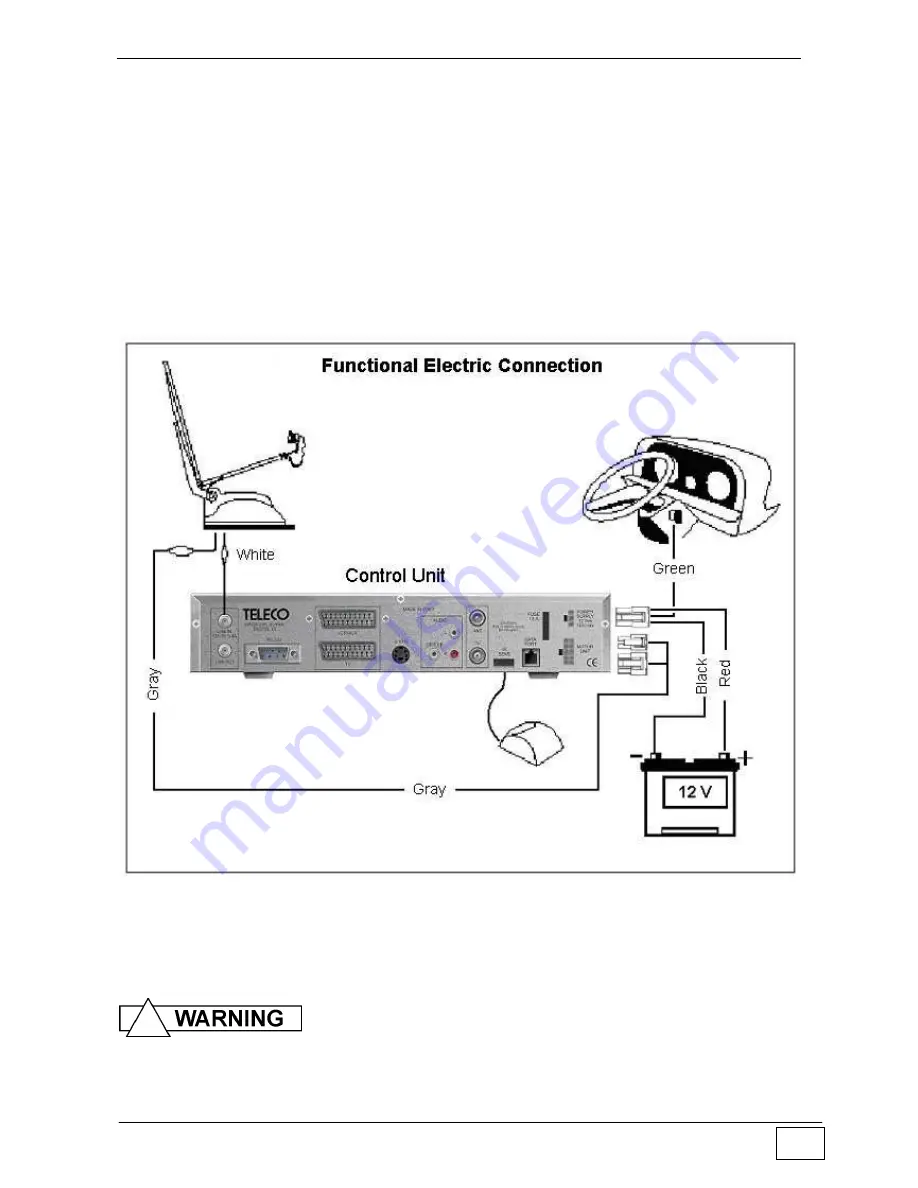
16) Connect the (motor) grey cable to the MOTOR UNIT Connector and the white
(antenna) coaxial cable to the ANTENNA Connector in the Control. (Fig. 15).
17) Connect the MIR remote control Extension to the IR REMOTE connector in the
Control Unit. (Fig. 15).
18) Connect the BLACK power supply cable of the CONTROL UNIT to the NEGATIVE
POLE of the vehicle 12 Volt battery, and the RED cable to the POSITIVE POLE +
(remember not to mix the + and - poles up), using 2 cables of a diameter of 2,5 mm (5
mm
2
cross-section). (Fig. 15).
19) The GREEN safety cable of the Control Unit must be connected to the consensus of
the vehicle startup console (in many cases such consensus is located on Pin 15 in the
main terminal board). In this way, whenever the motor is started, this cable receives a
positive + 12 Vdc voltage, which will automatically lower the antenna and lock all
functions of the Control Unit simultaneously (Fig.15).
Any connection made in points other than as indicated (e.g. on
the alternator) can give rise to equipment malfunction and/or damage resulting in loss of
the warranty.
MIR
15
Summary of Contents for Flat Sat Classic Smart 85
Page 1: ...Vers 001 INSTALLATION GUIDE AND USER MANUAL OF THE FLAT SAT LIGHT GB...
Page 63: ...Flat Sat Light digital Tav 1 Vers 1 del 10 02 2009...
Page 65: ...Flat Sat Light digital Tav 2 Vers 1 del 10 02 2009...
Page 68: ...Flat Sat Light digital Tav 3 Vers 1 del 10 02 2009...
Page 70: ...Flat Sat Light digital Tav 4 Vers 1 del 10 02 2009...


