Assembly instructions
Vers. 001
Flat Sat Light
9
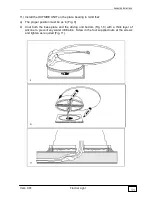
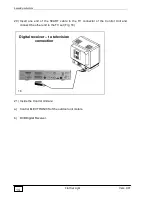
6) Remembering that the OUTSIDE UNIT must be fastened as shown on Figure 3,
remove the BASE PLATE from the outside unit, unscrewing all 4 nuts. Position the
base plate as Fig.4 with the short side towards the driving direction of the vehicle (Fig.
4).
7) Clean the lower part of the BASE PLATE carefully, applying a layer of glue on the
whole surface (e.g. SIKAFLEX).
8) Fasten the Base Plate to the roof (short side towards the driving direction of the
vehicle), now fasten the external powered unit to the four stud bolts of the plate, using
the four nuts supplied with the equipment.
Summary of Contents for Flat Sat Classic Smart 85
Page 1: ...Vers 001 INSTALLATION GUIDE AND USER MANUAL OF THE FLAT SAT LIGHT GB...
Page 63: ...Flat Sat Light digital Tav 1 Vers 1 del 10 02 2009...
Page 65: ...Flat Sat Light digital Tav 2 Vers 1 del 10 02 2009...
Page 68: ...Flat Sat Light digital Tav 3 Vers 1 del 10 02 2009...
Page 70: ...Flat Sat Light digital Tav 4 Vers 1 del 10 02 2009...


