background image


4

 
Emergency Procedure 
 

In case of Emergency, please follow the procedure below and contact the distributor for service 
immediately. 
 
1.


Press EMS button of transmitter. 

2.


Remove the key from transmitter. 

3.


Switch off crane main power. 

4.


Contact distributor nearest you immediately. 


F24-60N Operation


How to start 

 
1.


Insert 4 AA-size batteries into battery compartment.   

2.


Insert rotary key and switch to ON position. 

3.


Follow the Power-On procedure to energize receiver main relay.   

4.


Operate normally according to the function settings have been done. 

5.


Follow the instructions below to switch off the system: (1) Press EMS button /mushroom, (2) 
remove  the  key  and  keep  it  in  safe  place,  (3)  Switch  off  the  equipment’s  main  power  (e.g. 
Crane)   


Transmitter Batteries 
 

Transmitter  requires  4  AA  size  alkaline  or  rechargeable  batteries.  3  stages  power  indicator 
available  on  transmitter.  During  operation,  green  LED  indicator  flashes  when  battery  power  is 
full  and  flashes  yellow  when  battery  power  is  low.  Replace  new  battery  immediately  when 
yellow indicator appears, unloading and stop all activity until new battery is replaced. An EMS 
stop  signal  will  be  sent  automatically  to  receiver  accompany  with  red  LED  indicator  if  the 
transmitter power is below the limit. 


Receiver Power Supply 

 
Each transformer provide 2 option voltages for receiver power supply as below: 
(1) 48/110 VAC 
(2) 110/220 VAC 
(3) 48/220 VAC 
(4) 220/380 VAC 


Changing Frequency by Setting DIP Switch 
 

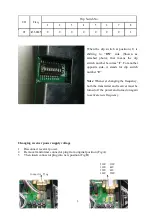
The  dip  switch  of  F24-60N  allows  users  to  set  in  70  different  frequency  channels.  And  each 

channel  is represented by a combination of 8 dip  switch numbers. For example, CH #01 (Freq. 

433.0625) is #

00000001

.   


Summary of Contents for F24-60N

Page 1: ...F24 60N Industrial Remote Controller Operating Manual TELECRANE Lee s Hi Tech Ent Co Ltd ...

Page 2: ...2 Table of Contents Warranty Precautions of Operation 2 F24 60N Operation 4 F24 60N Software Quick Start 8 Definition of Function Terminology 13 ...

Page 3: ...enance unauthorized modification improper operation ignorance of environmental specifications or improper software setting Remarks No other warranty is expressed or implied except for the above mentioned The remedies provided herein are the buyer s sole and exclusive remedies TELECRANE shall not be liable for any direct indirect special incidental or consequential damages Attention Never dismantle...

Page 4: ...rane Transmitter Batteries Transmitter requires 4 AA size alkaline or rechargeable batteries 3 stages power indicator available on transmitter During operation green LED indicator flashes when battery power is full and flashes yellow when battery power is low Replace new battery immediately when yellow indicator appears unloading and stop all activity until new battery is replaced An EMS stop sign...

Page 5: ... it stands for dip switch number 0 Note Whenever changing the frequency both the transmitter and receiver must be turned off the power and turned on again to activate new frequency Changing receiver power supply voltage 1 Disconnect receiver power 2 Remove transformer connector plug from original position Fig A 3 Then insert connector plug into new position Fig B Connector Plug 110V 48V 48V 220V 2...

Page 6: ...s not released completely The transmitter is not properly Power On Note Please contact the distributor nearest you for further assistant if need Transmitter green Yellow LED indicator flashing crossly when start key switch on The joystick 1 memory is damaged Contact the distributor for service Transmitter red yellow LED indicator flashing crossly when start key switch on The joystick 2 memory is d...

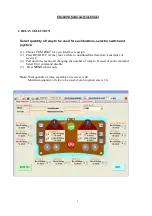
Page 7: ...nterface is assign 2 Press READ R C It may take a while to download the data from transmitter or receiver 3 Pull down the menu and changing the number of relay to be used of each command Select 0 for command disable 3 Press NEXT when ready Note Total quantity of relay available on receiver is 40 Maximum quantity of relay to be used of each joystick axis is 16 ...

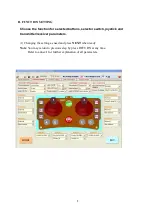
Page 8: ...ted buttons selector switch joystick and transmitter receiver parameters 1 Changing the setting as need and press NEXT when ready Note You may return to previous step by press RETURN at any time Refer to annex I for further explanation of all parameters ...

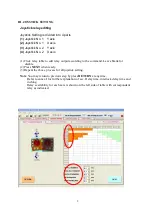
Page 9: ...dit relay output according to the command Leave blank for disable 2 Press NEXT when ready 3 Repeat the above process for all joystick setting Note You may return to previous step by press RETURN at any time Refer to annex I for further explanation of acc Delay time interlock delay time and inching Relay availability for each axis is shown on the left side of table with correspondent relay as indic...

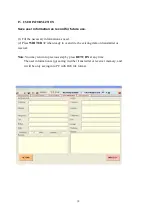
Page 10: ...mation as need 2 Press WRITE R C when ready to overwrite the existing data on transmitter or receiver Note You may return to previous step by press RETURN at any time The user information is not saving in either transmitter or receiver memory and it will be only saving into PC with D24 file format ...

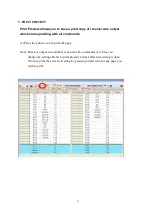
Page 11: ...nding with all commands 1 Press the printer icon to print the page Note Receiver output wire number is varied with command every time you change the settings Refer to print preview always after new setting is done You may print the screen of setting by pressing printer icon for any page you wish to print ...

Page 12: ...g one direction forward moving opposite direction backward immediately would be dangerous specially when crane is hooking up the heavy object The object may sway if crane does not completely stop before moving into opposite direction Therefore the interlocked delay time could potentially prevent it Normally the interlocked delay time should be larger than the duration of crane stop Bypass EMS The ...

Page 13: ...erates the control is not subject to temporary and unexpected stops Possible short interferences are bypassed The passive act can be select in 2 mode as below Ry Off If the interferences are larger than the pre set time the receiver will turn off all the relays under NORMAL function except the MAIN relay Power Off If the interferences are larger than the default time setting the receiver will turn...

Reviews: