Troubleshooting and Service
Teledyne API – Model T108 Addendum to T100 Manual
20
07268C DCN8258
15.
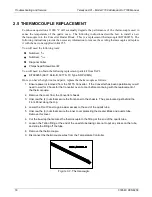
Clean
the chassis where the Tie-Wrap Hold-Down will be placed (alcohol is recommended), and
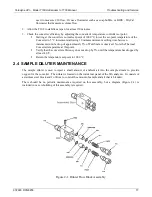
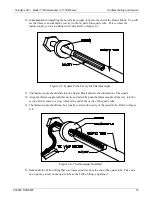
place the Tie-Wrap Hold-Down as shown in the Figure 2-5.
Figure 2-5. Tie-Wrap Hold-Down Location
16.
Form
the
Thermocouple wire so that it rests in the cavity with little movement.
17.
Connect
the (2) wires of the thermocouple to the Temperature Controller. The Black wire should
be connected to Pin 1 and the Red wire should be connected to Pin 2. (If the wires are of any other
color, STOP. Get the correct part from TAPI Sales or call Technical Support; see Section 2.6).
18.
At
this
point, all connections have been made, both electrically and pneumatically. A leak check
should be performed on the Converter to verify that all connections are leak free. If a leak is
detected, the leak should be resolved before continuing.
19.
Install
the inner cover of the Heater Block and secure with the (3) nuts. Close the Front Panel and
secure with the (4) nuts. Install the top cover on the Converter chassis.
20.
T
he Converter is now ready for the application of power. You will be looking for an
indication
from
the temperature controller that it is functioning correctly and driving the heater to the desired “set”
temperature. Apply power now.
The converter is now ready for operation.
2.6 TECHNICAL SUPPORT
For Technical Assistance regarding the use and maintenance of this instrument or any other Teledyne API
product, contact Teledyne API’s Technical Support Department:
Telephone: 800-324-5190
Email: api-techsupport@teledyne.com
or access any of the service options on our website at
Summary of Contents for T108 Series
Page 2: ......
Page 26: ...Appendix A Model 501 Interconnects 07268C DCN8258...


