189
9. CALIBRATION PROCEDURES
This section describes the calibration procedures for the T300/T300M. All of the
methods described in this section can be initiated and controlled through the COM ports.
I
MPORTANT
I
MPACT ON
R
EADINGS OR
D
ATA
If you are using the T300/T300M for US-EPA controlled monitoring, refer
to Section
Error! Reference source not found.
.
Note
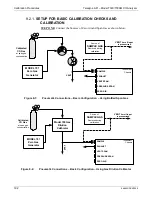
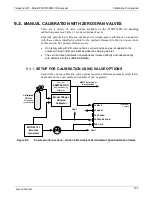
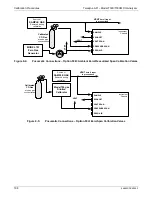
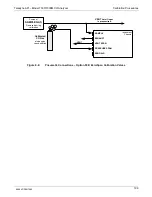
Throughout this section are various diagrams showing pneumatic
connections between the T300/T300M and various other pieces of
equipment such as calibrators and zero air sources.
These diagrams are only intended to be schematic representations of
these connections and do not reflect actual physical locations of
equipment and fitting location or orientation.
Contact your regional EPA or other appropriate governing agency for
more detailed recommendations.
9.1.
CALIBRATION PREPARATIONS
The calibration procedures in this section assume that the range mode, analog range and
units of measure have already been selected for the analyzer. If this has not been done,
please do so before continuing (see Section 5.7 for instructions).
9.1.1.
REQUIRED EQUIPMENT, SUPPLIES, AND EXPENDABLES
Calibration of the T300/T300M Analyzer requires specific equipment and supplies.
These include, but are not limited to, the following:
•
Zero-air source
•
Span gas source
•
Gas lines - All Gas lines should be PTFE (Teflon), FEP, glass, stainless steel or
brass
•
A recording device such as a strip-chart recorder and/or data logger (optional) (For
electronic documentation, the internal data acquisition system DAS can be used).
•
Traceability Standards
06864D DCN7562
Summary of Contents for T300
Page 2: ......
Page 182: ...06864D DCN7562 ...
Page 227: ...225 This page intentionally left blank 06864D DCN7562 ...
Page 228: ...06864D DCN7562 ...


