2 – Installation
DPN 402197 Issue 7.1
© Teledyne Limited
2- 5
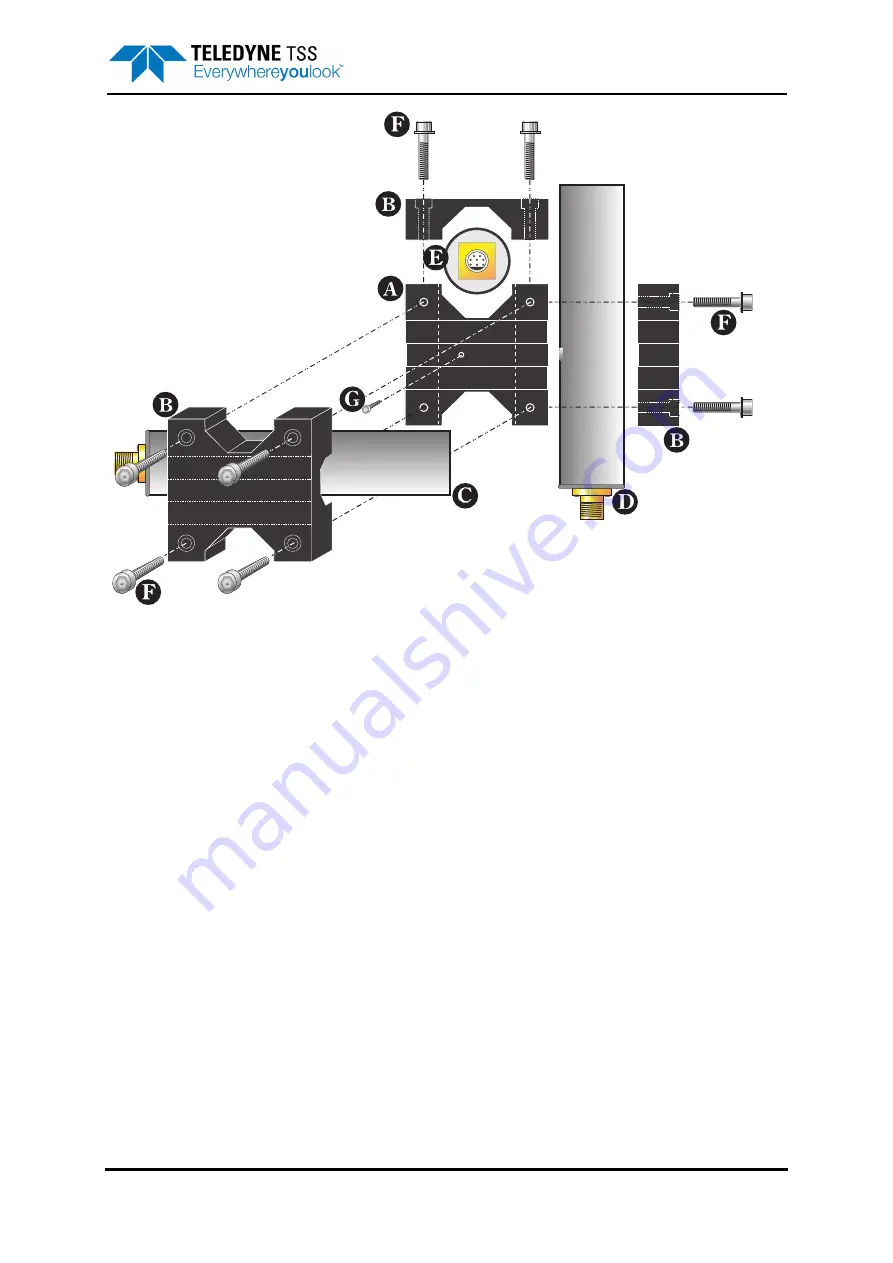
Figure 2-3: Construction of the starboard coil triad
The following instructions describe the construction of the
starboard
coil triad (the port coil triad is a
mirror image of this).
1. Place the centre support block
A
on a clear, flat space. Turn the block so that there is a groove
running left-to-right on the top face as shown in
Fit the lateral coil first:
2. Insert an M5 × 12mm screw
G
into the hole near the centre of the top groove. Use a 3mm hex-
agonal key to tighten the screw lightly.
3. Turn the lateral coil
C
so that the 8-way connector is towards the left-hand side of the centre
block as shown. Place the coil into the groove so that the head of the M5 screw engages with
the recess in the coil body.
4. Place a clamping block
B
against the coil and insert four M8 × 50mm bolts
F
. Use a 6mm hex-
agonal key to tighten the bolts evenly until the block supports the coil properly.
Do not over
tighten these bolts
.
Fit the fore-aft coil:
5. Insert an M5 × 12mm screw into the right-hand groove of the centre block. Use a 3mm hexag-
onal key to tighten the screw lightly.
6. Turn the fore-aft coil
D
so that it is to the right-hand side of the centre block with its 8-way con-
nector pointing towards you as shown in Figure 2-3. Fit the coil to the groove so that the head


