background image


USB Adapter 
User Manual


Page 

36 


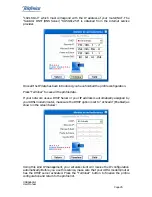
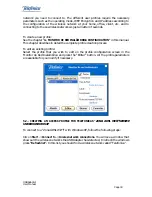
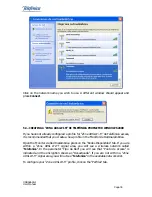
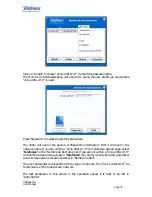
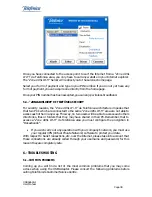
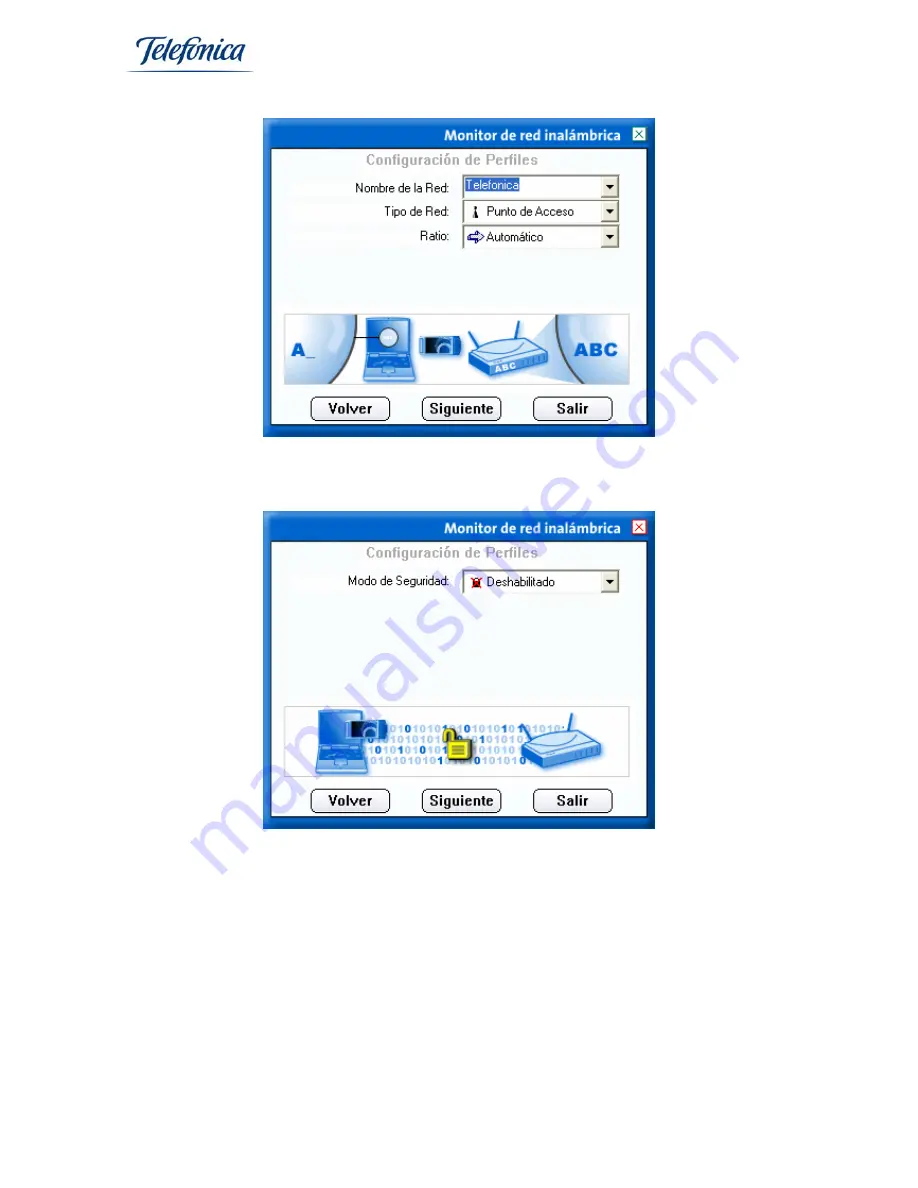
Once these three parameters are configured, press "Siguiente". The utility will then ask 
the encryption type. Select "Desactivado". 


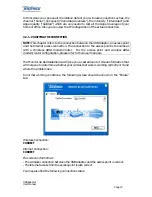
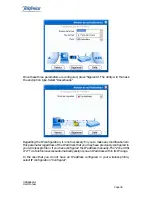
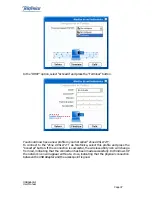
Regarding the IP configuration, it is not necessary for you to make any modifications to 
this parameter regardless of the IP address that you may have previously configured in 
your wireless profile or if you have configured the IP address manually. The “Zona ADSL 
Wi-Fi
” de Telefónica access automatically assigns you an IP address within its IP range 
 
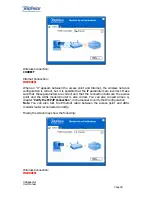
In the case that you do not have an IP address configured in your wireless profile, 
select IP configuration “Configurar”. 
 

Summary of Contents for USB Adapter

Page 1: ......

Page 2: ...OF PREFERRED NETWORKS PROFILE MANAGEMENT 13 4 1 4 CHANGING THE ADVANCED CONFIGURATION 14 4 1 5 DOMESTIC OR SMALL OFFICE WIRELESS NETWORK WIZARD 14 4 2 CONFIGURATION UNDER WINDOWS 2000 18 4 2 1 VARIFYING THE CONNECTION 27 4 3 USB ADAPTER DE INSTALLATION 31 4 3 1 USB ADAPTER DE INSTALLATION UNDER WINDOWS XP 31 4 3 2 USB ADAPTER DE INSTALLATION UNDER WINDOWS 2000 32 5 USAGE OF THE WIRELESS CONNECTION...

Page 3: ...the following chapters before proceeding with the start up of this service The new version of the Equipamiento ADSL Inalámbrico de Telefónica is based on the network standard IEEE 802 11g This regulation guarantees compatibility with IEEE 802 11b and between devices that comply with this Standard IEEE 802 11g can reach speeds of up to 54Mbps Attention Before proceeding with the installation of you...

Page 4: ...products box USB Adapter Cradle and USB cable Documentation Quick Installation Guide User Manual this document Warrantee Card Waiver Card One installation and support CD ROM which contains the following The devices driver and wireless network monitor setup file Acrobat Reader Quick Installation Guide in Spanish and English User Manual in Spanish and English TCP IP Guidelines Router location Guidel...

Page 5: ...dapter to an USB 1 1 port it will work fine but its performance will not be its maximum 2 3 SYSTEM REQUIREMENTS Desktop or laptop PC Operating system Windows 2000 or Windows XP One 1 1 or superior USB port Pentium III or superior 64 MB of RAM memory CD ROM reader 15MB free hard disk spacce VERY IMPORTANT It is very possible that during the installation in your PC you will need your operating syste...

Page 6: ...ader The CD ROM will play automatically 3 Select the option Instalar AdaptadorUSB 4 Please refer to chapter 3 2 DRIVER AND MONITOR DE RED INALÁMBRICA INSTALLATION 5 Connect the USB Adapter to a USB port on your PC 6 Refer to the chapter 4 MONITOR DE RED INALÁMBRICA CONFIGURATION to configure your USB Adapter Remember It is very possible that during the installation in your PC you will need your op...

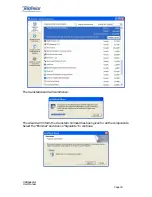
Page 7: ... installation programme will automatically prepare the installation of the drivers shown in the following screens The installation will welcome you to the installation process Press Siguiente to start the installation of the USB Adapter ...

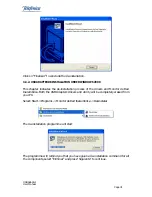
Page 8: ...nce press Sí and you will pass onto the screen shown bellow if you wish to exit the installation press No In this screen you can choose where you want to install the files that the installation programme will install Once you have selected press Siguiente to continue The programme will install the Monitor de Red Inalámbrica s components ...

Page 9: ...ur USB Adapter to a USB port of your PC and make sure that the task bar at the bottom right hand side of your screen has a new icon corresponding with your wireless device Windows 2000 Windows XP If the icon appears red this indicates that you have not yet associated your USB Adapter with another wireless device Important note If the icon that corresponds with the wireless network appears crossed ...

Page 10: ...nformation consult the routers user manual Example of the label on the router 4 1 CONFIGURATION UNDER WINDOWS XP Once you have installed your wireless adapter in your PC the wireless network configuration tool becomes enabled en Windows XP which allows you to connect to a wireless network and verify the wireless network status In this chapter screen shots are taken as an example to assist you to m...

Page 11: ...sh the list by clicking on the Refresh button situated at the top left hand side of this window 4 To connect to a wireless network shown in the list double click on the desired network If this wireless network is protected by WEP or WPA encryption once selected a new window will appear on the screen where you will be required to type in ...

Page 12: ...on about how to manage your wireless network please read the following chapters It is recommended that you use 128 bit WEP keys for ADSL wireless routers based on 802 11b and WPA PSK for those based on 802 11g 4 1 2 VERIFYING THE STATUS OF THE WIRELESS NETWORK To verify the status of the wireless network double click n the wireless networks icon situated in the task bar in Windows XP The wireless ...

Page 13: ...nd priority to a certain connection over another click on the Change the order of preferred networks in the related tasks menu on the left hand side of the Wireless networks screen The Wireless network connection properties screen will appear Click on the Wireless Network option and a list of preferred wireless networks will appear To give a higher priority to a certain network on the list select ...

Page 14: ...ess the Advanced Configuration of the wireless network adapter This is very useful for TCP IP configuration 4 1 5 DOMESTIC OR SMALL OFFICE WIRELESS NETWORK WIZARD To configure a domestic wireless network assisted by Window XPs setup wizard click on Configure a domestic or small office wireless network in the network task menu situated at the top left hand side of the screen The setup wizard will a...

Page 15: ...ose the Assign manually a network key option If you use a WPA encryption instead of a WEP select the corresponding option When you click on next a new screen will appear where you will need to type in the network key that you previously selected Be sure to type in the exact same key case sensitive that has been previously configured in your wireless router ...

Page 16: ...apter User Manual Page 16 When you click on Next once you have typed in the network key and the How would you like to configure the network Screen will appear choose the Configure the network manually option ...

Page 17: ...nce you have clicked on the Next button wizard finalization screen will appear where it is recommended that you print out the configuration for other possible wireless network clients To finish the setup wizard click on the End button ...

Page 18: ...y has been configured these graphic will help you to decide on the working state of the USB Adapter and its connections Click on the Redes Disponibles tab In this screen you will find all the available networks that are with the signal range of the USB Adapter In this screen you will see a Refrescar button when you click on this button the programme will search for all the wireless networks within...

Page 19: ...n the tab Perfiles to create a connection profile You can create as many profiles as necessary This way you can have a profile for your home office or any other place you may use a wireless connection Click on the Añadir Add button to start a new profile configuration ...

Page 20: ...type in the network name or select the network by pressing on the arrow next to the Nombre de Red option which is recommended If you choose to type in the network name manually the name has to be exactly the same if you select the name from the list you eliminate any margin of error The next parameter is the type of network you wish to use Tipo de Red If you wish to connect to an access point or w...

Page 21: ...less network can operate under the four speeds corresponding with the 802 11b standard 1Mbps 2Mbps 5 5Mbps 11Mbps and the 802 11g speeds 54 48 36 24 18 12 9 6Mbps You can force the USB Adapter to work under any of these speeds or set the USB Adapter to automatically select the speed for you This mode will always select the optimum speed possible Sometimes it is necessary to reduce the operating sp...

Page 22: ... the net or access the information on your local area network It is recommended that you always configure your wireless network with the encryption enabled WEP encryption has two options 64 bit key Less safe but quicker 128 bit key Safer but slower You can select any of the two codes It is recommended to select 128 bits key for an 802 11b Base Unit or wireless ADSL modem router The difference betw...

Page 23: ...bits Type in the wireless networks encoded key Remember that the same key must be specified in the rest of the networks wireless components such as the access point etc If you have an 802 11g Wireless ADSL Router and USB Adapter it is recommended that you use WPA PSK In the Encriptación Encryption option select TKIP and press Siguiente In the next screen type in the network key Remember that you m...

Page 24: ...e to another If you prefer to modify your IP configuration manually Consult your operating systems user manual for instructions and leave the utilities IP configuration disabled select No configurar and press Terminar In the example Configurar is selected then press Siguiente The example will be based static IP address For this you must disable Desactivado the DHCP service and type in an IP addres...

Page 25: ...e all the profile data If your network uses a DHCP Server or your IP address is automatically assigned by your ADSL modem router make sure the DHCP option is set to Activado Enabled as shown in the screen below Using this kind IP management your wireless client will receive the IP configuration automatically Before you use this service make sure that your ADSL modem router has the DHCP server acti...

Page 26: ...change from red and the connection information In Windows XP the network icon will appear in an operating status and without a red cross informing that there is a physical connection between the USB Adapter and the access point To test the quality of the wireless connection you can click on the Más More button situated in the Enlace Redes Disponibles and Acerca de tabs The following screen with ap...

Page 27: ...on to the access point is the same as with a Wireless ADSL modem router For the access point and wireless ADSL modem router configuration please refer to their user manuals The Monitor de Red Inalámbrica will give you a vast amount of visual information that will help you to determine whether your wireless network is working correctly or if and where the problem lies In normal working conditions t...

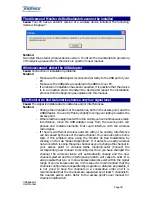
Page 28: ...incorrect Make sure that these parameters are correct and that the connection between the access point and the ADSL modem router is also correct You can also consult Annex A chapter Verify the TCP IP Connection in the manual to verify the IP configuration Note You can also test the Ethernet cable between the access point and ADSL modem router is connected correctly Finally the screen may show the ...

Page 29: ... Inalámbrica version 1 0 2 9 Note The Monitor de Red Inalámbrica is only visible when your USB Adapter is connected in the spot of your laptop PC When the USB Adapter is disconnected the Monitor de Red Inalámbrica will disappear from the task bar and will only return when the card is reconnected 4 3 USB ADAPTER DE INSTALLATION 4 3 1 USB ADAPTER DE INSTALLATION IN WINDOWS XP This chapter indicates ...

Page 30: ...B Adapter User Manual Page 30 The de install wizard will commence The wizard will inform the de install command has been given for all the components Select the Eliminar and click on Siguiente to continue ...

Page 31: ...rocess of the drivers and Monitor de Red Inalámbrica Both the USB Adapters drivers and utility will be completely erased from your PC Select Start Programs Monitor de Red Inalámbrica Desinstalar The de installation programme will start The programme will remind you that you have given a de installation command for all the components select Eliminar and press Siguiente to continue ...

Page 32: ...s correct your PC will automatically connect to the access point Use the Monitor de Red Inalámbrica to supervise configure and maintain your wireless network connection See chapter 7 TROUBLE SHOOTING if you detect any functional abnormality or if you wish clarify any queries 5 1 USER PROFILES The Monitor de Red Inalámbrica allows you to configure your wireless client so that it can be used in diff...

Page 33: ...mplete profile creation process To edit an existing profile Select the profile that you wish to edit en the profile configuration screen in the Monitor de Red Inalámbrica and press the Editar button All the profile parameters are available for you modify if necessary 5 2 CREATING AN ACCESS PROFILE FOR TELEFONICAS ZONA ADSL WI FI SERVICE UNDER WINDOWS XP To connect to a Zona ADSL WI FI with Windows...

Page 34: ...te a new profile in the Monitor de Red Inalámbrica Open the Monitor de Red Inalámbrica press on the Redes Disponibles tab If you are within a Zona ADSL Wi Fi signal area you will see a wireless network called Telefonica In the parameter Tipo de Red you will see that Punto de Acceso is indicated and the encryption shows as Desactivada If you are not within a Zona ADSL Wi Fi signal area you will not...

Page 35: ...ll ask for the network name If you are within a Zona ADSL Wi Fi de Telefónica signal range select Telefonica in the Nombre de Red drop list If you are not within a Zona ADSL Wi Fi de Telefónica signal range type in Telefonica be careful when typing this parameter as a wireless network is case sensitive in Nombre de Red The next parameter corresponds with the type of network The Zonas ADSL Wi Fi de...

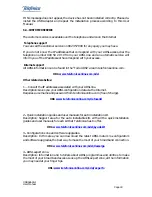
Page 36: ... you to make any modifications to this parameter regardless of the IP address that you may have previously configured in your wireless profile or if you have configured the IP address manually The Zona ADSL Wi Fi de Telefónica access automatically assigns you an IP address within its IP range In the case that you do not have an IP address configured in your wireless profile select IP configuration...

Page 37: ...t to the Zona ADSL Wi Fi de Telefónica select this profile and press the Conectar button If the connection is successful the wireless utility icon will change from red indicating that the connection has been made successfully In Windows XP the network icon will appear without a cross indicating that the physical connection between the USB Adapter and the access point is good ...

Page 38: ... Fi area are not able to access each other in any way This way no two users will be able to access each others directories files or folders that they may have shared in their PC Remember that to access a Zona ADSL Wi Fi de Telefónica area you must configure the encryption in Desactivado If you wish carry out any operation with your company s network you must use your regular VPN Virtual Private Ne...

Page 39: ...int Other electrical equipment within the vicinity can sometimes cause radio interference move the USB Adapter away from the access point cell phones and metallic elements that could interfere with the wireless radio signal If there is a different wireless network within the vicinity interference can be caused by the use of the same channel You can make some home tests if this problem arise using ...

Page 40: ...ameter Solution One of the most common wireless network incidents is the incorrect key which is specified in the user profile In the Monitor de Red Inalámbrica make sure the parameters that are specified are correct primarily the network name of the wireless network and the encryption key The wireless network Works but I do not have Internet access Cause The IP configuration is incorrect Solution ...

Page 41: ...he IP address of your ADSL modem router Servidor DNS Supplied in a letter sent by Telefónica or you can also call 900 50 20 10 from your ADSL line or see www telefonicaonline com 6 2 DRIVER VERIFICATION In the case of your USB Adapter is not activated LED permanently off make sure that the device s drivers are correctly installed To verify this follow these steps In Windows 2000 Select Start Setti...

Page 42: ... click over the USB Adapter and select Properties In the General tab there is a box in the middle of the window titled Device Status and if the USB Adapter is correctly installed inside this box will appear This device is working properly ...

Page 43: ...addresses associated with your ADSL line Description Gives you your ADSL configuration data via the Internet Requires a username and password from telefonicaonline com free of charge URL www telefonicaonline com datosadsl 2 Quick installation guides and user manuals for auto installation kit Description Support area for the auto installable kits with all the quick installation guides and user manu...

Page 44: ... and the pieces that form party of the USB adapter can all be recycled under the regulations enforced in Spain for recyclable material The symbol of the dust bin with a cross through it that can be found on the device jeans that once the device has reached the end of its usefulness it should be taken to the appropriate disposal centre and should be separated from regular domestic waste CUSTOMER SE...

Page 45: ...ass B limitations EN55024 1998 the generic immunity standard of electromagnetic compatibility residential commercial and light industrial ecology January 1992 Also with IEC 801 2 1984 IEC 801 3 1984 IEC 801 4 1988 SECURITY Low voltage committee The products previously aforementioned have been tested for their electrical security according to the Directive 72 23 EEC of the European council with the...

Page 46: ...r service centre for large companies 900 120 900 Where you will be attended by our advisors or if you prefer you can visit our website www telefonicaonline com To obtain information about our post sales service see the warrantee card of the product you have purchased Finally to send a complaint via postal service please send to Telefónica de España S A U Gran Vía 28 28013 Madrid Telefónica de Espa...

Reviews: