background image

English

   - 4 -

Features

• 

Remote controlled colour 

TV

• 

Fully 

integrated 

digital 

terrestrial/cable/satellite 

TV 

(DVB-T2/C/S2)

• 

HDMI 

inputs 

to 

connect 

other 

devices 

with 

HDMI 

sockets

• 

USB input

• 

OSD menu system

• 

Stereo sound system

• 

Teletext

• 

Headphone connection

• 

Automatic programming system

• 

Manual tuning

• 

Automatic power down after up to eight hours.

• 

Sleep timer

• 

Child lock

• 

Automatic sound mute when no transmission.

• 

NTSC playback

• 

AV

(Automatic V

olume Limiting)

• 

PLL

 (Frequency Search)

• 

Game Mode (Optional)

• 

3LFWXUHRႇIXQFWLRQ

Accessories Included

• 

Remote Control

• 

Batteries: 2 x 

AAA

• 

Instruction Book

Standby Notications

If 

the 

TV 

does 

not 

receive 

any 

input 

signal 

(e.g. 

 from 

an 

aerial 

or 

HDMI 

source) 

fo

m

inutes, 

it 

will 

go


into 

standby

. W

hen 

you 

next 

switch-on, 

the 

following 

message 

will 

be 

displayed: 

TV 

switched 

to 

stand-by


mode 

automatically 

b

ecause 

there 

was 

no 

signal 

for a long time.

” 

Press 

OK

 to continue.

If 

the 

TV 

is 

on 

and 

it 

isn’t 

being 

operated 

for 

w

hile 

it 

will 

go 

into 

standby

. W

hen 

you 

next 

switch-on, 

the 

following 

message 

will 

be 

displayed. 

TV 

switched 

to


stand-by 

m

ode 

automatically 

b

ecause 

no 

operation


was made for a long time.

” 

Press 

OK

 to continue.

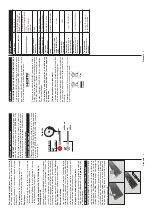
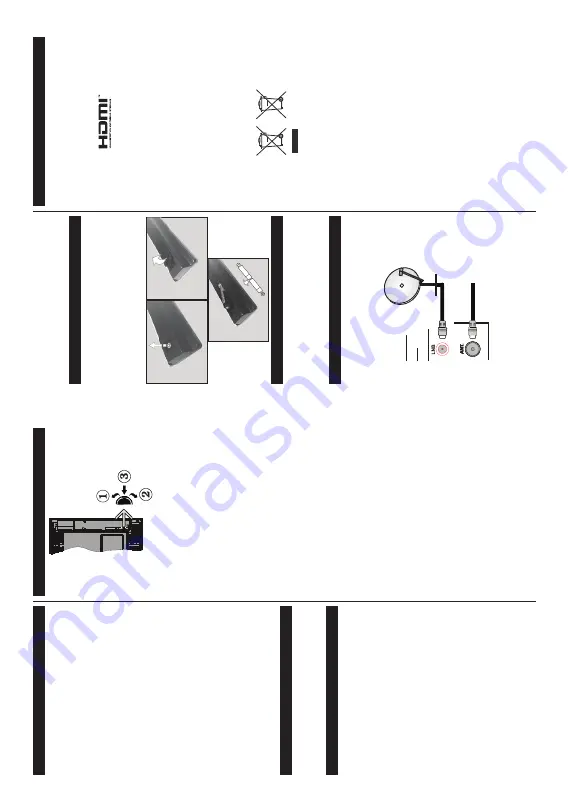
TV Control Switch & Operation

1. 

Up direction

2. 

Down direction

3. 

Vo

lume 

Info 

Sources 

List 

selection 

and


Standby-On switch

The 

Control 

button 

allows 

you 

to 

control 

the 

Vo

lume/ 

Programme/Source 

and 

Standby-On 

functions 

of


the 

TV

.

To

 c

hange 

volume: 

Increase 

the 

volume 

by 

pushing 

the 

button 

up. 

Decrease 

the 

volume 

by 

pushing 

the 

button down.

To

 c

hange 

channel:

 Press 

the 

middle 

of 

the 

button 


in, 

the 

information 

banner 

will 

appear 

on 

the 

screen. 

Scroll 

through 

the 

stored 

channels 

by 

pushing 

the


button up or down.

To

 c

hange 

source:

 Press 

the 

middle 

of 

the 

button 

in 

twice(for 

the 

second 

time 

in 

total), 

the 

source 

list 

will 

appear 

on 

the 

screen. 

Scroll 

through 

the 

available


sources by pushing the button up or down.

To

 t

urn 

the 

TV 

o

Press 

the 

middle 

of 

the 

button 

in 

and 

hold 

it 

down 

for 

few 

seconds, 

the 

TV 

will 

turn 

into standby mode.

To

 turn on the TV

:

 Press the middle of the button in, 

the 

TV will turn on.

Notes: 

• 

,I

\RX

WXUQ

WKH

79

Rႇ

WKLV

FLUFOH

VWDUWV

DJDLQ

EHJLQQLQJ

with the volume setting.

• 

Main 

m

enu 

OSD 

cannot 

be 

displayed 

via 

control 

buttons.

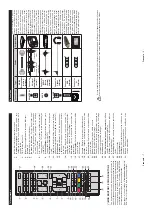
Operation with the Remote Control

Press 

Menu

 b

utton 

on 

your 

remote 

control 

to 

display 

main 

menu 

screen. 

U

se 

the 

directional 

buttons 

to 

select


menu 

tab 

and 

press 

OK

 to 

enter

. U

se 

the 

directional 

buttons 

again 

to 

select 

or 

set 

an 

item. 

Press 

Return/

Back 

button or 

Menu

 button to quit a menu screen.

Input Selection

Once 

you 

have 

connected 

external 

systems 

to 

your 

79

\RX

FDQ

VZLWFK

WR

GLႇHUHQW

LQSXW

VRXUFHV

3UHVV

Source

 b

utton 

on 

your 

remote 

control 

consecutively 

WRVHOHFWWKHGLႇHUHQWVRXUFHV

English

   - 5 -

Changing Channels and V

olume

Yo

can 

change 

the 

channel 

and 

adjust 

the 

volume 

by 

using 

the 

V

olume 

+/-

 and 

Programme


+/-

 buttons 

on the remote. 

Inserting the Batteries into the Remote

Remove 

the 

screw 

that 

secure 

the 

battery 

compartment


FRYHU

RQ

WKH

EDFN

VLGH

RI

WKH

UHPRWH

FRQWURO

¿UVW

/LIW

the 

cover 

gently

. Insert 

two 

size 

AAA

 batteries. 

Make 

sure 

the 

(+) 

and 

(-) 

signs 

match 

(observe 

correct


polarity). 

D

not 

m

ix 

old 

and 

new 

batteries. 

Replace 

only 

with 

same 

or 

equivalent 

type. 

Place 

the 

cover 

back


on. 

Then screw the cover back on again.

Connect Power 

IMPORT

ANT

: The 

TV 

set 

is 

designed 

to 

operate 

on 

220-240V 

AC, 

Hz

 s

ocket. 

After 

unpacking, 

allow 

the


TV 

set 

to 

reach 

the 

ambient 

room 

temperature 

before 

you 

connect 

the 

set 

to 

the 

m

ains. 

Plug 

the 

power 

cable


to the mains socket outlet.

Antenna Connection

Connect 

the 

aerial 

or 

cable 

TV 

plug 

to 

the 

AERIAL


INPUT

 (ANT) 

socket 

or 

satellite 

plug 

to 

the 

SA

TELLITE


INPUT

 (LNB) socket located on the back of the 

TV

.

satellite

REAR

OF

THE TV

aerial 

or

cable

Notication

TRADEMARK 

ACKNOWLEDGMENT

The 

terms 

HDMI 

and 

High-Definition 

Multimedia


Interface, 

and 

the 

HDMI 

Logo 

are 

trademarks 

or


registered 

trademarks 

of 

HDMI 

Licensing 

Administrator

Inc. in the United States and other countries.

Manufactured 

under 

license 

from 

Dolby 

Laboratories. 

Dolby

D

olby 

A

udio 

and 

the 

double-D 

symbol 

are


trademarks 

of 

D

olby 

Laboratories. 

Confidential


unpublished 

works. 

C

opyright 

©1992-2019 

Dolby


Laboratories. 

All rights reserved.

Information 

for 

Users 

on 

Disposal 

o

f Old 

Equipment


and Batteries

[European Union only]

Equipment 

bearing 

these 

symbols 

should 

not 

be


disposed as general household waste. 

You 

should 

look 

for 

appropriate 

recycling 

facilities 

and 

systems for the disposal of these products.

Notice: 

The sign Pb below the symbol for batteries indicates 

that this battery contains lead.

Products

Battery

Summary of Contents for C32H540A

Page 1: ......

Page 2: ......

Page 3: ... Abdecken oder 9HUVWHOOHQ GHU 9HQWLODWLRQV ႇQXQJHQ GXUFK HJHQ stände wie Zeitungen Tischdecken Gardinen o ä behindert werden Der Stecker des Stromkabels sollte leicht zugänglich sein Stellen Sie keine Gegenstände auf das Netzka bel weder das Gerät selbst noch Möbel usw und klemmen Sie das Kabel nicht ein Beschädigungen am Netzkabel Netzstecker können zu Bränden oder Stromschlägen führen Handhaben ...

Page 4: ...tark an Deutsch 4 WARNUNG Der Anschluss von Geräten die über die Netzverbindung oder andere Geräte an die Schutzerdung des Gebäudes angeschlossen sind über Koaxialkabel an ein TV Verteilersystem kann unter Umständen eine mögliche Feuergefahr darstellen Eine Verbindung über einen Kabelverteilersystem ist nur dann zulässig wenn die Vorrichtung eine Isolierung unterhalb eines gewissen Frequenzbereich...

Page 5: ... auf der Rückseite der Fernbedienung ab Heben Sie die Abdeckung vorsichtig an Legen Sie zwei AAA Batterien ein Vergewissern Sie sich dass die und Zeichen sich einander entsprechen korrekte Polarität Verwenden Sie niemals alte und neue Batterien zusammen Ersetzen Sie diese ausschließlich durch solche des gleichen oder eines gleichwertigen Typs Setzen Sie die Abdeckung wieder auf Schrauben Sie die A...

Page 6: ...s des Bildschirms 23 Text Zeigt Teletext an sofern verfügbar erneut drücken um den Videotext über das normale Fernsehbild Mix zu überlagern 24 Meine taste 2 2 EPG Elektronischer Programmführer Zeigt den Elektronischer Programmführer 26 Verlassen Schließt sich und verlässt angezeigte Menüs oder kehrt zum vorherigen Bildschirm zurück 27 Schnellmenü Zeigt eine Liste der Menüs für schnellen XJULႇ 28 K...

Page 7: ...se den Home Modus auszuwählen Diese Option ist in Einstellungen Einstellungen Sonstige Einstellungen verfügbar und kann später ein bzw ausgeschaltet werden Drücken Sie die OK Taste auf der Fernbedienung Nachdem die Ersteinstellungen vorgenommen wurden Deutsch 10 startet Ihr TV Gerät die Suche nach verfügbaren Sendern unter den ausgewählten Sendertypen Nachdem alle verfügbaren Sender gespeichert si...

Page 8: ...s angeschlossene Soundsystem geliefert Hinweis Das Audiogerät sollte die System Audio Control Funktion unterstützen und die CEC Option sollte auf Aktiviert gesetzt werden Deutsch 12 TV Menüinhalte System Bild Menüinhalt Modus Sie können den Bildmodus ändern um es nach Ihren Wünschen oder Anforderungen anzupassen Der Bildmodus kann auf eine dieser Optionen eingestellt werden Kino Spielen optional S...

Page 9: ...ählten Quellenoptionen ein oder aus Zugänglichkeit Zeigt die Zugänglichkeitsoptionen des TV Geräts an Für Schwerhörige Aktiviert eine spezielle Funktion die vom Sender gesendet wird Audio Beschreibung Für Blinde oder Sehbehinderte wird eine Schilderung abgespielt Drücken Sie OK um alle verfügbaren Menüoptionen der Audio Beschreibung anzuzeigen Diese Funktion ist nur verfügbar wenn der Kanalbetreib...

Page 10: ...e gewählten Sender werden zur Liste hinzugefügt Um einen oder mehrere Sender von einer Favoritenliste zu entfernen führen Sie diese Schritte in der gleichen Reihenfolge durch und stellen Sie die gewünschten Listenoptionen auf Aus S i e k ö n n e n d i e F i l t e r F u n k t i o n i m M e n ü Programmliste bearbeiten nutzen um die Sender in der Programmliste entsprechend Ihren Wünschen GDXHUKDIW X...

Page 11: ...u suchen Wird eine neue Softwareaktualisierung gefunden beginnt das Gerät mit dem Herunterladen Bestätigen Sie nach dem Abschluss des Downloads die Frage nach einem Neustart des TV Geräts indem Sie OK für die Fortsetzung des Neustarts drücken 3 Hintergrundsuche und Aktualisierungsmodus Wenn Ihr Fernsehgerät mit einem Empfangssignal verbunden und die Option Automatische Suche im Menü Upgrade Option...

Page 12: ...t rate 48kHz 44 1kHz 32kHz 24kHz 22 05kHz 16kHz 12kHz 11 025kHz 8kHz Abtastrate EAC3 32Kbps 6Kbps Bitrate 32kHz 44 1kHz 48kHz Abtastrate LPCM Unsigned 8bit PCM Signed Unsigned 16bit PCM jeweils big little Endian 24bit PCM big Endian DVD LPCM 16 20 24bit Bitrate 6kHz 8kHz 11 025kHz 12kHz 16kHz 22 05kHz 24kHz 32kHz 44 1kHz 48kHz 88 2kHz 96kHz 176 4kHz 192kHz Abtastrate IMA ADPCM MS ADPCM 384Kbps Bit...

Page 13: ...rn verwendet wird OSD Bildschirmanzeige On Screen Display Informationen wie Kanalnummer und Lautstärke die auf dem Bildschirm des TV Gerätes angezeigt werden PAL Europäische Norm für Zeilen TV Signale SECAM Ein in Frankreich und einigen anderen Ländern verwendetes Videoformat das dem Format PAL ähnlich ist Schärfe Eine Steuerung die den Effekt einer größeren XÀ VXQJ GXUFK HOO XQNHO EHUJlQJH HU HXJ...

Page 14: ...r normal operating conditions Caution See Operating Instructions The marked area s contain s user replaceable coin or button cell batteries Class 1 Laser Product T h i s p r o d u c t c o n t a i n s Class 1 laser source that is safe under reasonably foreseeable conditions of operation English 3 WARNING Do not ingest the battery Chemical Burn Hazard This product or the accessories supplied with th...

Page 15: ...nnot be displayed via control buttons Operation with the Remote Control Press Menu button on your remote control to display main menu screen Use the directional buttons to select a menu tab and press OK to enter Use the directional buttons again to select or set an item Press Return Back button or Menu button to quit a menu screen Input Selection Once you have connected external systems to your 79...

Page 16: ...u Displays TV menu 7 Directional buttons Helps navigate menus content etc and displays the subpages in TXT mode when pressed Right or Left 8 OK RQ UPV XVHU VHOHFWLRQV KROGV WKH SDJH LQ 7 7 mode views channel list DTV mode 9 Back Return Returns to previous screen opens index page in TXT mode 10 Media browser Opens the media browsing screen 11 Info Displays information about on screen content shows ...

Page 17: ...cast search option is turned on the TV will search for digital cable broadcasts after other initial settings are completed FFRUGLQJ WR RXU RWKHU SUHIHUHQFHV D FRQ UPDWLRQ message may be displayed before starting to search Select YES and press OK to proceed To cancel operation select NO and press OK You can select Network or set values such as Frequency Network ID and Search Step KHQ QLVKHG SUHVV O...

Page 18: ...nected it will be listed in source menu with its own name instead of the connected HDMI ports name such as DVD Player Recorder 1 etc The TV remote is automatically able to perform the main functions after the connected HDMI source has been selected To terminate this operation and control the TV via the remote again press and hold the 0 Zero button on the remote control for 3 seconds This feature c...

Page 19: ...les selected source options Accessibility Displays accessibility options of the TV Hard of Hearing Enables any special feature sent from the broadcaster Audio Description A norration track will be played for the blind or visually impaired audience Press OK to see all available Audio Description menu options This feature is available only if the broadcaster supports it More Displays other setting o...

Page 20: ...your four favourite lists to be displayed everytime the Channel list is opened 7KH OWHULQJ IXQFWLRQ LQ WKH Channel list menu will only OWHU WKH FXUUHQWO GLVSOD HG Channel list in order to QG D FKDQQHO DQG WXQH LQ WR LW 7KHVH FKDQJHV ZLOO not remain the next time the Channel list is opened if you don t save them To save the changes on the list press the Red EXWWRQ DIWHU OWHULQJ ZKLOH WKH Channel li...

Page 21: ...ons menu is set to Enabled and if the TV is connected to an aerial signal If a new software is found and downloaded successfully it will be installed at the next power on Note Do not unplug the power cord while led is blinking during WKH UHERRW SURFHVV I WKH 79 IDLOV WR FRPH RQ DIWHU WKH XSJUDGH unplug wait for two minutes then plug it back in Troubleshooting Tips Tv will not turn on Make sure the...

Page 22: ...z 24kHz 22 05kHz 16kHz 12kHz 11 025kHz 8kHz Sampling rate EAC3 32Kbps 6Kbps Bit rate 32kHz 44 1kHz 48kHz Sampling rate LPCM Unsigned 8bit PCM Signed Unsigned 16bit PCM big little endian 24bit PCM big endian DVD LPCM 16 20 24bit Bit rate 6kHz 8kHz 11 025kHz 12kHz 16kHz 22 05kHz 24kHz 32kHz 44 1kHz 48kHz 88 2kHz 96kHz 176 4kHz 192kHz Sampling rate IMA ADPCM MS ADPCM 384Kbps Bit rate 8KHz 48Khz Sampl...

Page 23: ...ilement DFFHVVLEOH 1H SRVH SDV OH WpOpYLVHXU RX OH PHXEOH HWF VXU OH FRUGRQ G DOLPHQWDWLRQ 8Q FRUGRQ XQH FKH G DOLPHQWDWLRQ HQGRPPDJp H SHXW SURYRTXHU XQ LQFHQGLH RX XQ FKRF pOHFWULTXH 7HQH OH FRUGRQ G DOLPHQWDWLRQ SDU OD FKH HW pYLWH GH GpEUDQFKHU OH téléviseur en tirant sur le cordon d alimentation Ne WRXFKH MDPDLV OH FRUGRQ OD FKH G DOLPHQWDWLRQ DYHF OHV PDLQV PRXLOOpHV FDU FHOD SHXW FDXVHU XQ ...

Page 24: ... VXLYUH OHV pWDSHV FL DSUqV Le téléviseur ajuste sa consommation d énergie en IRQFWLRQ GX QLYHDX FKRLVL HQWUH Minimum Moyen Maximum ou Auto 6L YRXV VRXKDLWH UpJOHU OH rétro éclairage j XQH YDOHXU H DOOH DX PHQX paramètres personnalisés HW UpJOH PDQXHOOHPHQW OH rétro éclairage situé en dessous de l option Économie d énergie à l aide des touches Gauche et Droite GH OD WpOpFRPPDQGH 5pJOH VXU Désactiv...

Page 25: ...se de 220 240 V CA 0 Hz SUqV OH GpEDOODJH ODLVVH OH WpOpYLVHXU DWWHLQGUH OD WHPSpUDWXUH DPELDQWH GH OD SLqFH DYDQW GH OH EUDQFKHU VXU OD SULVH VHFWHXU UDQFKH OH FkEOH d alimentation à la prise secteur Branchement de l antenne UDQFKH O DQWHQQH RX OH FkEOH GH OD 79 j OD SULVH d ENTRÉE DE L ANTENNE ANT ou le câble satellite à la prise d ENTRÉE DE SATELLITE LNB située à O DUULqUH GH OD 79 Satellite AR...

Page 26: ...H O LPDJH 23 Texte ႈFKH OH WpOpWH WH VL GLVSRQLEOH DSSX H GH nouveau pour superposer le télétexte sur une image normalement retransmise mélange 24 Mon bouton 2 2 EPG Guide électronique des programmes ႈFKH le guide électronique des programmes 26 Quitter IHUPH HW TXLWWH OHV PHQXV DႈFKpV RX UHWRXUQH à l écran précédent 27 Menu Rapide ႈFKH XQH OLVWH GH PHQXV SRXU DFFqV rapide 28 Aucune fonction 29 Pro...

Page 27: ... GH O pFUDQ FRPPH EDQQLqUH d informations Cette option est uniquement destinée à l usage de magasin Nous vous recommandons de sélectionner le Mode Domestique pour un usage GRPHVWLTXH 9RXV SRXYH DFFpGHU j FHWWH RSWLRQ j Français 10 partir du menu Système Paramètres Plus et vous SRXYH O DFWLYHU RX OD GpVDFWLYHU SOXV WDUG SSX H VXU OH ERXWRQ OK de la télécommande pour FRQWLQXHU OD Q GHV UpJODJHV LQLW...

Page 28: ...LW SUHQGUH HQ FKDUJH OD IRQFWLRQ GH RQWU OH GX 6 VWqPH XGLR HW O RSWLRQ CEC GRLW rWUH UpJOpH VXU Activé Français 12 Contenu du menu Téléviseur Contenu du menu Système Image Mode 9RXV SRXYH PRGL H OH PRGH G LPDJH VHORQ YRV SUpIpUHQFHV RX H LJHQFHV H PRGH PDJH peut être réglé sur l une de ces options Cinéma Jeux en option Sport Dynamique et Naturel Contraste 5qJOH OHV YDOHXUV GH O pFODLUDJH HW GH O ...

Page 29: ...s sélectionnées Accessibilité ႈFKH OHV RSWLRQV G DFFHVVLELOLWp GX WpOpYLVHXU Malentendant FWLYH Q LPSRUWH TXHOOH IRQFWLRQQDOLWp VSpFLDOH HQYR pH SDU OH GLႇXVHXU Description Audio 8QH SLVWH GH QDUUDWLRQ VH MRXHUD SRXU OH SXEOLF DYHXJOH RX PDOYR DQW SSX H VXU OK pour voir toutes les options du menu Description Audio Cette fonction est uniquement disponible VL OH GLႇXVHXU OD SUHQG HQ FKDUJH Plus ႈFKH...

Page 30: ...Q 2 p QLVVH O RSWLRQ GH OLVWH GpVLUpH VXU Activé Les chaînes sélectionnées sont ajoutées à la liste Pour supprimer une chaîne ou des chaînes d une liste de SUpIpUHQFHV VXLYH OHV PrPHV pWDSHV HW Gp QLVVH la liste désirée sur Désactivé 9RXV SRXYH XWLOLVHU OD IRQFWLRQ Filtre dans le menu Modi er la liste des cha nes SRXU OWUHU OHV FKDvQHV dans la Liste des cha nes de façon permanente selon vos préfér...

Page 31: ... H Système Paramètres puis Autres 6pOHFWLRQQH Mise jour du logiciel HW DSSX H VXU OH ERXWRQ OK Dans le menu Options de mise jour VpOHFWLRQQH Recherche de mise jour HW DSSX H VXU OH ERXWRQ OK pour lancer une nouvelle mise à jour du logiciel 6L XQH PLVH j MRXU HVW GLVSRQLEOH LO FRPPHQFH j OD WpOpFKDUJHU X WHUPH GX WpOpFKDUJHPHQW FRQ UPH la question relative au redémarrage du téléviseur en appuyant s...

Page 32: ...N N N N N N N N N 7DX G pFKDQWLOORQQDJH EAC3 ESV a ESV pELW ELQDLUH N a N N 7DX d échantillonnage LPCM ELW 3 0 QRQ VLJQp ELW 3 0 VLJQp VLJQp JUDQG SHWLW IRUPDW ELW 3 0 JUDQG IRUPDW 9 3 0 ELW pELW ELQDLUH N N N N N N N N N N N N N N 7DX d échantillonnage IMA ADPCM MS ADPCM ESV pELW ELQDLUH a K 7DX G pFKDQWLOORQQDJH LBR ESV a ESV pELW ELQDLUH N a N N 7DX d échantillonnage Image jpeg Point de compara...

Page 33: ...ti coperte ecc Il cavo di alimentazione dovrebbe essere facilmente accessibile Non mettere l apparecchio un mobile ecc sul cavo di alimentazione ne schiacciare il cavo Un cavo di alimentazione danneggiato può causare incendi o provocare scosse elettriche Prendere il cavo per la presa non scollinare la TV tirando il cavo di alimentazione Non toccare mai il cavo la presa con le mani bagnate ciò potr...

Page 34: ... e regolare la Retroilluminazione che si trova nell impostazione Risparmio energetico manualmente usando i tasti sinistro o destro sul telecomando Impostare su O per disattivare questa impostazione Nota Le opzioni disponibili di Risparmio energetico SRWUHEEHUR GL HULUH D VHFRQGD GHOOD Modalità selezionata nel menu Sistema Immagine Le impostazioni di Risparmio energetico si trovano nel menu Sistema...

Page 35: ...alla presa della rete elettrica Collegamento antenna Per collegare l antenna inserire nella presa INGRESSO ANTENNA ANT o la presa satellite all INGRESSO SATELLITE LNB sul retro della TV satellite POSTERIORE DELLA TV antenna oppure cavo Noti ca RICONOSCIMENTO DEL MARCHIO WHUPLQL 0 H LJK H QLWLRQ 0XOWLPHGLD QWHUIDFH oltre che il logo HDMI sono marchi di fabbrica o marchi registrato di HDMI Licensing...

Page 36: ...SRUWR GHOOR VFKHUPR 23 Testo Visualizza il televideo ove disponibile premere nuovamente per mettere in sovra impressione il televideo su una normale immagine di una trasmissione mix 24 Pulsante personale 2 2 EPG Guida programmazione elettronica Visualizza la guida del programma elettronico 26 Esci Chiude ed esce dai menù visualizzati o torna alla schermata precedente 27 Menu Rapido Visualizza un e...

Page 37: ...l telecomando per continuare Dopo aver completato le impostazioni iniziali la TV Italiano 10 inizierà a cercare le trasmissioni disponibili dei tipi di trasmissione selezionati Dopo aver salvato tutte le stazioni disponibili verranno visualizzati i risultati della scansione Premere il OK per continuare Successivamente verrà visualizzato il menu Modifica Elenco Canali Sarà possibile PRGL FDUH O HOH...

Page 38: ...pri requisiti Immagine può essere impostata su una di queste opzioni Cinema Gioco opzionale Sport Dinamico e Naturale Contrasto Imposta i valori di luminosità e buio dell immagine Luminosit Controlla la luminosità dello schermo Nitidezza Imposta il valore di nitidezza per gli oggetti visualizzati sullo schermo Colore Imposta il valore del colore regolazione dei colori Risparmio energetico Per l im...

Page 39: ... della TV Ipoudenti Attiva eventuali funzioni speciali inviate dall emittente Descrizione Audio Una traccia di narrazione verrà riprodotta per i non vedenti o per le persone con problemi alla vista Premere OK per visualizzare tutte le opzioni menu Descrizione Audio Questa funzione q GLVSRQLELOH VROR VH VXSSRUWDWD GDO FDQDOH WUDVPHVVR Per Saperne di Più Visualizza altre opzioni di impostazione dell...

Page 40: ...o Per togliere un canale o più canali dall elenco dei preferiti attenersi agli stessi passaggi e impostare l opzione desiderata su O Sarà possibile usare la funzione Filtro nel menu Modi ca elenco canali SHU OWUDUH L FDQDOL QHOO Elenco canali in modo permanente a seconda delle proprie preferenze Usando questa opzione Filtro sarà possibile impostare uno dei propri elenchi preferiti in modo che veng...

Page 41: ...ato lo scaricamento Dopo aver completato il download confermare la domanda che chiede di riavviare la TV premendo il tasto OK per continuare con l operazione di riavvio Ricerca di 3 AM e modalit aggiornamento La TV cercherà nuovi aggiornamenti alle ore 3 00 se l opzione Scansione automatica nel menu Opzioni aggiornamento q LPSRVWDWR VX Attivato H VH OD 79 q collegata a un segnale antenna Se viene ...

Page 42: ...nza di campionamento EAC3 ESV a ESV LW UDWH N N N UHTXHQ D di campionamento LPCM Unsigned 8bit PCM Signed Unsigned 16bit PCM big little endian 24bit PCM big endian DVD LPCM 16 20 24bit Bit rate 6kHz 8kHz 11 025kHz 12kHz 16kHz 22 05kHz 24kHz 32kHz 44 1kHz 48kHz 88 2kHz 96kHz 176 4kHz 192kHz Frequenza di campionamento IMA ADPCM MS ADPCM ESV LW UDWH a K UHTXHQ D GL campionamento LBR ESV a ESV LW UDWH...

Page 43: ... energetică Dimensiunea ecranului vizibil diagonală aprox inch cm Русский Справочный листок технических данных изделия Торговая марка Номер изделия Номер модели Класс энергопотребления Видимый размер экрана по диагонали Около дюймов см беларуская Справочный листок технических данных изделия Торговая марка Номер изделия Номер модели Класс энергопотребления Видимый размер экрана по диагонали Около д...

Page 44: ... čeština Dansk Suomi Français Hrvatski Nederlands Español Svenska Italiano Polski Magyar Norsk Português Română Русский беларуская македонски український Srpski Slovenčina Slovenščina Ελληνικά Bosanski עברית Türkçe Shqip Lietuvių Latviešu Eesti ﻓﺎﺭﺳﯽ Energy consumption kWh per year based on the power consumption of the television operating 4 hours per day for 365 days The actual energy consumption...

Page 45: ...tørrelser Længde X Tråd Y Русский РАЗМЕРЫ НАСТЕННОГО КРЕПЛЕНИЯ VESA Размеры системы отверстий Размеры винтов Длина Х Резьба Y беларуская ПАМЕРЫ НАСЦЕННАГА МАЦАВАННЯ VESA Памеры сістэмы адтулін Памеры вінтоў Даўжыня X Разьба Y македонски МЕРКИ ЗА МОНТИРАЊЕ НА ЅИД ЗА ВЕСА Шема на големини на дупката мм Големина на шрафот Должина Х Навој Y українськa РОЗМІРИ НАСТІННОГО КРІПЛЕННЯ VESA Відстань між крі...

Page 46: ...ktivom 2014 53 EU Cjeloviti tekst EU izjave o sukladnosti dostupan je na sljedećoj internetskoj adresi doc vosshub com HU VESTEL Elektronik Sanayi ve Ticaret A Ş igazolja hogy a TFT IDTV típusú rádióberendezés megfelel a 2014 53 EU irányelvnek Az EU megfelelőségi nyilatkozat teljes szövege elérhető a következő internetes címen doc vosshub com IT Il fabbricante VESTEL Elektronik Sanayi ve Ticaret A...

Page 47: ...önnen wir leider keine kostenlosen Garantieleistungen erbringen Geht uns ein Gerät ohne DE 08921129000 2J V108102012 Über eine Bewertung unseres Service würden wir uns sehr freuen www bewertemich online de Kaufnachweis zu erhalten Sie von uns einen Kostenvoranschlag für die Repa ratur Entscheiden Sie sich gegen eine Reparatur so liefern wir das Gerät an Sie zurück und berechnen Ihnen eine Pauschal...

Page 48: ...oranschlag für die Repa ratur Entscheiden Sie sich gegen eine Reparatur so liefern wir das Gerät an Sie zurück und berechnen Ihnen eine Pauschale für Transport und Ausarbeitung des Kostenvoranschlags Wichtiges Dokument Bitte mit Kaufnachweis 2 Jahre aufbewahren Herstellergarantie CH 7 Ausgetauschte Teile verbleiben in unserem Servicezentrum und werden nach unserem Ermessen vernichtet 8 Die Garanti...

Page 49: ...remo a fornire un preventivo per la riparazione Qualora il cliente decidesse di non far riparare l apparecchio questo verrà restituito insieme alla richiesta di una somma forfetaria per i costi del trasporto e dell elaborazione del preventivo 7 I pezzi sostituiti restano presso il nostro centro di assistenza e saranno distrutti a nostra discrezione 8 La garanzia perde di validità se l apparecchio ...

Page 50: ... preuve d achat vous recevrez un devis pour la répa ration Si vous décidez de ne pas faire effectuer la réparation nous vous ren verrons l appareil et nous vous facturerons un prix forfaitaire pour le transport et l élaboration du devis 6 Les pièces remplacées restent dans notre centre de service après vente Leur destruction est soumise à notre appréciation 7 La garantie expire si l appareil a été...

Page 51: ...ument Bitte mit Kaufnachweis 2 Jahre aufbewahren Herstellergarantie A Über eine Bewertung unseres Service würden wir uns sehr freuen www bewertemich online de leider keine kostenlosen Garantieleistungen erbringen Geht uns ein Gerät ohne Kaufnachweis zu erhalten Sie von uns einen Kostenvoranschlag für die Repa ratur Entscheiden Sie sich gegen eine Reparatur so liefern wir das Gerät an Sie zurück un...

Page 52: ......

Page 53: ......

Page 54: ......

Page 55: ......

Page 56: ......

Reviews: