English
- 48 -
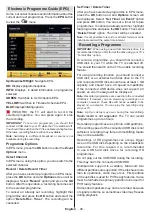
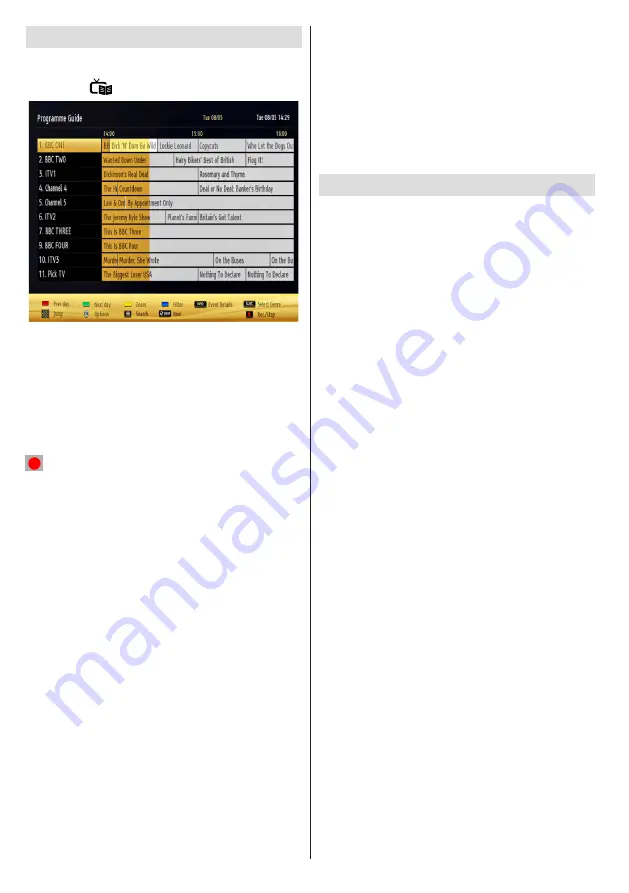
Electronic Programme Guide (EPG)
Some, but not all channels send information about the
current and next programmes. Press the
EPG
button
to view the “
” menu.
Up/Down/Left/Right:
Navigate EPG.
OK:
Displays programme options.
INFO:
Displays, in detail information on programme
selected.
GREEN:
Switches to List Schedule EPG.
YELLOW:
Switches to Timeline Schedule EPG.
BLUE:
displays filtering options.
(RECORD): the TV will start to record the
selected progamme. You can press again to stop
the recording.
IMPORTANT
: To record a programme, you should first
connect a USB disk to your TV while the TV is switched off.
You should then switch on the TV to enable recording feature.
Otherwise, recording feature will not be available.
Note
: Switching to a different broadcast or source is not
available during the recording.
Programme Options
In EPG menu, press the
OK
button to enter the
Event
Options
menu.
Select Channel
In EPG menu, using this option, you can switch to the
selected channel.
Record / Delete Record Timer
After you have selected a programme in EPG menu,
press the
OK
button and and
Options
screen will be
displayed. Select “
Record
” option and press the
OK
button. After this operation, a recording becomes set
to the selected programme.
To cancel an already set recording, highlight that
programme and press the
OK
button and select the
option “
Delete Rec. Timer
”. The recording will be
cancelled.
Set Timer / Delete Timer
After you have selected a programme in EPG menu,
press the
OK
button and and
Options
screen will
be displayed. Select “
Set Timer on Event
” option
and press
OK
button. You can set a timer for future
programmes. To cancel an already set timer, highlight
that programme and press the
OK
button. Then select
“
Delete Timer
” option. The timer will be cancelled.
Note
: It is not possible to record or set timer for two or more
individual events at the same time interval.
Recording a Programme
IMPORTANT
: When using a new USB hard disk drive, it is
recommended that you first format the disk using your TV’s
“Format Disk” option.
To record a programme, you should first connect a
USB disk to your TV while the TV is switched off.
You should then switch on the TV to enable recording
feature.
For using recording function, you should connect a
USB disk or an external hard disk drive to the TV
and connected USB disk should have at least 1 GB
capacity and should have 2.0 speed compatibility.
If the connected USB device does not support 2.0
speed, an error message will be displayed.
Note
: Recorded programmes are saved into the connected
USB disk. If desired, you can store/copy recordings on a
computer; however, these files will not be available to be
played on a computer. You can play the recordings only
via your TV.
Note
: Lip Sync delay may occur during the timeshifting.
Radio record is not supported
. The TV can record
programmes up to ten hours.
Recorded programmes are split into 4GB partitions.
If the writing speed of the connected USB disk is not
sufficient, recording may fail and timeshifting feaute
may not be available.
Recordings of HD programmes can occupy bigger
size on the USB disk depending on the broadcast’s
resolution. For this reason it is recommended
to use USB hard disk drives for recording HD
programmes.
Do not plug out the USB/HDD during the recording.
This may harm the connected USB/HDD.
Multipartiton support is available. Maximum two
different partitions are supported. If the disk have more
than two partitions, crash may occur. First partition
of the usb disk is used for PVR ready features. It also
must be formatted as primary partition to be used for
PVR ready features.
Some stream packets may not be recorded because
of signal problems, so sometimes video may freezes
during playback.

