background image

General information

15

Troubleshooting

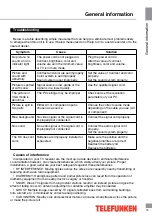
Below is a table describing simple measures that can help you eliminate most problems likely 

to emerge when this unit is in use. If below measures do not help, turn to a service center or to the 
nearest dealer.

Symptom

Cause

Solution

No picture, no 

sound, and no 

indicator light

The power cord is not plugged in.

Contrast, brightness, color and 

volume are all in the minimum value 

or TV is in mute mode.

Plug the power cord in.

Alter the value of contrast, 

brightness, color and volume.

Picture and 

sound with 

abnormity

Contrast and color are set improperly.

Color system is set improperly.

Sound system is set improperly.

Set the value of Contrast and color 

properly.

Set the sound system properly.

Picture is spotted 

or with snow

Signal source is low-grade or the 

signal is in a lower quality.

Use the qualified signal cord.

The picture in 

VGA mode is 

abnormal

The PC settings may be improper.

Check and set the resolution 

parameters of your PC.

Picture is split in 

two parts

Either AV or component input is 

chosen as a source.

Choose the correct source mode 

depending on the cable you use (AV 

or component)

Blue background No video signal or the signal cord is 

improperly/not connected.

Connect the signal cord properly.

No sound

No audio signal or the signal cord is 

improperly/not connected.

Connect the audio signal cord 

properly.

Set the sound system properly.

The RC does not 

work

Batteries are improperly installed or 

exhausted.

Make sure the positive and the 

negative polarities are correct.

Reattach the battery lid.

Replace the batteries.

Causes of interference

Incorporated in your TV receiver are the most up-to-date devices to eliminate interference. 

Local radiation however, can create disturbances, which visibly affect your picture. Proper 
installations, a good aerial are your best safeguards against these disturbances.

•  RF INTERFERENCE: Moving ripples across the screen are caused by nearby transmitting or 

receiving short-wave radio equipment.

•  DIATHERMY: Herringbone pattern and partial picture loss can result from the operation of 

diathermy equipment from a nearby doctor’s surgery or hospital.

•  SNOW: Weak TV signals from long distant stations result in an instead picture and give the 

effect of falling snow. An antenna adjustment or antenna amplifier may be needed. 

•  GHOST: Multiple image, caused by TV signals reflected back from surrounding buildings, 

hills, aircraft, etc. is minimized by correct aerial positioning.

•  CAR IGNITION: Nearby cars and electrical motors can cause small streaks across the picture 

or make the picture roll.

General information

Summary of Contents for TF-LED40S29T2

Page 1: ...Table of contents 3 LED TV Телевизор цветного изображения c жидкокристаллическим экраном TF LED40S29T2 Instruction manual Руководство по эксплуатации ...

Page 2: ...on Channel installation Picture setting Sound setting Lock settings Timer settings Option settings USB operation General information File playback CI information General information Troubleshooting Causes of interference Accessories Specifications Dear customer Thank you for purchasing our product For safety it is strongly recommended to read this manual carefully before connecting operating and o...

Page 3: ...nal cables from the input ports when the unit is unused for long periods of time When pulling the plug always hold the wide slot do not touch the metal part and do not destroy refit twist pull or burn the power cord Please contact the service center immediately if you found that the cable core is bare or has been broken Please replace the AC outlet if the metal bolt cannot be inserted into the pow...

Page 4: ...cord connected If you move this product with the power cord or the connection cable connected the damaged power cord connection cable or connection terminal may cause the fire the electric shock or breakdown 2 persons or more shall transport the device which is heavier than 18 kg If you drop or tip over the device it may damage it The temperature of the product s body becomes a little higher after...

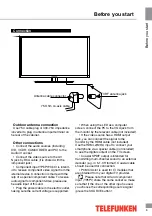
Page 5: ...current voltage is supported When using the LED as a computer screen connect the PC to the VGA jack from the monitor by the relevant cable not included If the video source has a HDMI output jack you can connect the signal to the monitor by the HDMI cable not included Use the HDMI 2 MHL input to connect your smartphone via a special cable not included to see the digital content on the TV screen Coa...

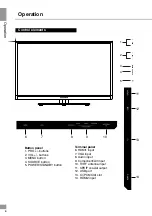
Page 6: ...ttons 3 MENU button 4 SOURCE button 5 POWER STANDBY button PRO VOL MENU SOURCE 1 2 3 4 5 11 12 13 14 6 7 8 9 10 Terminal panel 6 HDMI1 input 7 VGA input 8 Audio input 9 Component AV input 10 TVRF antenna input 11 SPDIF coaxial output 12 USB port 13 CI PCMCIA slot 14 HDMI2 input ...

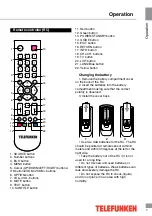
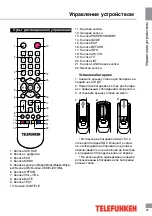
Page 7: ...on 21 LANG Blue button 22 Yellow button Changing the battery 1 Remove the battery compartment cover on the back of the RC 2 Insert the batteries into the battery compartment making sure that the correct polarity is observed 3 Install the cover back Use two AAA batteries for the RC The RC should be pointed at remote sensor within 8 meters and within 30 degrees at the left or the right side Take the...

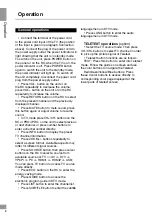
Page 8: ... previous or next channel or press number buttons to enter a channel number directly Press INFO button to display the preset TV channel information Press ZOOM buttons repeatedly to select a screen format Available aspects may differ for different signal sources Press SOURCE button then press cursor buttons on the RC to select a source from available source list TV AV DTV YPbPr PC HDMI1 HDMI2 USB Y...

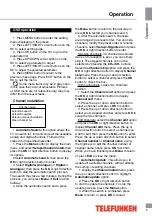
Page 9: ... preset order You can skip channels modify the preset order or rename channels select Setup Organiser and press the OK or right direction button to enter Skipping channels if a channel was stored twice or its reception is poor you can simply skip it The skipped channels can not be selected by pressing the CH CH buttons Select the Channel skip option and press the OK or right direction button to di...

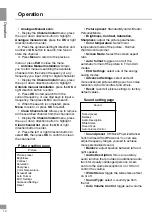
Page 10: ...ess OK to confirm to clean the channel list Picture setting page Picture Picture preset Brightness Contrast Saturation Sharpness Color Temperature Screen Mode Auto Format ECO Settings Advanced Settings Reset Picture preset Standard Dynamic Studio Personal Movie Brightness Contrast Saturation Sharpness adjust the picture parameters Color temperature Select color temperature mode of the picture Norm...

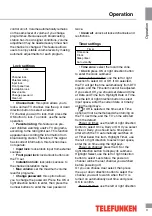
Page 11: ... password twice Clean all unlock all locked channels and restrictions Timer settings Timer Time zone Clock Sleep timer Auto standby Time zone select the local time zone Clock press OK or right direction button to enter the clock submenu Auto synchronization use the left or right direction to select On or Off If On selected the TV will get the time automatically from DTV signals and the Time item c...

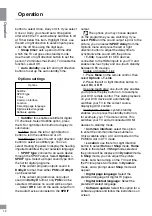
Page 12: ...io Device connected to the SPDIF output The options you may choose depend on the programme you are watching If you select PCM and the sound output is prior to the picture you can select SPDIF delay from the Options menu and press the left or right direction button to adjust the delay time to synchronize the sound with the picture T link to search for CEC devices connected to the HDMI inputs in you...

Page 13: ...s MENU button select Media option and press OK button The screen will show USB playback menu Media center Photo Music Video Video file playback Select Video item and press OK button Press cursor buttons to select a file and press OK button to start playback During playback press MENU but ton to show playback menu in which you can select an operation by LEFT RIGHT cursor buttons and perform this op...

Page 14: ...rvice by consulting your dealer Please do not insert or pull out the CI card when power on During initialization of the CI card please don t operate the TV Do not insert or pull out the CI card frequently so as to avoid any damages of the TV and the CI card If there is no picture and or sound with the CI CAM module inserted please contact the customer support of the service provider Operation ...

Page 15: ...roperly not connected Connect the signal cord properly No sound No audio signal or the signal cord is improperly not connected Connect the audio signal cord properly Set the sound system properly The RC does not work Batteries are improperly installed or exhausted Make sure the positive and the negative polarities are correct Reattach the battery lid Replace the batteries Causes of interference In...

Page 16: ...0 volume 65 W Specific power rating in working mode 0 02 W cm 2 Power consumption in stand by mode 0 5 W Power consumption in off mode 0 W Unit dimensions with stand 913 x 586 x 200 mm without stand 913 x 529 5 x 80 mm Net weight 8 7 kg The LCD panel is a high technology product with many thin film transistors that can give you a fine picture details Occasionally a few non active pixels may appear...

Page 17: ...овка на подставку Подключение Подключение Подключение внешней антенны Прочие подключения Управление устройством Элементы управления Пульт дистанционного управления Установка батареек Общие операции Операции с телетекстом Экранное меню Установка каналов Настройка изображения Настройка звука Настройка блокировки Настройка таймера Настройка опций Операции с USB Общая информация Воспроизведение файлов...

Page 18: ...но не работает должным образом Данное изделие может подключаться к розетке питания как без заземляющего третьего контакта так и с заземляющим третьим контактом Во избежание поражения электриче ским током защищайте шнур питания от возможного нажатия на него или защемле ния особенно рядом с разъемами Не закрепляйте шнур питания метизами Если Вы не пользуетесь устройством длительное время или в случа...

Page 19: ...го излучения может наблюдаться искаже ние изображения Не устанавливайте вблизи устройства источники открытого огня например свечи В случае их падения устройство может быть повреждено или может произойти возгора ние Установка телевизора в замкнутое пространство при эксплуатации может со кратить срок службы устройства поэтому необходимо обеспечить минимальную дистанцию между LCD телевизором и внутре...

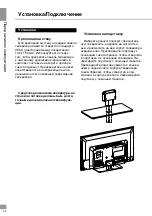
Page 20: ... монтаж повлекший повреждение телевизора Средства для монтажа аппаратуры на стене или потолке должны быть доста точными для выполнения своей функ ции Установка на подставку Выберите ровную плоскую горизонталь ную поверхность накройте ее мягкой тка нью и разместите на ней корпус телевизора экраном вниз Присоедините подставку к основанию таким образом чтобы отверстия в подставке и в основании совпад...

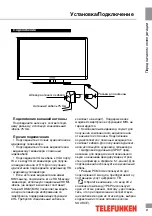
Page 21: ... поддерживающих функцию MHL Требуется специальный кабель в комплект не входит Поддержка всех моделей смартфонов с функцией MHL не гарантируется Компонентный видеовход служит для получения компонентного видеосигнала от внешнего источника Подключение осуществляется с помощью входящего в комплект кабеля Для получения аудиосиг нала используйте аудиовход телевизора Цифровой аудиовыход SPDIF пред назнач...

Page 22: ...2 13 14 6 7 8 9 10 Панель с кнопками 1 Кнопки PRO 2 Кнопки VOL 3 Кнопка MENU 4 Кнопка SOURCE 5 Кнопка POWER STANDBY Панель терминалов 6 Вход HDMI1 7 Компьютерный видеовход VGA 8 Аудиовход 9 Компонентный AV вход 10 Разъем для антенны 11 Цифровой аудиовыход SPDIF 12 USB port 13 Разъем CI PCMCIA 14 Выход HDMI2 ...

Page 23: ... Кнопка GUIDE 15 Кнопка EXIT 16 Кнопка RETURN 17 Кнопка INFO 18 Кнопки CH CH 19 Кнопка TV 20 Кнопка LIST 21 Кнопка LANG Синяя кнопка 22 Желтая кнопка Установка батареек 1 Снимите крышку отсека для батареек на задней части ПДУ 2 Поместите батарейки в отсек для батаре ек с правильным соблюдением полярности 3 Установите крышку отсека на место Вставьте две батарейки AAA 1 5V в отсек для батарей ПДУ Мо...

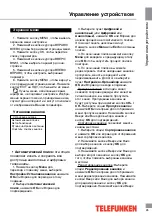
Page 24: ...ла Нажимайте кнопку INFO для отображе ния информации о текущем канале Нажмите кнопки ZOOM для выбора одного из доступных форматов изображе ния Форматы могут различаться в зависи мости от текущего источника сигнала Нажмите кнопку SOURCE затем на жимайте кнопки курсора на ПДУ чтобы выбрать один из доступных источников сигнала TV AV DTV YPbPr PC HDMI1 HDMI2 USB Нажмите кнопку OK на ПДУ для подтвержде...

Page 25: ... Вправо для начала процесса автоматического поиска Это может занять несколько минут Нажмите кнопки Menu или Exit для отмены поиска 4 По окончании поиска нажмите кнопку Menu для возврата к предыдущему этапу или OK чтобы запустить процесс поиска повторно 5 По окончании поиска вы можете редактировать список найденных каналов пропускать менять очередность или переименовывать Для этого выберите пункт Н...

Page 26: ...новка канала с помощью кнопок Вверх или Вниз выберите опцию Ручная настройка антенны нажмите ОК или кнопку Вправо для входа в подменю 2 Нажмите кнопку OK для начала поиска на данной частоте или с помощью кнопок с цифрами введите новую частоту и нажмите ОК для начала поиска 3 По завершении поиска нажмите Menu для возврата к главному меню или OK для повторного поиска Очистить список каналов позволяе...

Page 27: ...ти регулирования громкости для каждого канала отдельно поскольку громкость звука на канале по умолчанию устанавливается вещательной компанией этого канала Настройки блокировки Блокировка Блок канала Родительский контроль Блок ввода Блок кнопок Блок настроек Максимальная громкость Смена пароля Очистить все Блок канала эта опция позволяет заблокировать определенный ТВ канал С помощью кнопок Вверх и ...

Page 28: ...и Выкл Если вы выбрали Один раз или Ежедневно введите время выключения телевизора с помощью кнопок курсора и кнопок с цифрами Таймер сна задайте период времени по истечении которого телевизор перейдет в режим ожидания Выберите время с помощью кнопок Вправо и Влево максимум 120 минут Для отключения функции выберите Выкл Автоотключение с помощью кнопок курсора задайте время автоматического отключени...

Page 29: ...н по умолчанию При выборе режима Магазин изображение переведется в Динамический режим В режиме Магазин вы можете выбрать другой режим изображения однако при следующем включении телевизор снова переведется в Динамический режим и на экране появится уведомление о режиме Магазин Язык цифрового режима выберите язык для страниц в режиме цифрового ТВ Язык телетекста выберите язык телетекста Обновление ПО...

Page 30: ...его следую щего файла остановка повтор воспроизве дения повтор фрагмента А В плей лист замедленное воспроизведение покадровое воспроизведение регулирование яркости контрастности приближение отдаление масштаб сдвиг изображения Для выхода из режима воспроизведения видео нажмите кнопку EXIT Воспроизведение изображений Выберите Фото и нажмите кнопку OK С помощью кнопок курсора выберите файл и нажмите ...

Page 31: ...д меню и услуги CI для этого необходимо обратиться к предоставителю услуг Нельзя вставлять и извлекать CI карту из слота во время работы телевизора Перед операциями с картой выключите телевизор Не допускайте слишком частой загрузки и извлечения CI карты из слота телевизора Если в телевизоре отсутствуют видеоизображение и звук при подключенном CI CAM свяжитесь с оператором клиентской службы наземно...

Page 32: ...рная система цвета Установлена неверная система звука Настройте контрастность и цвет Установите правильную систему звука Изображение заснеженное Сигнал низкого качества Используйте исправный и каче ственный кабель Изображение в режиме VGA некорректное Параметры разрешения на компьютере установлены непра вильно Отрегулируйте параметры раз решения компьютера Изображение на экране делится на две част...

Page 33: ...налов отдален ных телевизионных станций изображение становится нестабильным а на экране по являются мерцающие белые пятна так назы ваемый эффект падающего снега В этом случае помогает более точная настройка антенны и применение антенного усилителя ФАНТОМНЫЕ ИЗОБРАЖЕНИЯ Появление на экране нескольких контуров изображения объясняется тем что теле визионный сигнал отражается от окружаю щих построек х...

Page 34: ...110 240 В 50 60 Гц Максимальная потребляемая мощность при 100 яркости и 100 громкости 65 Вт Удельная мощность рабочего режима 0 02 ВТ см 2 Потребляемая мощность в режиме ожидания 0 5 Вт Потребляемая мощность в выключенном режиме 0 Вт Размеры устройства с подставкой 913 x 586 x 200 мм без подставки 913 x 529 5 x 80 мм Масса нетто 8 7 кг ЖК панель является высокотехнологичным устройством содержащим ...

Page 35: ......
Reviews: