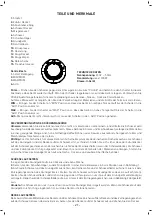
HOW TO PRESS
- 17 -
5. After the operation, turn the knob to “OFF” the corn stops working, remove the the fruit.
6. remove the juice refer to “How to open the the juice”?
Note: The fruit muse be holded fully in hand.
USING YOUR BLENDER
Before first use, wash all parts except the unit base. The Measuring cup, lid, jar assembly, the jar assembly include
jar blade assembly gasket and jar base. The jar assembly is non- decomposable.
Note : BLADES ARE SHARP. HANDLE CAREFULLY. NEVER PLACE BLENDER MOTOR BASE IN WATER OR OTHER
LIQUIDS.
HOW TO ASSEMBLY THE JAR ASSEMBLY
1. Place blender unit base on a dry level surface.
2. Ensure the jar assembly align with the mark unlock on the Base while aligning the centerlines of jar assembly and
Base, put down the jar assembly until it is correctly placed on the Base, snap the jar assembly handle and rotate it
anticlockwise until it is fully locked on the Base, then the jar assembly handle will align with the mark lock on the
Base, as shown in the Fig. 19.
Note: There is only one position for the jar assembly to be locked onto the Base. The unit won’t operate if the jar
assembly is not correctly placed onto the Base.
HOW TO OPEN THE JAR ASSEMBLY
Snap the jar assembly handle and rotate it clockwise until it is unlocked on the Base, then the jar assembly handle
will align with the mark unlock on the Base, as shown in the Fig. 20.
Note: When the jar assembly is UNLOCK, the safety mechanism on the jar assembly and Base will be in different
position. The unit won’t operate .
HOW TO USING YOUR BLENDER
1. Place the jar assembly onto the Base at first. Refer to “How to assembly the jar assembly”
1. Place the food to be blended into the jar and put the lid on the jar before blending.
Be sure the measuring cup is in place.
2. Ensure the knob is on“OFF”?Plug the cord into a standard electrical outlet.
3. For best results when crushing ice, use the “PULSE”. To activate, rotate it anticlockwise until it is on the “PULSE”;
to stop crushing, release the knob.
4. If you want to add ingredients while the blender is on, remove the measuring cap and place through the lid opening.
5. When finished blending, rotate the knob until it is on the “Off”.
BLENDING TIPS AND TECHNIQUES
* Cut food into small pieces, about 2 in. (5 cm) before adding to the blender. To chop, grate or prepare fruit smoothies
using fresh or frozen fruit, cut foods into 3/4 in. (2 cm.) pieces.
* For best circulation of foods that are to be blended with some liquid, pour the liquid into the jar first, then add solids.
* Some of the tasks that can not be performed efficiently with a blender are: beating egg whites, whipping cream,
mashing potatoes, grinding meats, mixing dough, and extracting juices from fruits and vegetables.
* The following items should never be placed in the unit as they may cause damage: bones, large pieces of solid frozen
foods, or tough foods such as turnips.
* To crush ice, fill blender jar half-full with cold water. Add about 2 cups of ice cubes. Hold one hand firmly on the lid:
pulse the ice crush button. If more ice is needed, remove the cap and add cubes one by one through the hole in the
lid. DO NOT CRUSH ICE WITHOUT LIQUID. Failure to follow these directions can result in damage to the blades, jar,
bender, and possibly result in personal injury.
CARE & CLEANING
NOTE: Do not attempt to sharpen the cutting edges of the Chopping Blade or the Reversible Disc. They are permanently
sharpened at the factory and will be ruined by attempted sharpening.
CLEANING
1. Before cleaning, be sure the unit is switched off and the cord is unplugged.
2. Whenever possible, rinse parts immediately after processing for easy cleanup.
3. Wipe the Base, Control knob, and feet with a damp cloth and dry thoroughly.
Stubborn spots can be removed by rubbing with a damp cloth and a mild, non-abrasive cleaner. Do not immerse the
Summary of Contents for TLF FP500
Page 1: ...EN DE RU HR TR PER ...
Page 2: ... 1 1 3 2 4 5 6 7 9 8 11 10 12 13 14 15 ...
Page 12: ...DO RAMA KILAVUZU 11 ...
Page 13: ...RENDELEME KILAVUZU 12 ...
Page 20: ...SHREDDING GUIDE 19 ...
Page 27: ...ANLEITUNG ZUM HACKEN 26 ...
Page 28: ...ANLEITUNG ZUM REIBEN 24 ...
Page 29: ...ANLEITUNG ZUM REIBEN 28 ...
Page 30: ......
Page 31: ......
Page 32: ......
Page 33: ......
Page 34: ......
Page 35: ......
Page 36: ... 35 ...
Page 37: ... 33 ...
Page 38: ... 37 ...
Page 39: ... 38 No 1 FP500 12072011 ...
Page 40: ... 39 ...
Page 47: ... 46 VODIC ZA SJECKANJE ...
Page 48: ... 417 VODIC ZA STRUGANJE ...
Page 49: ... 48 ...
Page 50: ... 49 ...
Page 51: ... 50 ...
Page 52: ... 51 ...
Page 53: ... 52 ...
Page 54: ... 53 ...
Page 55: ... 54 ...


