background image

WHD-310(V)2 User Manual 


28 


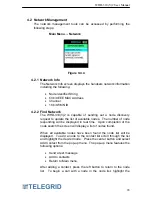
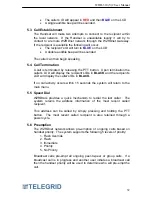
4.2 Network Management 

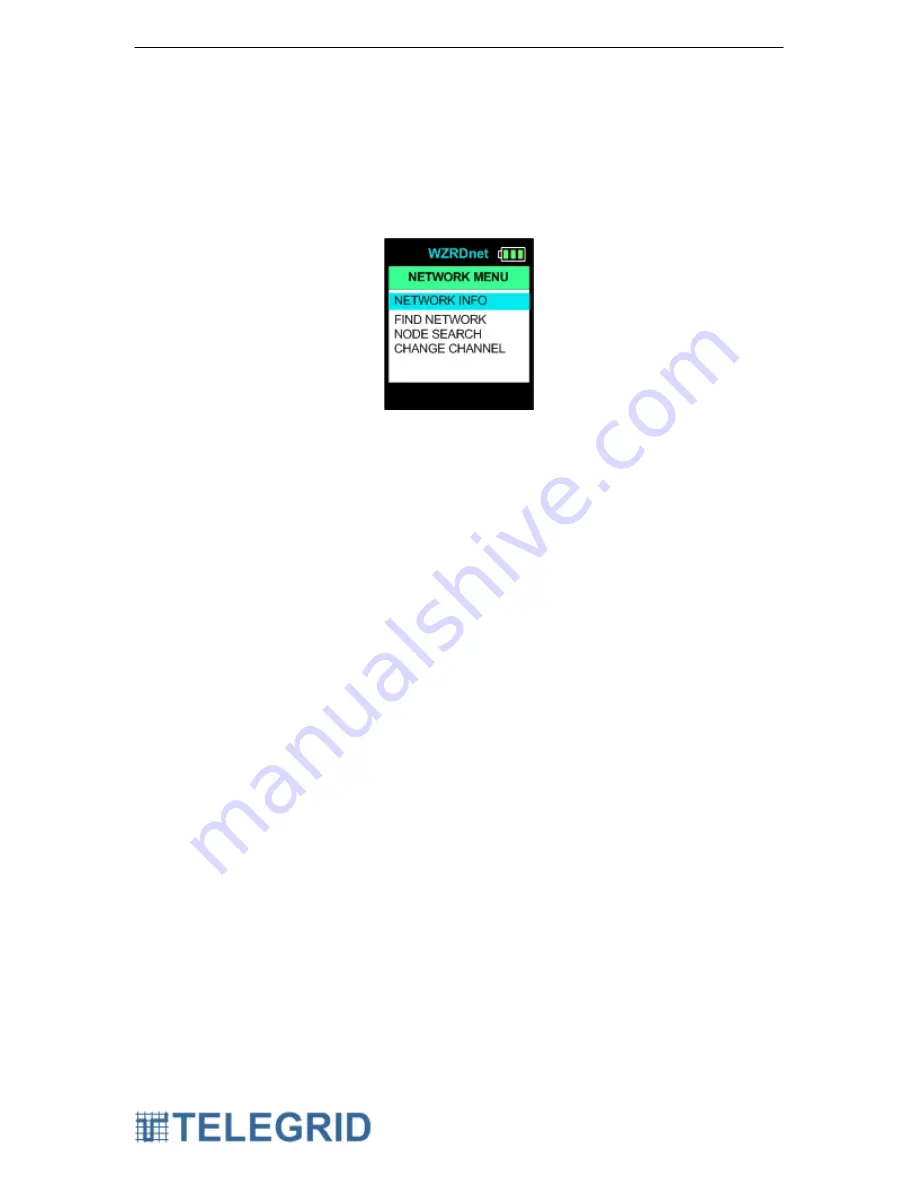
The network management tools can be accessed by performing the 
following steps: 


Main Menu 

 Network 


Figure 9.4.4 


4.2.1 Network Info 

The Network Info screen displays the handsets network information 
including the following: 
 

  Node Identifier String 

  64 bit IEEE MAC Address 

 Channel 

  16 bit WMN ID 


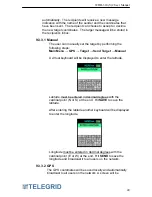
4.2.2 Find Network 

The WHD-310(V)2 is capable of sending out a node discovery 
request to update the list of available nodes.  The number of node 
responding will be displayed in real time.  Upon completion of the 
node search the screen will display a list of nodes found. 
 
When all available nodes have been found the node list will be 
displayed.  To add a node to the contact list scroll through the list 
and highlight the desired node.  Press the center button and select 
Add Contact from the pop-up menu.  The pop-up menu features the 
following options: 


  Send a text message 

  Add to contacts 

  Return to Main menu. 


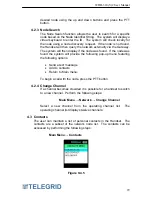
After adding a contact, press the left button to return to the node 
list.  To begin a call with a node in the node list, highlight the 

Summary of Contents for WZRDnet WHD-310(V)2

Page 1: ...ail telegrid telegrid com Copyright 2012 TELEGRID Technologies Inc WZRDnet Handset Model WHD 310 V 2 USER MANUAL Version 2 4 0 Document Number USM310 V 2 120831 08 31 2012 TELEGRID Technologies Inc 19...

Page 2: ...erview 11 2 Mesh Networking 11 3 Router 11 4 Ad Hoc Network 11 4 1 Network Formation 11 4 2 Associating with a WMN 12 5 Network Addressing 12 5 1 64 bit MAC Address 12 5 2 Node Identifier String NI 12...

Page 3: ...dentifier Strings 21 2 Getting Started 22 2 1 Buttons and Connectors 22 2 2 Battery Voltage Indicator 22 2 3 Charging the Battery 23 2 4 Turning ON OFF 23 2 5 Navigation Tool 23 2 6 IDLE mode 24 3 Usi...

Page 4: ...Position 41 9 5 Upload GPS Coordinates 41 SECTION 10 TROUBLESHOOTING 42 1 Factory Reset 42 SECTION 11 PRODUCT AND SAFETY INFORMATION 43 1 WHD 310 V 2 Safety Instructions 43 1 1 Battery Information 43...

Page 5: ...at allows its light weight handsets to provide service for 38 hours between battery recharges WZRDnet is a true end to end packet switched network which facilitates straight forward interoperability w...

Page 6: ...2 4 GHz Radio Transceiver GPS Receiver Real Time Clock Integrated Speakerphone Microphone 5 Button Navigation Tool Illuminated Keypad Mini USB Port 2 5mm Audio Output Jack External Components Mini US...

Page 7: ...WHD 310 V 2 User Manual 7 Figure 2 1 1 WHD 310 V 2 Handset...

Page 8: ...icrocontroller and the other two power the peripherals and the DC DC converter for the Liquid Crystal Display LCD backlight 1 1 Battery Charging The battery pack is recharged via the USB port This can...

Page 9: ...Mode when the user is inactive for a predetermined amount of time and the USB port is not connected to an external power source i e a PC or a wall charger In Idle Mode the LCD screen is disabled and...

Page 10: ...the battery gauge disconnects the battery due to over temperature over voltage or under voltage Return to the Power on Mode occurs when an external power source i e a PC or a wall charger is connecte...

Page 11: ...ng network information Operating channel WMN ID Network Key for encryption only A Router assists in routing data and therefore its RF section must remain fully powered when in idle Handsets Repeaters...

Page 12: ...5 1 64 bit MAC Address Each node contains a unique IEEE defined 64 bit MAC address The 64 bit address uniquely identifies a node and is static 5 2 Node Identifier String NI A node can be assigned a ch...

Page 13: ...d a response that includes the handset s addressing information Node Identifier String and other relevant information 8 Node Search The WHD 310 V 2 provides the ability to search for a specific node b...

Page 14: ...user is ready to accept calls 1 3 Call Establishment The call originator receives an audible alert if a response to the invitation was received and the destination is ready to accept the call The res...

Page 15: ...signaling protocol to control voice communication over Internet Protocol IP A SIP phone is a hardware based or software based SIP user agent that provides call functions such as dial answer reject hol...

Page 16: ...e WZRDnet Access Point WAP can be either embedded in the WZRDnet Gateway or be standalone equipment It provides a link between the WZRDnet network and the WAN The WAP is able to transfer packets betwe...

Page 17: ...talk group directly from the Handset This approach allows the group to remain dynamic and eliminates the need for a group administrator to maintain the list of members An alert will be forwarded to t...

Page 18: ...and network monitoring WZRDnet Command Center allows uploading of GPS coordinates and modification of node settings The WZRDnet Command Center application serves as a gateway between WZRDnet Handsets...

Page 19: ...ly handsets that have the same security key can communicate on the WMN Routers that associate with a secure WMN must obtain the correct security key 1 1 Network Key The Network Key is used to apply 12...

Page 20: ...ver the air 4 GPS Clock Sync The WHD 310 V 2 allows syncing of the time to the GPS clock GPS time is reported in Greenwich Mean Time GMT The user has the ability to maintain a local time offset that w...

Page 21: ...g channel list The operating channel list displays twelve channels The channel options start at the current channel setting Figure 9 1 1 WHD 310 V 2 Change Channel Screen 1 2 Assigning Node Identifier...

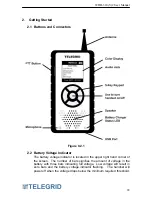
Page 22: ...dicator is located in the upper right hand corner of the screen The number of bars signifies the amount of voltage in the battery with three bars indicating full voltage Low voltage will result in zer...

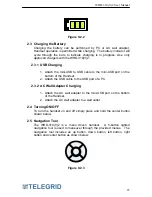
Page 23: ...ttom of the Handset 2 Attach the USB cable to the USB port of a PC 2 3 2 AC Wall Adapter Charging 1 Attach the AC wall adapter to the mini USB port on the bottom of the Handset 2 Attach the AC wall ad...

Page 24: ...s are grouped in a series of menus with each handset s Node Identifier String located at the top of the screen The main menu is shown below Figure 9 3 1 3 1 Scrolling To access available menu items si...

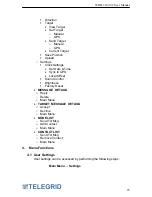
Page 25: ...nc to GPS Local Offset Sound Control Brightness Factory Reset MESSAGE DETAILS o Reply o Delete o Main Menu TARGET MESSAGE DETAILS o Accept o Decline o Main Menu NODE LIST o Send Txt Msg o Add Contact...

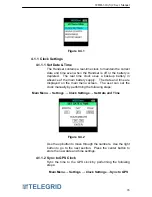
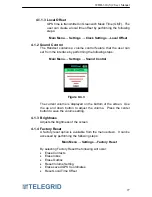
Page 26: ...upply The date and time are displayed on the main menu screen The user can set the clock manually by performing the following steps Main Menu Settings Clock Settings Set Date and Time Figure 9 4 2 Use...

Page 27: ...tings Sound Control Figure 9 4 3 The current volume is displayed on the bottom of the screen Use the up and down button to adjust the volume Press the center button to save the volume setting 4 1 3 Br...

Page 28: ...the list of available nodes The number of node responding will be displayed in real time Upon completion of the node search the screen will display a list of nodes found When all available nodes have...

Page 29: ...e node was found the system will provide the following pop up menu featuring the following options Send a text message Add to contacts Return to Main menu To begin a call with the node press the PTT b...

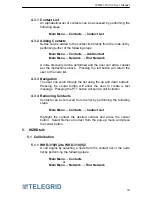
Page 30: ...list 4 3 3 Navigation The user can scroll through the list using the up and down buttons Pressing the center button will allow the user to create a text message Pressing the PTT button will send a ca...

Page 31: ...ion tool After the number has been entered simply press and hold the PTT button on the side of the handset The entered phone number will appear in RED on the screen The number should be entered area c...

Page 32: ...he recipient s LCD will display the caller s IDs in BLACK If no call activity occurs within 15 seconds the system will return to the main menu 5 5 Speed Dial WZRDtalk provides a quick mechanism to red...

Page 33: ...Handset 7 2 1 Group List Display Talk Groups are displayed in red and uppercase in the Contact List 7 2 2 Add Group To add a group perform the following steps Main Menu Contacts Add Group A virtual k...

Page 34: ...Main Menu Find Network Main Menu Messaging New Message Highlight the desired node and press the center button Select NEW TXT MSG from the pop up menu and a virtual keyboard will be displayed 8 1 1 Vi...
Page 35: ...8 4 2 Message Options Press the center button to display the following options Main Menu Reply Delete 8 5 Replying to a Message By selecting reply the virtual keyboard will be displayed with the reci...

Page 36: ...he following steps Main Menu GPS Figure 9 10 1 9 1 Position The user can track their GPS location by performing the following steps Main Menu GPS Position The screen will display Searching for Signal...

Page 37: ...ass with the current direction in degrees at the top of the screen The bearing is calculated from real time GPS coordinates and updated automatically with any change in position A sample of the direct...
Page 38: ...urrent heading The distance to the target will appear in the lower right hand corner of the screen The screen will continue to update as the user s position changes Figure 9 10 4 9 3 2 Set Target The...

Page 39: ...save the longitude and complete entering the target 9 3 2 2 GPS The user can set the target to the current position by performing the following steps Main Menu GPS Target Set Target GPS The GPS coordi...

Page 40: ...Menu GPS Target Send Target Manual A virtual keyboard will be displayed to enter the latitude Latitude must be entered in decimal degrees with the cardinal point N or S at the end Hit SAVE to save the...

Page 41: ...description perform the following steps Main Menu GPS Save Position Enter a description using the keypad and the location will then be saved in the system for future upload 9 5 Upload GPS Coordinates...

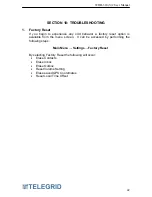
Page 42: ...or a factory reset option is available from the menu screen It can be accessed by performing the following steps Main Menu Settings Factory Reset By selecting Factory Reset the following will occur Er...

Page 43: ...nt time for moisture to evaporate before using the Handset Avoid pushing objects into the Handset as this action might cause a short circuit a fire or electric shock Never force a connector into a por...

Page 44: ...sult 1 3 Health and General Use Loud speaker can cause hearing loss Keep Handset away from head and set volume to a safe level When using the earpiece set volume to a safe level Use of earpiece at hig...

Page 45: ...Handsets when driving riding or walking Pacemakers The Advanced Medical Technology Association AdvaMed recommends that a minimum separation of 6 inches 15 centimeters be maintained between a handheld...

Page 46: ...rence to radio or television reception which can be determined by turning the equipment off and on the user is encouraged to try to correct the interference by one or more of the following measures Re...

Page 47: ...nsenting to be bound by this Agreement TELEGRID shall grant Customer a limited non exclusive subscription to use the TELEGRID software Software per the terms set forth below The Agreement shall entitl...

Page 48: ...t to copy distribute reproduce alter display or use these Materials or any TELEGRID trademarks for any other purpose except as it relates to internal communication Customer agrees that a it will keep...

Page 49: ...shall be brought in a court of competent jurisdiction in Essex County New Jersey c Customer consents to be subject to the jurisdiction of the state or federal courts located in Essex County New Jersey...

Page 50: ...estoppel or otherwise any license under the copyrights patents or patent applications of any third party software provider except for the normal non exclusive license to use that arises by operation...

Page 51: ...itself or by others doing so TELEGRID will not warrant any equipment damaged due to fire explosion power irregularities power surges Acts of God including without limitation earthquakes rains floods...

Reviews: